fbpx

Global Clean – Cleaning Services In London

11 Tips to Clean Silver Jewelry at Home

Are you tired of buying new silver jewelry after every few months? Are you sad that your favorite silver necklace is now damaged and discolored and you are unable to find it in the market again? Don’t worry, we are here to share some easy and simple ways to prevent your silver jewelry from tarnishing. But your jewelry is already tarnished? Don’t be upset, you’re in a good place to learn about inexpensive and effective ways to clean your silver jewelry at home and maintain its luster and shine.

Silver jewelry, when left in the open air, tends to tarnish over time, this is due to the chemical reactions of sulfur present in the air and silver. If silver is mixed with copper, it reacts with oxygen as well. It is best to take preventive measures to keep your jewelry from tarnishing but if it has been a little damaged you can still save it by cleaning it at home using easily available household items. Let’s dive into the tips to clean silver jewelry at home.

Household items to clean silver jewelry at home

You can easily remove tarnish and make your jewelry shine like before by using simple items present in your kitchen cupboard.
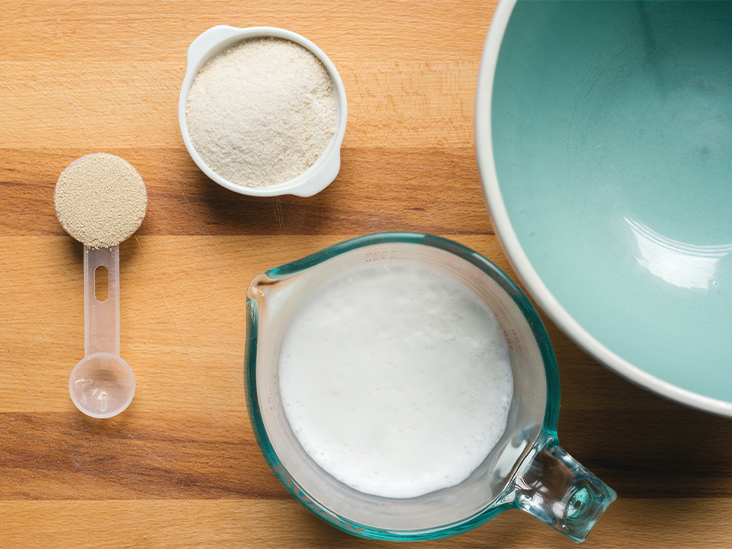
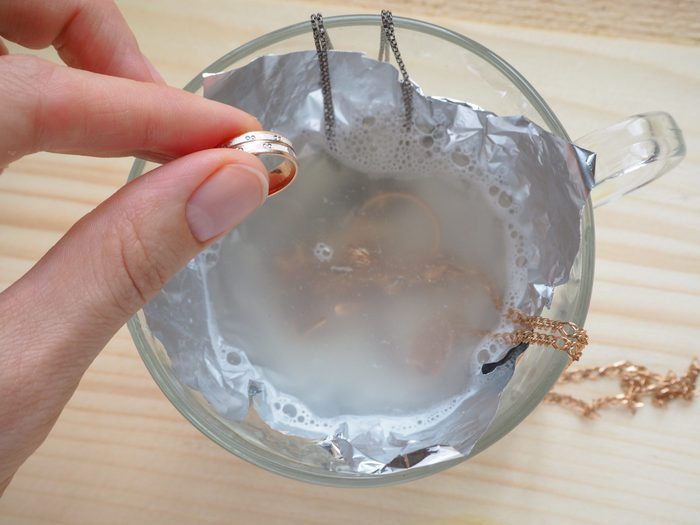
1. Baking soda

Baking Soda

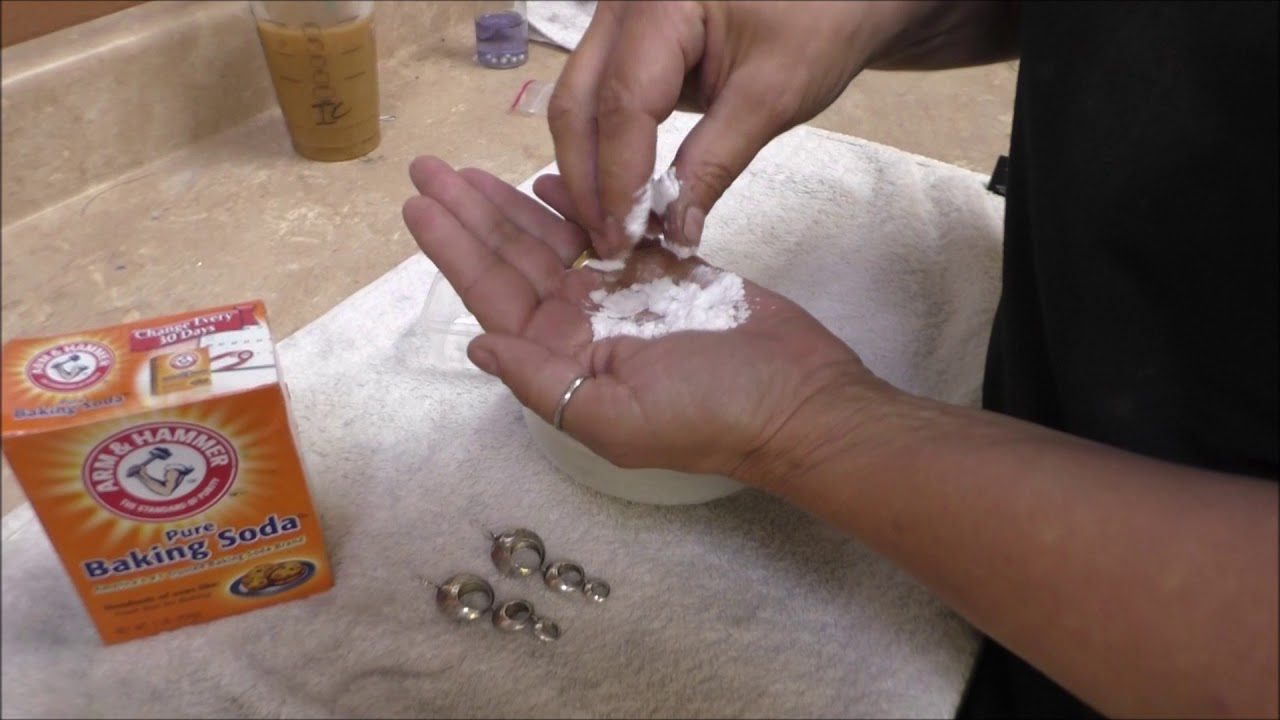
Wondering how to clean your silver earrings at home? Try using baking soda.

Time: 10 minutes

Instructions:

      A) Aluminum foil method

  1. Boil water. Pour it into a small dish.
  2. Line your dish with aluminum foil
  3. Add baking soda to the dish to make a solution in the ratio of 1 tablespoon baking soda to 1 cup water (the solution will bubble).
  4. Now, put your tarnished silver earrings or any other jewelry item in the solution for about 5-10 minutes.
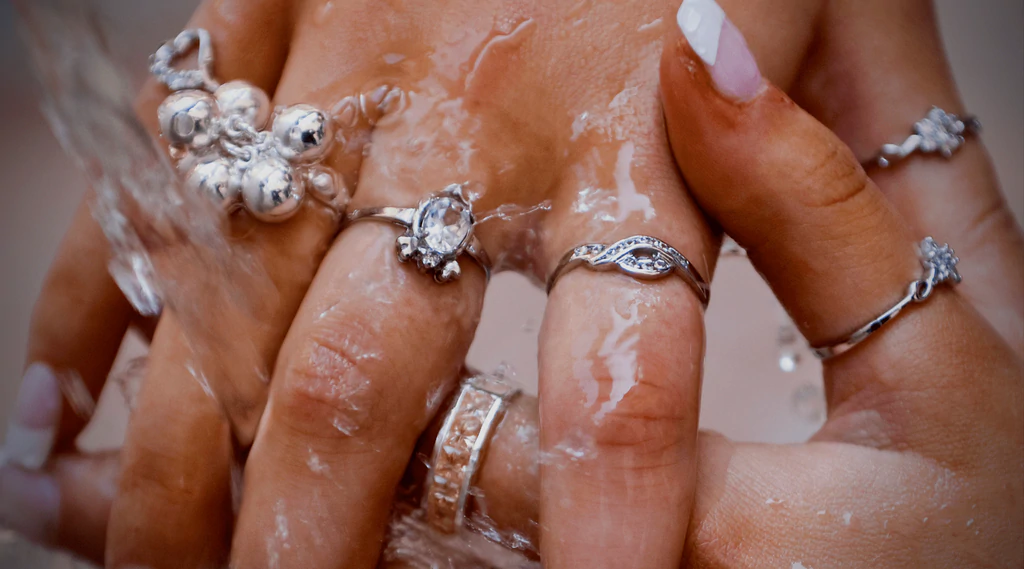
  5. Take out the jewelry and rinse it with cool water and dry it out with a soft cloth.

Your jewelry is ready to be worn again.

      B) baking soda paste method

  1. Take a small dish and add 2 tablespoons of baking soda and 1 tablespoon of water.
  2. Mix them together to make a thick paste.
  3. Use your fingers or any brush to spread the paste over your damaged jewelry item.
  4. Rinse it with cold water and dry it with a soft cloth and enjoy your clean jewelry.

2.  Salt + Lemon

salt & lemon

Go to the kitchen and find these two items to rescue your tarnished silver jewelry at home.

Time: 15 minutes

Instructions:

  1. Take a small dish and put 3 tablespoons of salt and hot water in it
  2. Add a medium-sized lemon to it
  3. After mixing all the ingredients, place your silver chain in it for about 5 to 10 minutes
  4. Take it out and remove the tarnish by thoroughly cleaning it with a cleaning cloth.

3. Ketchup

ketchup

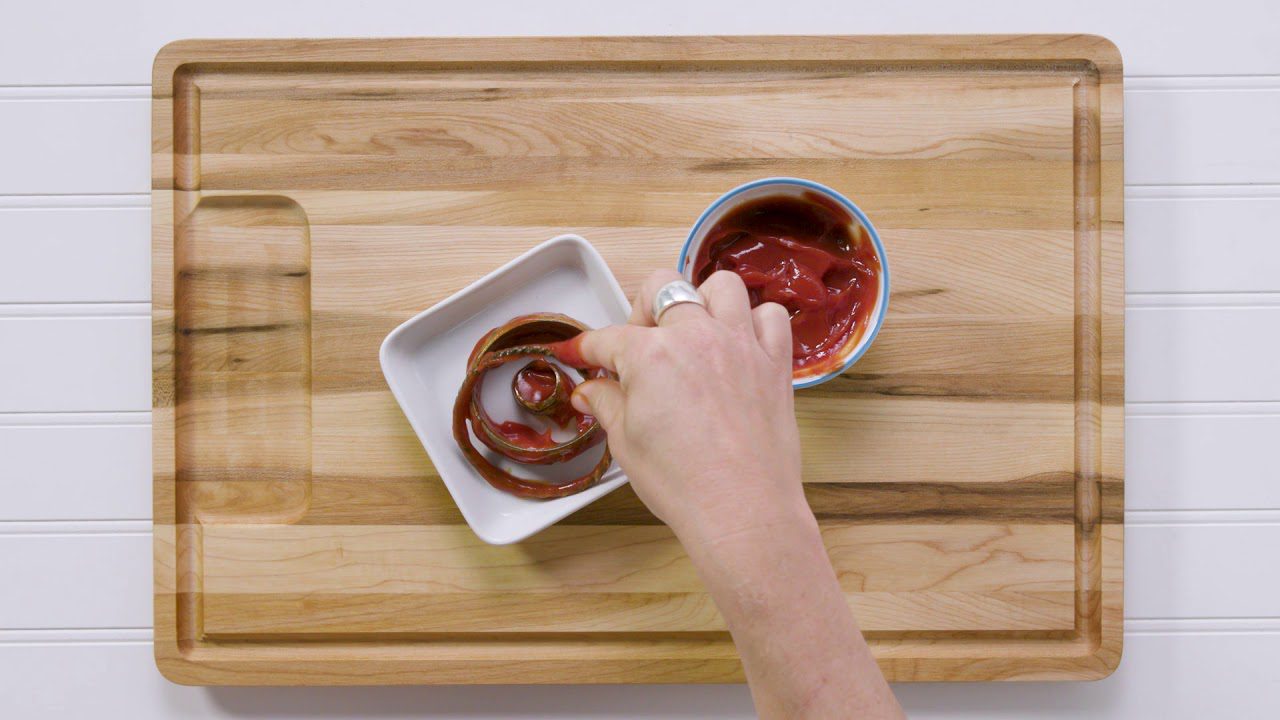
You can also use ketchup to fix your tarnished silver.

Time: 15 minutes

Instructions

  1. Spread a generous amount of ketchup over your jewelry and rub it with a soft cloth or paper towel or use a toothbrush for more stubborn tarnish.
  2. Ketchup helps loosen up the tarnish and make the jewelry shiny.

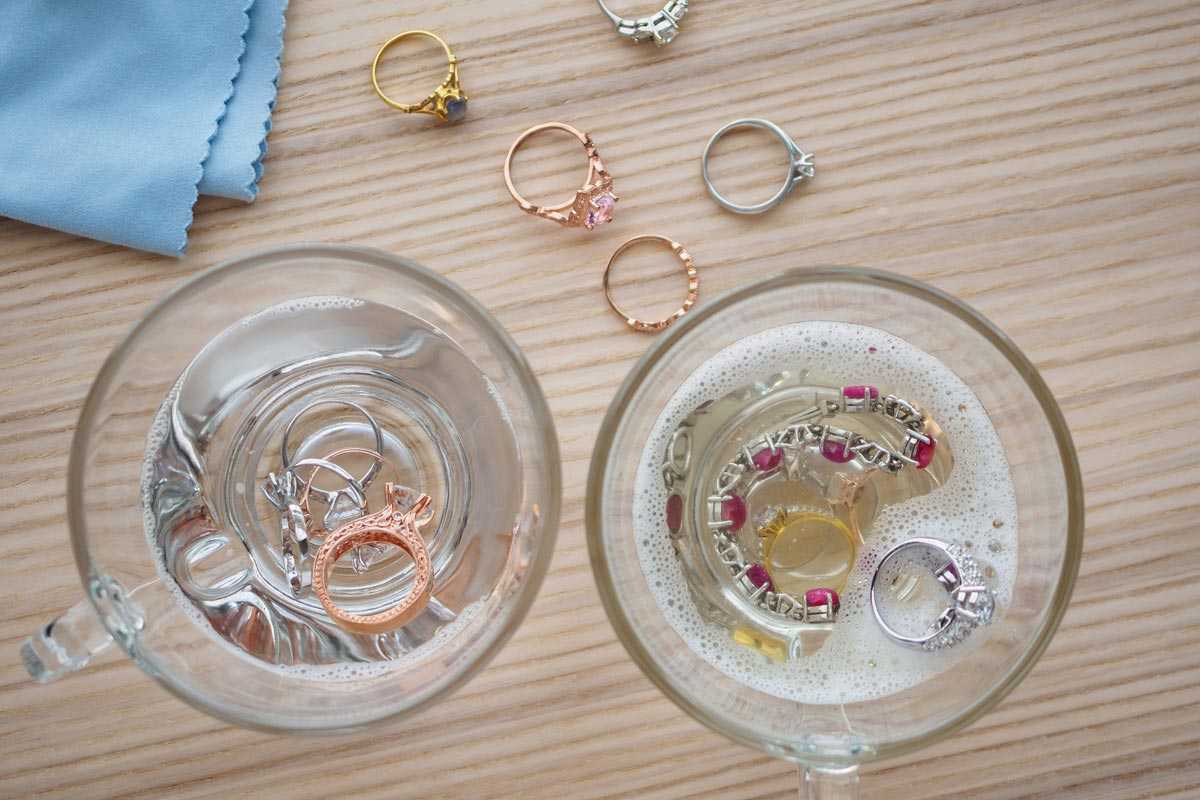
4. Detergent or soap

Detergent or soap

To clean badly tarnished silver cutlery or jewelry, detergent is a very good option.

Time: 30 minutes

Instructions:

  1. Take a dish according to the size and quantity of your silver jewelry.
  2. Pour hot water into it and add 1 cup of detergent or liquid soap. Leave it submerged for 30 minutes.
  3. After 30 minutes the dirt and grime build-up will loosen up. Take a toothbrush and scrub it gently.
  4. Rinse it with cool water and let it air dry or wipe it off with a dry towel.
  5. It will leave the jewelry clean and bright.
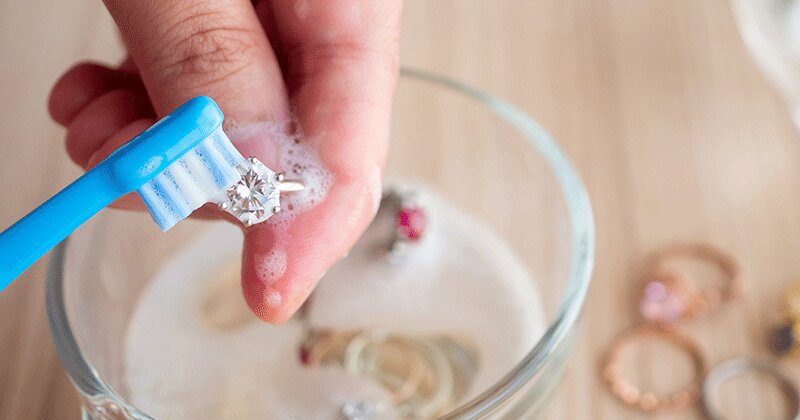
5. Toothpaste

toothpaste brush

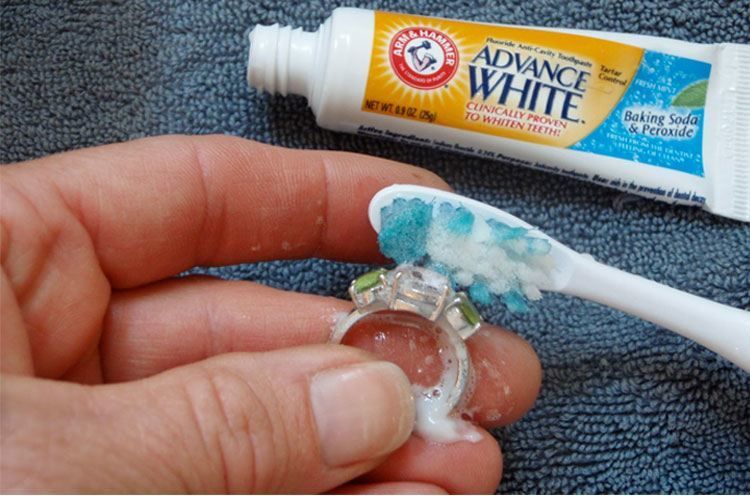
Do you want to quickly clean your silver ring before going out to a party? Just head towards your washroom and your problem is solved.

Time: 5 minutes

Instructions:

  1. Apply toothpaste to the silver ring and thoroughly scrub it with a toothbrush for 5 minutes.
  2. Rinse it with tap water.
  3. Next, wipe it dry with a clean cloth.
  4. Now you’re good to go.

6. Vinegar

Vinegar

If your silver bracelet or necklace needs cleaning and you want a DIY solution, follow the instructions below.

Time: 3 hours

Instructions:

  1. Take half a cup of vinegar, 2 and a half tablespoons of baking soda, and ΒΌ cup of hot water in a glass.
  2. Mix all the ingredients together.
  3. Now immerse your tarnished silver for 2 to 3 hours.
  4. Remove it and rub it with a cloth.
  5. Then rinse it with cold water and dry it with a clean cloth.

7. Hand Sanitizer

Hand sanitizer

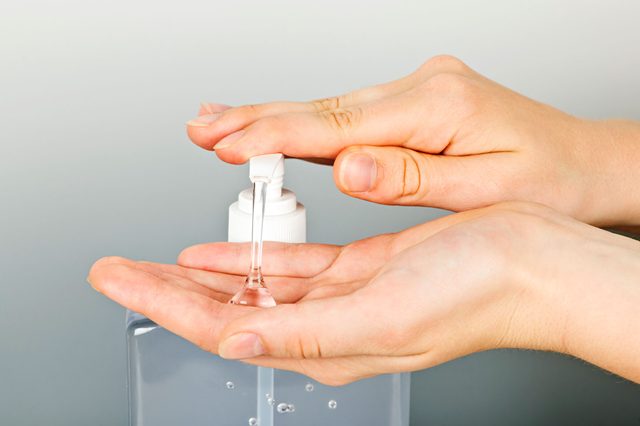
Another household product to clean silver is hand sanitizer. Hand sanitizers have alcohol in them which is great for removing dirt and gunk off the silver products.

1. Cover your jewelry item with a generous amount of sanitizer.

 2. Now rub it with a cloth. It will polish the dullness away from your jewelry.

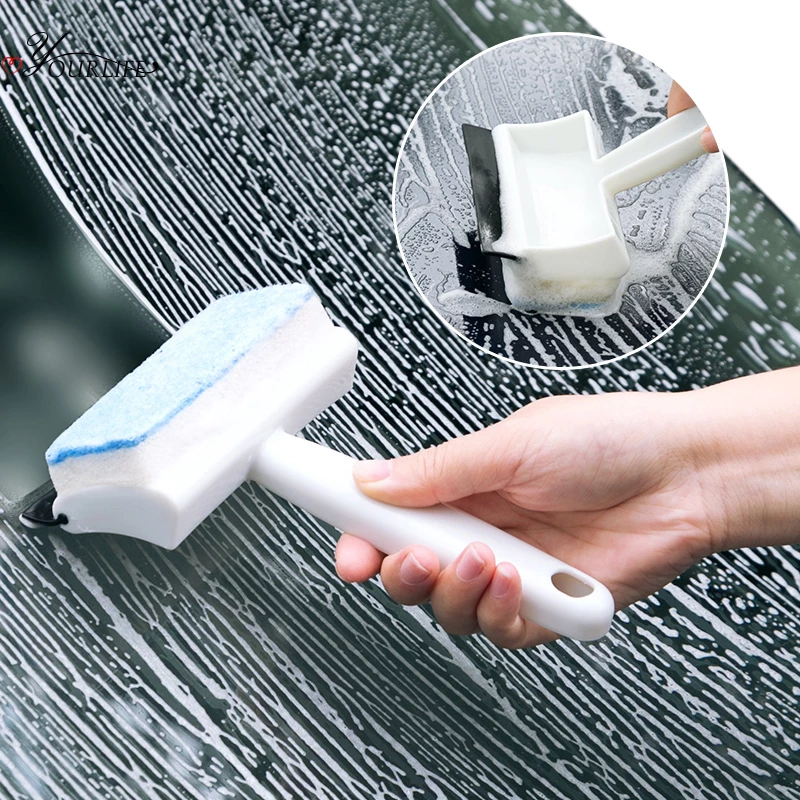
8. Window Cleaning spray

window cleaning spray

Although not recommended for every kind of silver jewelry, window cleaners work pretty well for cleaning sterling silver jewelry items.

  1. Spray your sterling silver with window cleaner and rub it with a clean cloth to remove the dirt and grime build-up.
  2. Repeat the process until the required clean shine is achieved.

9. Ammonia + Water

Time: 3 hours

Instructions:

If your jewelry has a gunk buildup of years and has very strong stains, you can make use of ammonia. But make sure that the jewelry is sterling silver and not pure silver.

  1. Take ammonia and lukewarm water in the same ratio in a vessel. Soak your jewelry for about 15 minutes. 
  2. Scrub it lightly with a toothbrush or cloth.
  3. Rinse it with tap water and wipe the water with a clean dry cloth.

10. Cornflour + Water

Cornflour is a great ingredient to restore the shine of your jewelry.

  1. Make a thick paste of water and cornflour as much as required.
  2. Apply it generously to your jewelry and let it dry.
  3. Rub it off of your jewelry using a clean damp cloth.
  4. Now take a dry cloth and buff your jewelry turning it from dull to shiny.

11. Professional cleaning

If you want to clean your silver jewelry at home and get the best cleaning results and avoid any possible damage by using home remedies. You can opt for a professional cleaner as well.

How to prevent your jewelry from tarnishing

To keep your silver jewelry from corrosion and to extend its life span keep in mind that apart from the air (that is responsible for the actual reaction) there are other factors that contribute to the acceleration of the tarnishing process. For example pH and temperature.

Moreover, apart from oxygen and sulfur, Chlorine, Amino acids, Alcohols, and Salts also react with silver. Thus, to keep your jewelry as good as new for a longer period of time make sure to avoid its contact with products that contain the above-mentioned elements.

Products that damage silver jewelry

  • Skin products
  • Perfumes
  • Deodorants
  • Makeup
  • Moisturizers
  • Sweat and body oils
  • Tap water
  • Water in swimming pools
  • Wool clothing
  • Food
  • Hair products
  • Hair sprays
  • Hair creams
  • Hair gel

Tips to prevent your jewelry from tarnishing

Here are some very useful tips to prevent your jewelry from tarnishing.

  1.  Make sure to wear jewelry after you wear perfume.
  2. Remove your jewelry before swimming to avoid chlorine contact and preferably before bathing as well.
  1. Try to take off your silver jewelry before exercising to prevent contact with salts and amino acids present in sweat.
  2. It is also recommended to keep away from foods like salad dressings, mayonnaise, and eggs when wearing silver jewelry.
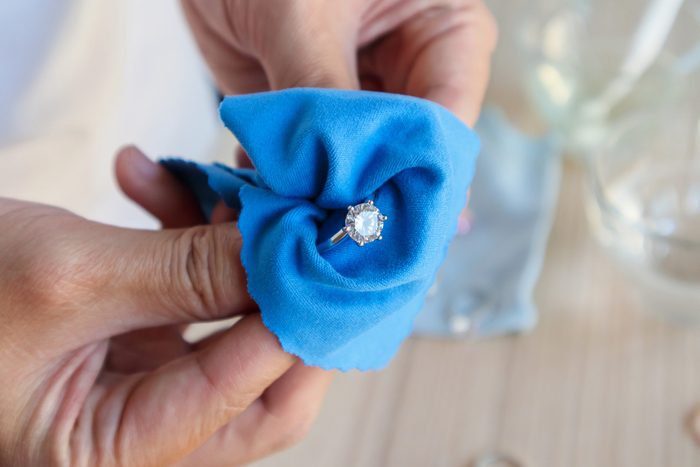
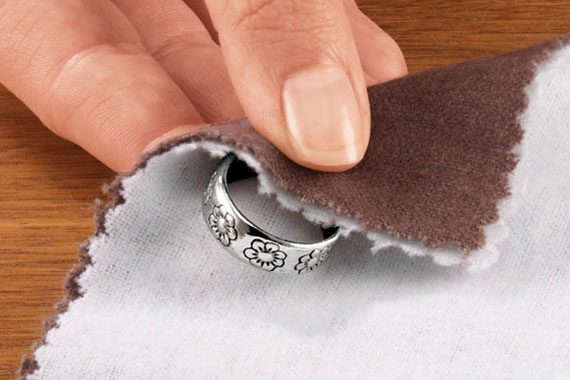
  3. Cleaning silver with a polish cloth or in a jewelry cleaning machine regularly will also delay the tarnishing process.
  4. It is seen that silver jewelry that is worn often has longer life as compared to unused jewelry. So make sure to use your jewelry regularly.

If the tarnish is heavy make a very thick paste of baking soda. Apply it to the jewelry with a cloth, let it dry. Now scrub it with a brush lightly. Rinse it with water and buff dry to polish.

Vinegar does not damage silver. It is in fact the best cleaning agent for tarnished silver.

Baking soda is a very good remedy for cleaning silver but one should avoid cleaning antique silver with it because it is delicate and baking soda can be too harsh on it.

Storage

By and large, to delay the process of tarnishing, make sure to keep your silver jewelry from exposure to moisture and air. Here are some key points to follow while storing silver.

  • Storage should be in a cool and dry area.
  • Storing your jewelry items in tightly sealed bags will keep them as fresh as new.
  • Tiny bags of silica gel can also be added to these air-tight bags for moisture absorption.
  • A flannel-coated container is also ideal for silver jewelry items.
  • Some chalks can also be placed with your jewelry items to absorb moisture.
  • Another remedy used is the application of hair conditioner over silver jewelry to slow down the tarnishing.

These DIY hacks will help you clean silver jewelry easily at home. If your jewelry is expensive and you want to get the best cleaning results and avoid any possible damage by using home remedies, you may opt for a professional cleaner as well. For more cleaning tricks and tips, please explore our blog further. To find out more about our cleaning services from global clean, contact us through a call or text message via Facebook or our website https://global-clean.co.uk/.

How to Remove Grease Stains the Right Way – 7-Step Guide

In this article, we will be going over the 7 best ways to Remove Grease Stains. The first and most important step is to ensure you have the right supplies, you need to do a bit of research on what products work the best, where to find them, and at the best cost. You should also know that these stains can be challenging to Remove if they’ve been there for a while. But don’t worry! There are many different methods you can use depending on what works best for your situation and how much time you want to spend cleaning them up!

So, let’s begin without any more delay!

Step One: Pre-Treat the Stain with Dish Soap or Laundry Detergent

Laundry detergent

Before you start scrubbing at that stain, it’s essential to pre-treat it with a little dish soap or laundry detergent. This will help to break down the grease and make it easier to Remove. Just use a cloth or your fingers to apply a small amount of soap directly to the stain and wait about five minutes before moving on to step two.

Step Two: Apply a Stain Remover Solution to remove the grease stain

Stain remove solution the grease stain

If you have a commercial stain remover like Shout or Resolve, now is the time to use it! Pour some of the solutions directly onto the grease stain and use a little bit of elbow grease to Remove. This step is most effective if you onto another item of clothing and hold it over the stain for a few minutes to let the solution soak in. Then you can remove all of that nasty grease!

Step Three: Apply Baking Soda

Baking Soda

Baking soda is excellent at absorbing oils, so this step will help remove any excess oil or residue on your clothes after pre-treating and scrubbing them with soap. Just sprinkle some baking soda onto the spot. Where there’s still visible oil, then use an old toothbrush (or another item like a credit card) to rub off as much as possible.

You can easily remove this with dish soap if you used it earlier, as that stuff is quite powerful! If not, simply repeat these steps until you have removed everything from your fabric. Make sure to let the baking soda sit on your fabric for at least 30 minutes before moving on to step four.

Step Four: Use Rubbing Alcohol to Remove Stubborn Stains

Rubbing Alcohol to Remove Stubborn Stains

This is one of our favourite ways to Remove Grease Stains because it’s so simple yet effective! Just mix some rubbing alcohol with water in a spray bottle and spritz the area where there are still visible stains. Then use an old toothbrush or another item like a credit card to rub off all of that residue until it has completely disappeared. This method works great if you have white vinegar, which can also be used as part of this process instead of plain ol’ rubbing alcohol. The only problem with that is that sometimes oil stains will transfer over onto whatever surface you’re using to remove them. So if you’re working on a white shirt, be careful not to get the vinegar on any other parts of the fabric!

Step Five: Use Ammonia

Use Ammonia

If all else fails, ammonia can be used as an effective grease stain Remover. Just mix one part of ammonia with four parts of water in a spray bottle and spritz the area where the stains are still visible. Let it soak in for about five minutes before scrubbing it off with an old toothbrush or another item like a credit card. Make sure to test this solution on an inconspicuous spot first to make sure that it doesn’t cause any damage to your clothes!

Step Six: Remove Stubborn Stains with WD-40

 Remove Stubborn Stains with WD-40

Remove Stubborn Stains with WD-40

If you’re really struggling to Remove Grease Stains, then this method is your best bet. Just spray some WD-40 directly onto the stain (you can also use another type of oil like vegetable oil if there’s not a big difference in price). Then take an old toothbrush or another item like a credit card and rub it into the fabric until all of that nasty grease has been Removed! Try applying mineral spirits instead for something even more effective since they work great at dissolving oils.

Step Seven: Use Rubbing Alcohol Again

Rubbing Alcohol

Last but not least, just mix one part rubbing alcohol with three parts water in a spray bottle and spritz it onto the area where the stains are still visible. Let it soak in for about five minutes before scrubbing it off with an old toothbrush or another item like a credit card. This will help remove any leftover residue from the WD-40 or mineral spirits that you just used!

And there you have it – seven easy steps to Remove Grease Stains the right way! Be sure to bookmark this page so you can reference it next time you have an unfortunate grease stain emergency. And if all of these methods still don’t work, then maybe it’s time to invest in some specialized laundry detergent specifically designed for removing oil and grease stains. To get professional help visit us.

The Importance of Move-In Checklist for Landlords, and Tenants

The Importance of Move-In Checklist for Landlords, and Tenants

Imagine you have moved into a new apartment, and deposited a high amount as a security fee but have received half of it when you shift your place. Heartbreaking right? Similarly, if you are a landlord who returned the entire security deposit to your former tenant, but later realized the mistake when you had to incur significant expenses to repair your thoroughly damaged property caused by the tenants.. The two situations are equally panic for both tenants and landlords.
If you are one, you never want to become trapped in them. So, how can you avoid such troubles? Through a carefully signed move-in checklist.Β 

Both renters and tenants must sign the Move-In Checklist, a document required whenever a shift to a new location takes place.

What is a Move-In Checklist?

This document provides a convenient way for both tenants, and landlords a way to keep a good track of the rental property’s condition. It gives a deep insight into the status of all rooms, bathrooms, kitchen, appliances, furniture, plumbing system, heating system, cooling system, garden, porch, and garage. 

Why Move-In Checklist Important?

It presents a fair play between the two stakeholders and saves them from any disagreement/conflict in the future.

For Landlords:

The document provides great helping hands for the property owners. It gives the existing state of affairs to them. It documents the awareness about the damage caused by the rentals other than the regular wear, and tear. It will help to hold the rentals accountable for the indemnity caused by them. You can easily deduct a calculated amount from the security. It gives a legal backup to the landlords so that they can file a legal suit against the rentals who have caused the harm.

For Tenants:

It is evenly beneficial for both rentals, as it offers the present condition of their new residence. A complete picture of every nook and corner of the rented estate is presented to them. So, that they can demand any repairs, and will enjoy a well-maintained, good-conditioned, andΒ deeply cleanedΒ residence to live in. Not only this, but they can also obtain legal support in case of any dispute with the owner. As it serves as preserved written evidence. Hence documenting the preexisting harm reduces the likelihood of any disturbances in the future. It also offers an opportunity to get to know about the damaged parts of the house. Through this document, the rentals would be able to secure their amount paid as a security fee.

How the Move-In Checklist is Managed?

Soon after the completion of a thorough inspection of the rental property, the written part of the document should be signed by both parties. Before signing it make sure that you have read it carefully. A copy of the signed file should be with both tenant and the landlord. Attaching one copy with the lease agreement and keeping it there until your tenant moves out of the estate would be a wise approach.

Point to be Noted:Β 

Specify the responsibilities of both the tenant and the landlord in the lease agreement to ensure being in a safe zone. Moreover, it would help the property administration of your rental unit which would receive less wear and tear.

What is the Move-Out Checklist?

This document gives instructions for the tenants when they are about to shift from their earlier residence. It outlines the tasks that tenants need to complete before their move out.

How is it Looks like?

There are no general terms for composing the checklist. Since it defines the existing conditions which are different for each property, thus every landlord documents a specific checklist according to suitability. It enlists the terms which the rentals are supposed to fulfill when they are about to move out. Following these instructions, and sticking to the terms minimizes the probability of emerging issues in the future. Both subjects will get peace of mind, and it ensures a friendly departure of rentals while guaranteeing the full security amount in their accounts. In the same manner, the landlord would not have to bear the cost of extra expense for the intentional, or accidental injuries caused by rentals

Template for Move-In Checklist

  • Kindly schedule your inspection 1 week before your move-out.
  • You must thoroughly clean the house before moving out.
  • Clean kitchens and all bathrooms cautiously.
  • Maintain the paint on the walls in the same condition as it was during the check-in.
  • Β Do not leave any trash residue at any corner.
  • All the kitchen appliances must be working properly, and should not retain any stain.
  • Properly manage and clean all the window glasses and frames.
  • All the furniture, and light fixtures, and bulb lights should work properly.
  • The plumbing system must not show any blockage or leakage.
  • All the heating, and cooling systems should work efficiently.
  • All the alarms should be working properly. 
  • All sinks, tubs, and tiles should not bear any hard water stain.
  • Inform the landlord about the issues or other damages inside the rental property.
  • Β 
  • Fulfill all the above-mentioned items before the move-out inspection to ensure that you receive the full amount of your security deposit.

Therefore, prioritize the repairing, repainting, and trash removal. Above all deep cleaning is mandatory. You need not risk your security amount, so it is suggested to hireΒ professional cleaning services. Test outΒ Global Cleaning CompanyΒ to assure perfectΒ End of Tenancy Cleaning.

How Much Does a Normal Gutter Cleaning Cost? Global clean

How Much Does a Normal Gutter Cleaning Cost?

Gutter is the focal point of your home cleanliness, if it gets clogged, or stuffed, then the appealing site of your house would be damaged in a short span. Imagine the severe consequences in the form of mold buildup, foul smell, herbs sprouting, and blockade of the sewerage system. These are highly undesirable results that you never want to get entangled in. The more precarious situation comes when you need to replace the entire gutter setup of your home. It will put a high burden on your pocket. Thus, get saved from the heavy loss by adopting a regular cleaning habit of your gutter.

It is highly advisable to go through the cleaning process of the gutter twice a year, especially during spring which gets more rain, the water moves down the pipe along with the debris present in the roof, they get stuck in the narrow passage of pipes blocking the water passage. Similarly, during autumn the trees shed their leaves. If your house is surrounded by shrubs, and tress then they are carried to your roof by the wind. They can block the downward pipelines.

While you are dealing with gutter cleaning, you must get confused on some points like, How often should I clean my gutter? How do I get to know that my gutter needs cleaning? Should I clean the gutter by myself, or hire a professional cleaner? What tools and expertise is needed for gutter cleaning? How Much Does a Normal Gutter Cleaning Cost?

If you are entrapped in these questions, get relaxed. We are here to answer all of your questions with guaranteed satisfaction. Keep patience and read the article to make yourself carefree.

What is the Cost of Gutter Cleaning at Home?

Gutter Cleaning is a complex task. If you have intended to perform it manually at home high care is needed.

First, check your expertise level and stamina. Keep in mind the weather condition as well. Don’t try to step out on hot sunny days especially at noon rather wait for the evening or morning time.

Before initiating the process, you need to purchase suitable cleaning tools. A ladder to reach the height of the roof. But it requires utmost care as we are all vulnerable to accidents. You might get slipped and fall on the ground securing severe injuries. Fix a bucket on the top step to collect the filth. You can use your hands, don’t forget to put on gloves, or take the help of a garden shovel. If you want to ease your job and to save your time, and energy then you can go with expensive gadgets as helping hands.

The recommended tools are as under:

  • Telescopic Wand:

 It is a good replacement for pole extension.  It uses high-pressure water, so all the dirt moves away from your roof singlehandedly.

  • Gutter Sense:

 It has a claw that is designed to get opened and closed. It has an attached rope thus you can take the debris down to the ground easily. It is best for single, and double stories. With its easy-to-handle quality, you can choose a method that suits well to your expertise.

  • A Retractable Telescopic Extension Pole: 

It has an approximate extension length of almost 24 feet which enables you to reach a suitable height easily. It is a multipurpose lightweight cleaning tool. It is supported by a tip that can rotate up to 180 degrees.

A Good Quality Gutter Cleaning Scoop:

It can provide the best cleaning service and save your time by 75%. However, you need to get the help of a ladder to reach the height. You can choose between hands and a shovel.

These tools are good to use but they might not be cost-effective. Moreover, they need your effort and time. If you are lacking the basic cleaning skills of the gutter, don’t take risks. You might damage the beauty of your property, or bring an injury to yourself.

How Often Should I Clean Gutter?

Gutters and other downspouts require cleanliness on a need basis. The cleanliness schedule depends upon the area surrounding your locality, the tree coverage, and the average rainfall. The proper maintenance of gutters requires a thorough cleanliness session at least twice a year.

It also depends upon the structure of your home, if you are residing in a single-story, you need not get much worried about the duration and demands of more cleaning sessions. But if you are a resident of the double story or more than that, then you are required to care about the cleanliness challenges posed by your dirty drainage system. So, the inhabitants of more than single-floor houses should perform agile cleaning services more than twice a year.

In the same manner, if your locality is encapsulated by tress then their leaves, or the birds create a mess on your roof. Your pipes might get blocked by bird nests, tree debris, and other solid dirt. Hence, it is in need of pro cleaning schedules, thrice or four times a year.

What is the Benefit of Hiring Professional Cleaners?

Carrying out deep cleaning of the gutter is not a piece of cake. Thus we suggest you get professional help due to the given reasons

  • Expertise: Professional cleaners are well trained for all kinds of cleaning services. Hence they will skillfully perform the job efficiently while saving your energy and time.
  • Efficient Cleaning: Instead of getting engaged in a complex procedure, avail the services of expert cleaners. They know how to perform their job without neglecting a single corner untreated. They are equipped with modern cleaning tools which ensure a thorough cleaning. For elegant cleaning services try out the experts of Global cleaning Agency. Our expert cleaners will be available if you have made a booking one week earlier.
  • Repairing:  If any part of your drainage system needs any repairing work, it will be efficiently handled by professionals. They will replace the old parts like leaking pipes, lid covers, and others on demand.
  • Minimize the Probability of Accidents: While you are busy with the hectic cleaning process, you might lose balance and fall on the ground all of a sudden. It might happen that the ladder might get slip and fall on the vehicle of your neighbor or might break his window glass. All of the liabilities will be on handled by the cleaning company.

What are the Average Costs of the Gutter Cleaning Process?

For a more clear idea, we have brought you a table that shows the normal market rates for professional Gutter Cleaning Services according to the structure of your locality.

  • A single-story of 1500 sq ft with 150- 180 ft of gutters exhibits the cleaning cost of 100$ to 200$.
  • A double story of 2000 sq ft with 200 ft gutter exhibit the cleaning cost of 120$ to 230$.
  • A three-story building of 2500 sq ft with 250 ft gutter exhibit the cleaning cost of 150$ to 250$.

However the costs might get differ with the changed circumstances given as follows,

  1. Landscaping

The trees and shrubs around your home might increase your cleaning costs, as they increase the amount of dirt on your roof.

  • The downspouts with heavy clogging

If your pipes are almost filled with dirt, they require an extra effort to get cleaned. They required extra effort and more time resulting in an increase in cost.

  • Gutter Screens

If the structural formation of your home requires the removal and reinstallation of the gutter screen during the cleaning process, then get ready to pay an extra amount for the effort.

  • The Foot and Story Pricing System

Most cleaning agencies have set their gutter cleaning cost according to the nature of your building, and the size of the gutter. Mostly, a company can set their prices 1$per square foot. Some might charge on an hourly basis depending upon your contract with them.

Hopefully, this article turns out to be a good fellow to sort out your confusion about the gutter cleaning costs. If you want to get professional help, visit us.

Tips for how to clean a hazy mirror

Have you just finished the energy-consuming job of cleaning your mirrors but are still frustrated? The streaks and scuffs on the surface are still enjoying their place. It’s heart-wrenching right! The condensed haze on the mirror glass becomes so stubborn that it does not leave you to sigh in relief, it snatches the attractiveness of your mirrors that were once gleaming and highly reflecting. But with time haze overshadows your reflection and the appeal of your mirror sneaks away. If you are suffering from misty and foggy mirrors, what would be your first choice for their cleaning? Definitely, you will rush to the glass cleaners available in markets but end up with more stains and a persistent haze. No further worries- you have come to the right place to get better ideas to clean a hazy mirror

What makes the Mirrors Foggy?

Before purchasing an antic mirror or highly expensive brand mirror, it’s a wise idea to know about the future risks which may snatch the beauty of your precious mirrors, so that you would be conscious of their proper maintenance and timely neatness.

The obvious reasons for accumulated haze are listed as:

  • The natural process of building up of residue with time may cause haziness.
  • It might be as a result of damage to the silver mirror backing
  • The warm water bath in the washroom or the splashes from brushing may add their share in residue accumulation.
  • The persistent ignorance of the cleanliness of mirrors or application of Abrasive cleaners may create scratches that serve as a focal point of haze.

Which Items are needed to clean a hazy mirror?

Before conducting the cleaning task, you should be equipped with the appropriate cleaning tools and solutions to perform the job easily and timely.

  1. Lint-free microfiber cloth for rubbing the glass
  2. A Good Quality Commercial Glass Cleaner, it is preferable to choose non-toxic cleaners with natural characteristics to avoid any health risk
  3. A homemade vinegar solution with water in the ratio of 1 cup vinegar with 3 cups water, to make a distilled and diluted solution.
  4. Cotton Pads to treat the individual stains which are not removing by the ordinary cleaning process.
  5. Alcohol Solution to remove the limescale or calcium deposits if any.
  6. A definite Jeweler’s rouge to remove the prolonged and difficult spots.
  7. A Spray bottle to apply the mixture on the mirror surface.
  8. An inexpensive foamy Shaving cream to avoid the coverage of fog on the surface.
  9. A delicate Newspaper free from soy based inks.

Step Wise Process of Mirror Glass Cleaning

Cloudy mirrors are more threatening than a nightmare as they do not allow you to view a clear image in your valuable mirror. Ordinary commercial leaners mostly fail to address the streaks and smudges, as they might switch their location after a thorough cleaning process. If you are continuously struggling with a definite mirror but unable to get the desired results, do not lose hope rather try the below-mentioned easy tips to get rid of the most stubborn stains and prolonged cloudiness.

  1. Start with proper dusting of the mirror glass to ensure the removal of the on surface dust particles, molds, and spores.
  2. If you find and settled solid scuffs remove them manually with the help of a paint scraper or a butter knife, special care is needed during this process as any careless movement can damage the mirror surface or put scratches on it.
  3. Now take a good quality glass cleaner and spritz it on the surface, this step needs special attention as the solution could damage the backing of your mirror if you put it on the surface with heavy spills. All you need is to spray at the middle of the mirror gently and spread it on the entire surface using a microfiber cloth, rub the surface gently, and wipe down the solution, now apply clean water and replace the cloth with a new one and mop the glass.

Tip: Adopt a zig-zag pattern instead of a circular motion while wiping the glass surface to get a streak-free surface.

  • Use a Homemade Solution instead of Commercial Cleaner. You can perform the job easily if the market cleaner fails to remove the stains entirely. Take 1 cup of white vinegar and mix it with 3 cups of water, it is recommended to use distilled water as the tap water contain minerals that get accumulated on the surface of mirror.
  • If the stains still persist? Soak cotton pads in alcohol solution and apply them on the scuffs individually. Gently rub them for a thorough removal.
  • Tip: For the most obstinate stains use a jeweler’s rouge in paste form, apply manually on them then wipe with a clean lint-free cloth.

How to Avoid the retention of Haze on the Mirror Glass?

Sometimes, the regular cleaning fails to save the mirror surface to host haze and cloudy marks and commercial glass cleaners do not succeed to present a streak-free shiny surface. Here is the wonder in your hand,

The Ordinary Shaving Cream:  Take the foamy cream and squirt a definite amount on a paper towel which must be lint-free to avoid any leftover on the surface, then briskly wipe it down using a crippled newspaper, it will remove all the dirt and waste present on the surface completely. Use this trick before going to bathe, apply the cream on the surface. It will not only fight effectively with grime, scuffs, and streaks but also keep the glass free from cloudiness.

How to Maintain Best Cleaning Practices to clean a hazy mirror

It is not only the cleaning process that is important to remove the spots and bring high reflectivity to your mirror surface, and offer a clear image. Also, you can check our details guide on Move-In Checklist

Some Ideas should be kept in mind while dealing with the cleaning practice.

Regular cleaning of your mirrors. If you adopt a habit of dusting and cleaning your window glass regularly, you will not get a stuffed surface tough to be cleaned. It will not take much time, you can perform the job easily along with your routine home cleaning.

Use a clean microfiber cloth every time. While cleaning the surface we mostly use a single cleaning microfiber cloth and do not bother to replace it with a new one or do not clean it regularly after the cleaning practice. It would facilitate the building up of waste on the surface as it might contain dust particles, grime, or other hidden waste in its fibers.

Avoid scrubbers or abrasive cleaners. The scrubber sponges or other abrasives are highly damaging to the surface of the glass, they put scratches that permanently damage the mirror’s reflectivity. Use soft touch mopping materials but it must be lint-free.

Check the result of your cleaning job by viewing it through different dimensions. The head-on testing approach to get the outcomes of your cleaning practice is not suitable to ensure perfect neatness, in this practice you will discover the missing dirt at corners or in between which was missed out earlier.

It is better to not directly spray water or other cleaning solutions on the mirror surface. It can travel to your backing and the result would be a cloudy mirror. Put them on a microfiber cloth or towel then apply on the surface.

Always remember to cover the frames, especially wood and metallic ones during a deep mirror cleaning process, the applied mixtures might ruin the luster of your precious frames. Special care is needed while dealing with antic mirrors.

Always stick to a mild glass cleaner or homemade solution. Never switch to multi-purpose cleaner or furniture polish, it may cause resting of unwanted materials on the surface which might be difficult to remove.

Final Comments

The smudges on the mirror surface are always repulsive and can’t seem to be getting off.  They are the most difficult thing to handle as they may transfer to other places and the mirror still looks cloudy, it definitely breaks the heart. Sometimes you can’t clean mirrors with the routine cleaning service, thus the poor fellows are stuffed with dirt. If you want to save your energy and time then it is the best idea to avail the of professional cleaners. Global Cleaning Agency in the UK is at a single call away from your locality to facilitate you with complete lush clean mirrors.

Top 5 dishwashing brushes of all time

Top 5 dishwashing brushes of all time

How it feels that after spending hours scrubbing and wiping your pans, plates, and cups, you are not sure about the microbial presence in your cleaned dishes. On the other hand traditional cleaning helping hands like the scrubber, and scotch consumes your valuable time, and additionally gift your persistent back pain.Β Make the job much easier for you with the delicate dishwashing brushes specially designed for specialized cleaning of your precious dishes. Since your ordinary sponges provide the best spot for bacterial growth and reproduction, so they are not the hygienic way to give a thorough wash to your dishes.

The updated dish brushes are designed with durable bristles to facilitate powerful cleaning. They dry up quickly and are less prone to bacterial invasion. Thus, they are preferable over the sponges. Now the problem emerges on picking up the best one, which is more adaptable and delivers high performance during cleaning.

Let us have a cursory look at the general characteristics of the best cleaning brushes. They have flexible bristles made up of mostly natural fibers or plastics. Their adaptable design enables them to reach the bottom line of your glassware, and ensure effective removal of the sticky stuff on your pans, and pots.

We have picked some fascinating dishwashing brushes which would go well with all of your dishwashing needs.

Kitchenmaid Classic Soap Dispensing Sink Brush

This brand is known for its modern design and distinctive appearance which enhances the classic outlook of your kitchen. You can choose your favorite color product.

Pros of the Product:

It has multi-purpose features equally applicable for different dishes ranging from non-stick, iron cookware, glassware, pans, and pots.

The non-slip handle is easy to use even with dry, and soapy hands. You don’t need to put much force to remove stains from your dishes. If you have to clean a pile of dishes, double the soap amount in the soap champer. 

Its head is easy to remove, you can turn it around and replace it according to your need. Moreover, it is highly durable as it is constructed with BPA-free plastic material.

Its soft nylon bristles provide resistance against any kind of deformation when you go through a tough scrubbing. Its hanging loop enables its easy storage, enjoy easy, and safe dishwasher cleaning.

Cons of the Product:

  • If its bristle head undergoes any damage, then you won’t be able to find its replacement.
  • Its price might not be suitable for your limited budget.

Mr. SIGA Soap Dispensing Dishwashing Brushes

Enjoy the benefit of two dispensing brushes at a reasonable price, you can simply use one for the delicate dishes, and the other for the heavy dishes. To use it just turn the loop at the end of the handle in an anti-clockwise direction and fill it with the soap solution and close by turning it in the clockwise direction.

Pros of the Product

Its non-scratch-able nylon bristles are also odorless and highly durable which facilitates easy scrubbing of the dirt and thus fit for non-stick cookware.

You can easily wipe out the stuck-on food with the help of the scrapper built-in at the back of the brush. Furthermore, the head can be replaced and removed without putting in much effort.

TPR material has covered its handle making it easy to use without any slippery trouble. It fits easily in your hand for a thorough wash. Moreover, its head is easily replaceable you can use it as a brush head, or a sponge head. 

Cons of the Product

  • You might get in trouble while filling the dishwashing liquid, as the mouth has a narrow opening. 
  • If you use it for a long interval you might witness the head sliding. 

OXO Good Grip Palm dishwashing brushes

Potentially suitable for all kinds of dishes, best for the sharp edge dishes, thus ideal replacement of the old sponges. It is simple to use, you just need to unscrew the cap on the head, you can control the dispensation of soap by pressing the central button at the top. After the engagement, the leak-proof seal prevents any wastage of soap.

Pros of the Product

The brush contains nylon bristles which enhances its durability, is the best solution for the back-on food dirt, and is carefreely useable for non-stick cookware.Β 

A convenient brush handle will prevent slipping during the washing process, it provides you a continuous flow of soap, and you don’t need to approach your dish soap bottle time and again.Β 

Its holder also carries a drip tray which is easily removable with a built-in pour spout. It has a non-skid base for better handling of sudsy soapy water.

Cons of the Product

  • It has been specially designed for flat dishes like plates, and pans but you might face difficulty while going through the cleaning of narrow mouth items like cups.
  • It has a single head thus you have to spend extra on other replacements.

Dawn Fillable Kitchen Brush

Dawn brand is known for the best cleaning products in Market, their dishwashing brush is adapted to lessen your scrub time on your dishes.

Pros of the Product

Provides you a soft contact on the handle thus washing process goes on smoothly without putting in much effort. It is non-slip even with soapy and dry hands.

You can save money with its non-leaking capability, it helps you to preserve the dishwashing soap for a longer duration by preventing its wastage.

Its bristles are designed to perform cross action, which can easily scrub away the baked-on foodstuff on your dishes.

Cons of the product

  • It has a relatively large head which is not suitable for narrow-mouth items like cups, pots, and other small dishes. So, you have to think about a good replacement for your narrow dishes.

ANIX Soap Dispensing Palm Brush

This product has a set of 2 small brushes which can be easily held, so you can comfortably carry on the dishwashing process. The two brushes offer you the best choice to carry out washing on a variety of dishes from pans, pots, glassware even the countertops, and sinks.

Pros of the Product

You have to simply put the soap on the specialized chamber on the head which releases the soap through the bristles with just a simple push of the button at the top. It restricts the direct contact of your hands with soap.Β 

Its body has stainless steel covering with an easily replaceable, and removable head, and also carries a rubber top for any extended use.

You can easily check the soap quantity through a transparent bar, thus you can put it according to your need

Its great scrubbing job lies in its design. It is small in size and rounded body which better suits your dish’s structure.

Cons of the Product

  • Since its size is small so, you have to fill the soap chamber in intervals which becomes problematic when you have to wash a pile of dishes.

To get professional help you can visit us.

Oil stain remove tips

How to remove oil stain from carpet?

From ancient times to the digitalized world, carpets accompany men in all periods, whether it is a luxurious setting, or a middle-class locality carpets are your best friends. It is panic to see spots, dirt, and dust on the flexible carpets placed in your living room, when it comes to obstinate oil stains, it is more heartbreaking, as they are the most difficult to get rid of. Accidents happen any time, right? What happens when you spill some oil on the fluffy carpet in your launch, or your kid has emptied the vegetable oil bottle on it, what would be your first reaction? You will definitely try to rub it out with a cloth, but you will end up creating more mess, the oil will spread to the other regions, making it more horrible. Whether larger, or smaller the oil stains appear to be painstaking, which are no longer to be tolerated, so you will think to replace it immediately, but wait, you don’t need to spend money on the purchase of new carpet, invest your money on other items, and deal with your stained carpet elegantly, through our valuable cleaning ideas to ensure the neatness of your lovely carpet.

How to Eliminate Carpet Oil Stain? 

If you find a stain on your precious carpet, it is better to take a deep breath and relax. Don’t rush to rub it immediately, it will worsen the situation, and you won’t be able to handle it easily. Hence, the first thing to keep in mind is not to stress out. Yes, oil stains are bad for your carpet, they need to be handled on the spot without wasting time, otherwise, they would get absorbed and spread on the large area.

Thus, the best idea is to take wise steps to remove the spot rapidly with little effort. 

Which Items are Needed During Oil Spill Cleaning Process?

To get quick outcomes, it is pertinent to select the helping items, which would assist you during the process.

  • Baking Soda
  • A Commercial Degreaser
  • A cleaned Absorbent Towel
  • Paper Towel
  • Aerogard Spray
  • Warm Water

Cleaning Steps to Remove Oil Stains:

1.Β  Β Β Dabbing the Stain. The first step is to dab the oil spot with the help of absorbent cloth, but the better choice would be a disposable paper towel, so you don’t need to clean the cloth towel later on. Continue with the dabbing process until maximum oil has been extracted.

2.    Further, continue the process with bolting, apply pressure using your palm, or heel. The process should proceed by movement from outward to inwards. It will decrease the remaining oil. 

3.    Coating with the corn starch. The next step would be to cover the spill with corn starch or you may use baking soda instead. Sprinkle it thoroughly and leave overnight. The soda will suck out the remaining oil and will act as a perfect absorbent.

4.    Next, it’s time to vacuum it out. It will be easy to take out the soda, or starch than to handle it manually.

Or you may switch to the application of Aerogard on the affected area. Pour the definite amount of aerogard on a clean colorful cloth, dab it on the region in a frequent rolling motion. Repeat the process until the complete extraction of oil.

Point to Remember: Make sure to not shake the Spray can, otherwise it would cause the mixing of alcohol with the insect repellent, which will reduce the cleaning potential of alcohol.

Tip: Open windows, or doors to ventilate the room for rapid drying, and smell removal.

1. Apply the degreaser. Now, it’s time to remove the remaining patch with the application of detergent or soap. The degreasing fight starts with the formation of a mixture by taking 2 tablespoons of soap, and two tablespoons of hot water. Pour the solution on a towel, and start dabbing it over the spot gently. Make sure that the stain has been completely dapped. Leave it for 5 minutes, so that the degreaser starts its fight with oil.

2. Now, dab a clean cloth in lukewarm water and rub it on the patch, repeat the process many times until the complete removal of the detergent.

3. If you find that the stain has not been removed in the first attempt, then apply some more detergent solution on it, and repeat the process of rubbing.

Hopefully, by this step, you have succeeded in the complete removal of the horrible stain from your valuable carpet. 

How to Remove Motor Oil Stain from Carpet?

If motor oil from your garage finds a way to get settled on the carpet of your launch. It is no more a worry to get rid of the suborn stain. You can easily deal with it. Here are some suggested steps for your ease.

1. Try to remove the surface oil with the help of a butter knife. Special care is needed that hard pressing would damage the fibers of the carpet.

2. Secondly, sprinkle some amount of baking soda to ensure total cover of the spot. Leave it for 20 minutes.

3. Thirdly, remove the soda preferably by vacuuming, it would make your job easy.

4. Now, take a good quality dry-cleaning solvent on a clean cloth, rub the cloth on the oil-affected area, rinse it with warm water.

5. If you find that the oil patch is still present then don’t lose vigor, simply make a solution by adding 1 cup of warm water, and half a cup of vinegar along with 1 tablespoon of handwashing detergent. Hold a sponge and dip it into the mixture, and apply it to the remaining stain.

6. Lastly, rinse it with cold water, dab a clean cloth, to extract water, fan it out for fast drying. When the carpet dries up vacuum it out to restore the texture of your product.

Surely, these steps will facilitate you for the complete removal of the unwanted, difficult-to-handle stain.

How to Remove Difficult Stains from Carpet?

Red Wine: For effective removal, cover it with salt followed by vacuuming and rubbing with detergent.

Coffee: prepare a mixture of warm water, white vinegar, and dish soap, followed by blotting, and dabbing.

Paint: Dab the stain with a good quality paint thinner, rinse with hot water, and apply soap then rub it well.

Ink: Apply a white color toothpaste on the spot, take an old toothbrush and rub it thoroughly, then rinse it with warm water.

Chocolate: Cover the stain with a high-quality detergent leave it for two minutes and brush it followed by rinsing it with cold water.

Grass:Β Take hydrogen peroxide and baking soda in 1:2 amount, mix them with a few drops of ordinary dish soap, apply it on the stain, and leave it overnight, then rinse it with warm water.

Final Remarks

Carpets are the most valuable part of your interior decoration, they are the most contacted entities, thus, it is obvious for them to host stains, and scuffs. But when they are suffered from the troublesome oil spots, then the situation becomes worsen as the spots do not ready to be removed easily. If you are short with time and energy then it will be wise to get benefited from our expert professionals of Global Clean, we deliver the best services of carpet cleaning and guarantee you the deeply cleaned stained free carpet in your home, or office.

Effectively Eliminate Damp Smell?

How to Effectively Eliminate Damp Smell?

Your beautiful home never deserves to be damped and staled filled with mold, and mildews. Misfortune never comes alone, misty and damp smell not only makes your house a repulsive place but also possesses greater health hazards. You may be suffering from severe health hazards like dizziness, sore throat, nasal irritation, nausea, and fatigue, and in some special cases, you might become a patient of Asthama. So, how can you get saved from such a hideous situation? Exactly, through prevention which is better than cure. To safeguard your residence from such a critical situation special concern is needed. But you can’t do it without an expert opinion right? You are in the right place to get one.Β This article will help you to get a clear idea about the right treatment for Damp Smell to completely remove it from your comfortable home.Β 

What Causes the Damp Smell in your House? 

Mostly, your residence comes under attack of molds and mildews due to various reasons. You need to make a clear differentiation between them before you get started with proper treatment. 

Molds 

These are thick stains of fungal growth. They are very damaging to your property. Their structural damage can cause a heavy burden on your pocket. They show relatively complex growth patterns. 

Mildews

These are mainly thin fungal stains. They normally show flat or straight growth patterns. 

How to Find out Moulds and Mildews?

The desirable place for the growth of the fungus is in moist areas. A closed house with a condensed environment is heaven for mildews, and molds. Misty smell can’t be eliminated until you have located and removed the sole reasons for the foul smell. You mostly focus on the floor and other visible locations of your home while performing the cleaning. It is unfortunate that you mostly neglect the off-sight spaces, which become desirable places for the sole reasons of foul damp smell. 

Never neglect to identify the main hidden locations like,

  • Below Carpet or Rug especially when it is vulnerable to absorb moisture.
  • Windowsills are the primary places where warm and cool air strikes resulting in condensation. The moisture also gets along due to their outdoor exposure.
  • On the Mattress, especially when it is placed in your kid’s rooms and is exposed to urination, spills, and other accidents.
  • The Potted Plants, when the underneath soil remains wet.
  • Walls adjacent to the bathrooms bear excess moisture
  • The filters of AC Installations, primary sites of condensation.
  • Between the Wall and the Sofa, air does not pass in between, consequently leading to damp surfaces best for fungal invaders.
  • Behind your Furniture which is being neglected during the cleaning process.
  • Wall Cracks that can bear the moisture.
  • Leaked Pipes become fundamental polluters when remaining untreated for longer durations.
  • Bathroom Sinks, bathtub, floors that are always in contact with moisture.
  • Untreated dustbins for a longer time not only emit out pungent smell due to microbial activity but also provide space for one of the fungal strains, Rhizopus for its optimal growth.
  • Inside your freezer, Microwave, Toaster, and other appliances in Kitchen. They carry bread crumbs and other food chunks which are appropriate for emitters of detestable smell.
  • Books of your mini Library. The pages, if remain for some reason can host fungal stains. You can also check other locations if you have doubts that might host the fungal projections.

How can You Identify Musty Smell in Your Home?

The human olfactory sense is modified to experience various smells. They are more obvious if they carry a repulsive odor. So, believe in your sense of smell. Leave your home closed for time mainly for a night or a day. Close all the external windows to cut off any probability of ventilation. The air inside your house will get a misty, and stuffy texture which is identifiable. If the structure of your house is such that it allows limited air passage, or your outdoor windows remain close for a prolonged period then there is no need of shutting your house. You will smell foul in your daily routine. 

How to Clean Mildews?

We know that it is a real panic experience if you are unable to find any coziness in your sweet home after you have got through a tiresome routine of the entire day due to a misty smell. 

If you locate places having molds, and mildews don’t get worried rather elegantly remove them by taking a wise approach. 

To eliminate mildews you can take the following steps.

Removal through Bleach:

Bleach is effective for fungal stain removal. It is a very fast cleaning agent. Before the application of bleach make sure that you have managed proper room ventilation. Open all the outdoor windows, and turn on the fans. Don’t forget to put on rubber gloves for safety and other protective accessories like a face mask, So that you will make yourself protected from the spores that might get dispersed during the process and you are vulnerable to inhale them through your breath.

Simply, apply the bleach over the fungal growth. Give it some time for its action of killing the grownups. Rem them through scrubbing, and then wipe it out immediately with a cleaning rag. It is better to spill warm water over the area to restrict the regrowth of the mildews.

Removal through Vinegar Solution and Baking Soda:

  • Make a saturated solution of white vinegar and distilled water. Fill it in a spray bottle. Spray it over the affected location. Let it sit for some time like 2 to 3 hours.
  • Now the next step is the application of the most effective agent, baking soda. You need to take an abrasive sponge, soak it in hot water and apply baking soda over it. 
  • Hold it in your hand and scrub the area well until you feel that there are no remains of fungal growth projections.
  • Finally, pour hot water over it and clean it with an absorbent cloth. Leave it for a while and then carefully examine it, if the area shows some color pattern, indicates that the mildews are not completely removed. Repeat the process until you don’t find any mold residue.

Point to Remember: It is highly suggested to maintain a deep ventilation system by turning on all fans and opening all windows. Secondly, dispose of all the used items like a rag, gloves, mask, spray bottle, and scrubber into a plastic bag and bind it tightly to eliminate the spreading of spores.

Applicable Tips to Remove the misty Smell:

Proper Ventilation : 

  • Never make the mistake to keep your home shut all the time. Give it proper fresh air exposure. It is a wise step to open windows for some time even in winters to give a chance to the internal stuffy air to get escaped outwards. In return the indoors will be filled with external fresh air. It will help to prevent the accumulation of mistiness in your indoors.
  • Use a Dehumidifier: Good quality dehumidifiers are available in markets at different prices. You can get one according to your range. It is an efficient appliance to not let moisture in your indoor air because condensation is the main reason for suffocating air. 
  • Regularly Replace Your Air Filters: Air filters are the primary locations where molds find the most suitable place to grow.  

Hire Professional Cleaners:

If you are still worried about a consistent damp smell in your beautiful house, it takes a wise step and approaches professional cleaners for the complete removal of foul smells professionally. Check out the experts of Global Clean, we will ensure a cozy fragranced home at an extremely affordable price. 

Clean The Wheelie Bin

Everything You Need to Know How to Clean The Wheelie Bin

Imagine your life without a reliable partner who hides all the dirt from your house and presents you with a shiny neat home. Miserable right? You could not handle the scattered mess of your locality effectively if you have not been accompanied by the most neglected but highly valuable wheelie bin. However, wheelie bins are a crucial part of your cleanliness mechanism, alas! Mostly, the poor souls themselves get stained with organic and inorganic waste, reflecting a pungent, foul smell even from an actual distance. The dirty bins undoubtedly ruin the beauty of your lovely house, and yes, they act as the precursors to fail all of your cleaning strategies.Β In this blog, we are presenting everything that you are required to learn about the maintenance of your bins and the perfect method to clean your bin efficiently.

Imagine the risk of polluted bins by keeping this research in mind that an ordinary toilet seat carries 500 to 1000 bacteria. Still, a bin in your kitchen or outdoor produces 300million bacteria on average weekly. Thus, pose a high threat of contagion getting spread and making you feel dull and diseased.

What Cause your Bins to Smell Foul?

Since bins are the storehouse of all the produced waste material in your house, they carry a range of organic and inorganic materials. Upon rotting, emit out a pungent smell that spreads all across your house. While you remain busy with other chores, the discarded food, dust, papers, plastics, and other organic waste remain there. The microbial activity initiates the rotting process, which decomposes the filth and hence emits the notorious odor.

It becomes a serious matter, especially during the summer season when you let your bins in a corner untreated full of nasty curd.

The rancid bins will not let you sigh in relief.

Items Required to Effectively Clean your Bin

Following are the items required to clean your bin:

  • Mop
  • A Shovel
  • Good Quality Garden Hose
  • Bleach
  • Bucket
  • A High-Quality Scrubbing Brush
  • Disinfectant Spray
  • Old Rags and Cloths

Step Wise Cleaning Process

  1. To clean your bin, your first step should be emptying your stuffed bins and then taking them to the washing place.
  2. In the next step, lay the bin on one of its sides; if you find any sticky debris at the bottom, remove them with the help of a long broom, or you can use a definite long yard brush. Wipe them out completely. Special care is needed when dealing with a bin in your kitchen, as the food particles can get stick quickly on the sides and the bottom.
  3. Collect all dirt immediately in bags and carry them away to get disposed of. Taking the sludge to a safe place is not an easy task; it might spill out on its way. Give a good tight binding to the bags to eliminate any accidents.
  4. Now upright the bin again. Take a water hose to remove the accumulated dirt. Give the bin a high-pressure water spray, and concentrate on all areas. To make the job easy for you, use a good quality jet cleaner. Focus well on the bottom lining of the bin. Repeat the process until you have completely removed the stuffy waste.
  5. Now it’s time to get rid of the dirty water gathered in the bin; it’s better to end it in a drain. Pick the food scraps with the help of gloves. Next, give a thorough wipe inside the bin with a cleaning rag and soap solution, scrub well, put special focus on the bottom of the bin, and mop it completely. Give it some time to ensure a neat bin.
  6. The coming step is not hard. It’s scrubbing outside of the bin by putting extra effort on the lids and bottom, but don’t ignore the sides.Β 
  7. Sanitization is the core element of the cleaning bin. You can either choose a bleach or a disinfectant solution for the purpose. First, sanitize the inside of your bin with a cleaned mop followed by the outside.
  8. Lastly, rinse your bin with clean water from a hose or bucket. Put it in sunlight for rapid drying by turning it upside down; you can also dry it with an old towel or a good water-absorbing cloth. Avoid putting rubbish in the bin before it gets dried completely; otherwise, you will make it slurry.
  9. After the completion of the cleaning process, clean your clothes and the stuff used in the cleaning process. Make sure that you use these clothes only for the cleaning bins.

Note:  To save yourself from the hectic cleaning process next time, make a habit of a regular rinse every time you have emptied it. It will prevent the smell and the accumulation of building up of the sludge in deep. For a classic professional bin cleaning, avail of the Specialist Cleaning Service of Global Cleaning Agency based in the UK.

 How to Maintain the Cleanliness of your Bin?

Surely, you would love to make your job easy by preventing your bins from becoming smelly than putting your extra effort into a deep clean.

The following things will help you in this mission.

  • Rinse it with water after you have emptied it every time.
  • To restrict unwanted spillage, always put your food waste in sealed bags so that they would not travel downwards and make a smelly sludge.Β 
  • Always empty and rinse your cans and bottles with foodstuff before throwing them in your lovely bins.
  • To keep flies and maggots away, it is suggested to sprinkle a good quality bin powder, instead of going with special bin cleaning products.
  • Moreover, you can disinfect your bins, especially the lids, to keep insects away from getting into the bin.
  • To soak up any sludge building at the bottom, it is better to use bin liners or newspapers, to absorb the leaks. You can go with the biodegradable papers as wheelie bin liners.

How to Eliminate the Maggots in Brown Bins?

Are you worried about the piling up of maggots in the bins? They pose a great threat during warm summers. They attract other species like flies, rodents, and other pests. You need to get rid of this headache peacefully; now take a sigh of relief with this expert opinion.

Never throw food scraps uncovered in the bin as they attract maggots like a magnet attracts iron. But if you find some in your bins, pour boiling water that would effectively repel further maggots to get in and restrict the existing ones to lay eggs. If eggs are already present, it will prevent their hatching.

To make the job easy for you further, we have brought you the following steps:

  1. Provide outside with a thorough bleach spray or any other special disinfectant spray.
  2. Thoroughly spray it on the top and inside as well.
  3. Give it time to get dried.
  4. If you see some remaining maggots in the bin, pour boiling water over them. It will also destroy their eggs to control their population.

How Can Flies be Prevented in Bin?

The following points will help you out to prevent hovering of flies:

  • Always wrap all the food scraps in a paper or a bag to prevent the flies from getting attracted to your cleaned bin.
  • To avoid the warming up of the litter, settle bins in the shade away from direct sunlight.Β 
  • Squeeze the bags before placing any waste in them to remove all of the captured air in them. It will slow down the decomposition, thus reducing the smell and the growth of eggs in the litter.
  • It is better to use the pedal bin liners rather than the regular carrier bags containing holes that ensure the air passage, thus hindering the nasty rotting process.
  • If flies are a constant problem, reduce their presence by smearing your bin with tea tree oil, or citronella, which are the best natural insect repellents.
  • The last thing, is always to keep the lids of your bins closed to restrict the flies’ growth.

Efficient Tips to clean your bin:

  • Before throwing any food packaging in the bin, remove all the remaining in the packs. So that flies would not find their way in the neat bin.
  • If you have to throw any wet item like a meat piece or any other foodstuff, it also includes the pet waste, chicken bones, or nappies, first place them in biodegradable bags, or can also wrap them in the newspaper. It would restrict not only the spilling but also the buzzing of flies.
  • When you put anything in the bag, tie them sharply to prevent any material from getting inside and outside the bin.
  • Quickly empty the indoor bins in scorching hot weather, and give them a rinse.Β 
  • For your outdoor bins during scorching hard weather, store them in the shade away from sunlight.
  • Always ensure that you have closed the lid of the bin after you have used it; otherwise, flies will get in and breed there rapidly. It will also trap the foul smell inside, keeping your surrounding refreshed.
  • Never make the mistake of overloading your bin; empty it right after it has reached its maximum limit.
  • Deal with different wastes differently before placing them in the bin. Special attention is needed while dealing with liquid waste; it should be packed tightly.
  • Whenever you are in contact with bins, make sure to wash your hands, even if you have just touched the lid. It would save you and your family from getting infected.
  • If you are worried about a foul smell, put peels of some citrus fruits like orange or lemon peels in your bin. It will temporarily reduce the notorious pungent smell.Β 
  • Use commercial fragranced bin liners to make the job easy for you.Β 
  • It is preferable to make compost and place the organic waste in a compost bin than in the regular bin to get saved from smell and insects.
  • Empty your bins at least on a weekly basis, don’t wait for them to get filled with garbage up to the top.
  • Always wear rubber gloves to protect your hands while dealing with bin cleaning.

Surely, till this point, you must have got a better idea about how to clean your bin. For perfect Home Cleaning, regular treatment of your bin is necessary. Keep them clean to present a fresh look to your locality. To assure complete deep cleanliness, you need to act wisely from the moment when you have purchased a new luxurious bin. If you neglect your best cleanliness fellow for once, you will find yourself in trouble. Foul smell, flies, rodents, and maggots will be your guests for the coming period.Β 

To get professional help visit us.

How to Clean Skylights

How to Clean Skylights

Have you installed skylights with fondness in your home but are still been unable to enjoy the clear view of the bright sky? With time the stuffed dust, cobwebs, and dirt have covered your sky vision while hindering the passage of natural light into your sweet home; the ventilation and warmth of the house would also be affected; now it’s the moment of getting rid of the worry and shine thoroughly. Being fixed on the roof, they might have a tough time during their cleanliness process; however, if you neglect their neatness for a more extended period, you will ultimately end up with a blurred exterior vision, as they will no longer serve as transparent but turn into a cloudy cover. Hence, clean skylights are very important as they will lose their purpose otherwise. Thus, their proper maintenance is a prerequisite.

Although they serve as windows on the roof, special care is needed as their material is not made up of glass instead of a mix of plastic and other synthetic materials; thus, the application of commercial glass cleaners for their neatness will be damaging and may cause scratches on their surface. For more information read our article window cleaning

How to Maintain Skylights?

They are directly associated with your home’s cooling and heating system; if not fixed properly, they may cause the escape of heat during winters and allow the outdoor warm air inside your house. Hence the cautious approach is needed while fixing them on your roof, ensuring a complete fixation through an expert check. It is suggested to use the updated designs and models. Regular cleaning of your valuable skylights is mandatory, no matter how costly they are; if you have not made a habit of cleaning them in intervals, they will lack their luster, and you will be left with a cloudy view.

How to Clean Inside of Skylights?

Before the initiation of the cleaning process, make sure that you have taken all the preventive measures. Please start with the covering of furniture with a tap, or displace them to a safe point so, that they get saved from the downwards tickling of solutions and the sticky dirt.

The next move should be to place a tarp on the ground just below the skylights to save your carpet from dirt.

The Required Material for the Deep Cleaning of Skylights:

  • An Empty Bucket
  • Lukewarm Water
  • White Vinegar
  • A Good Quality Dish Soap
  • Rage, or Microfiber cloth
  • Power Washer
  • Ladder
  • Sponge

Step Wise Process of Skylights Cleaning from Inside

  1. First of all, adjust a ladder to reach them, now starting wiping them with a clean rag to eliminate the surface debris and dirt. For this process, a rag attached to a long pole would be permissible to wipe away all the sticky dust, dry debris, and cobwebs. You can also use a dry mop or a long broom instead of a rag.
  2. Next, you have to make a solution and half fill the bucket with lukewarm water with a liquid detergent. Now take a clean rag and dip it in the solution, be wise in keeping the rag over a bucket of water to reduce the dripping on the floor. Make sure that you have made a foamy solution for the removal of dirt scuffs.
  3. Now, it’s time to wipe the interior of your skylight to remove the accumulated grime. Clean it side by side and moving upwards and downwards. It’s better to wipe it down in a zig-zag motion. Since the skylight interior is not dirty much primarily, its cleanliness does not demand much time and energy.
Note:  Not to poke the material with your pole, or scrub it harder. Could you not push it forcefully?

4. Finally, mob it out with the help of a clean microfiber cloth attached to the tip of the pole

How to Remove Tough Grime from Skylights?

Sometimes, a regular cleaning mechanism fails altogether to remove the stubborn stains, especially the grime. It would help if you did not feel trouble, remove them with the help of this simple solution.

Prepare a mixture by taking white vinegar and water in a 1 to 2 ratio. When you have finished with the regular cleaning process, dip a clean rag in the solution and rub it gently on the spots. The high cleaning properties of vinegar and very effective for the removal of residue or obstinate stains. It is very effective, especially for greasy skylights, to remove the oil quickly. If you fail in the first attempt, add more vinegar to the solution, and give it a second try.

How to Clean Outside of Skylights?

Approach them by setting up a ladder. Be careful while setting the ladder; you may fall on the ground if you have not balanced it on even ground. 

Stepwise Process to Clean Outside of Skylights

  1. At first, take a towel to wipe away all the surface dust. Being exposed to the harsh weather patterns, bird’s waste, and atmospheric dust, there is a high probability of accumulating excess filth, like web, spores, dirt, animal residue, and rocks. If simple wiping fails to remove the debris, the application of a power washer is admissible.
  2. In the next step, take a soft sponge, and dip it in the solution. Now gently rub the sponge on the material. Start the process from the top, and with care and effort, rub the rain buildup, grime, and cloudy residue, and move downwards to prevent the already cleaned areas from the dirty dripping.
Note: Avoid using the cleaning pad with abrasive cleaning pads to avoid any damage or scratching.
  1. To remove hard residue, make a saturated mixture of water, and vinegar, rub it on the leftovers, and gently wipe it out to lighten the tough marks. Afterward, clean it with the regular soap solution.
  2. Lastly, rinse it with clean water and dry it by rubbing a dry microfiber cloth or a good absorbent towel. However, it is also suggested to spray the skylights through the hose nozzle.
Note:  The summer cleaning must include the deep cleaning of your skylights, like the winter and spring rains have put their marks on the skylights.

Effective Tips to clean skylights

  • It is better to clean the interior, dry it well, and then move to the exterior.
  • Never Scrap harshly to prevent marks on the material. For more stubborn stains, use a commercial cleaner specifically for the skylights, read the preventive measures and the application mechanism.
  • Use an absorbent sponge to remove the loose marks.
  • It is wise to approach determining the kind of material of your fiber. It might be a regular glass or a Plexiglas before the selection of market cleaners.
  • Always polish your skylights after a thorough cleaning to avoid accidental scratches and lines.

If you have chosen to clean your precious skylights by yourself, you might feel anxiety as they are hard to approach and difficult to completely clean while maintaining your balance and ruining your floor or furniture. If you have decided to get benefited from the professional work, then try Global Cleaning Services. You will experience quality cleaning services at highly affordable prices.