fbpx

Global Clean – Cleaning Services In London

ways to Clean and Organized Garage

Maintain a Clean and Organized Garage in Manchester -Tips

Your garage is more than just a place to park your car; it serves as a storage area for tools, equipment, and other household items. However, without proper organization, it can quickly become a cluttered mess, making it difficult to find what you need when you need it. In this comprehensive guide, we will provide you with valuable tips and strategies to maintain a clean and organized garage in Manchester. By implementing these ideas, you’ll not only create a functional space but also enhance the overall aesthetics of your garage.

1. Declutter and Sort:

Clean and Organized Garage managment

The first step in achieving a clean and organized garage is to declutter and sort through your belongings. Begin by categorizing items into three groups: keep, donate/sell, and discard. Dispose of any broken or unused items, and consider selling or donating things you no longer need. This process will help free up valuable space and create a clutter-free environment. As you go through each item, ask yourself if it’s something you genuinely need or use regularly. Be honest with yourself and let go of items that no longer serve a purpose.

2. Optimize Storage Solutions:

Investing in smart storage solutions is crucial to making the most of your garage space. Utilize vertical storage by installing shelves or cabinets along the walls. Clear plastic bins with labels can help keep items visible and easily accessible. Group similar items together, such as gardening tools, automotive supplies, and sports equipment.

Utilize overhead storage racks for seldom-used items like seasonal decorations or camping gear. Consider utilizing pegboards to hang frequently used tools, maximizing accessibility and minimizing clutter. Magnetic strips or tool organizers can also be useful for keeping small metal tools within reach.

3. Create Dedicated Zones:

Designate specific areas in your garage for different purposes. Create a zone for gardening tools, sports equipment, automotive supplies, and household maintenance items. Clearly mark each area using labels or signage, making it easier to find and return items to their designated spaces.

For example, you can have a designated corner for your gardening tools with a pegboard for hanging tools, a shelf for pots and planters, and a bin for gardening gloves and supplies. By having dedicated zones, you’ll eliminate confusion and maintain organization.

4. Implement Regular Cleaning Routines:

regular cleaning tips

Set aside time on a regular basis to clean your garage. Sweep the floor to remove dirt and debris, and consider using a pressure washer for a deep clean. Wipe down shelves, cabinets, and surfaces to prevent dust buildup.

Regular cleaning not only keeps your garage looking tidy but also helps prevent pests from invading your space. Inspect for any signs of water leaks or damage and address them promptly to avoid further issues. Additionally, consider installing proper ventilation to prevent moisture buildup and keep the air fresh in your garage.

5. Utilize Hooks and Hangers:

Make use of hooks and hangers to keep frequently used items within reach. Hang bicycles, ladders, and garden hoses on wall hooks to free up floor space. Install a pegboard or magnetic strip for organizing small hand tools like screwdrivers and wrenches.

Utilize sturdy hooks for hanging power tools or larger equipment. By utilizing these storage solutions, you’ll maximize space and keep your garage well-organized. Consider investing in adjustable shelving or modular storage systems that can be easily customized to fit your specific needs.

6. Maintain a Maintenance Schedule:

Regular maintenance is essential for keeping your garage clean and organized. Inspect your garage for any signs of damage or wear, such as cracks in the floor or leaks in the ceiling. Address these issues promptly to prevent further damage. Additionally, check your stored items periodically to ensure they remain in good condition and discard any damaged or expired products.

Create a maintenance schedule to remind yourself of regular tasks such as checking the garage door for proper operation, lubricating hinges and tracks, and replacing light bulbs as needed. By staying proactive with maintenance, you’ll keep your garage in optimal condition.

7. Enhance Lighting:

A well-lit garage not only improves visibility but also creates a more inviting and functional space. Assess the current lighting situation in your garage and consider making improvements. Add additional light fixtures or upgrade to brighter, energy-efficient LED bulbs.

Ensure that key areas such as workbenches and storage zones have sufficient lighting. Install motion-sensor lights near the garage entrance for convenience and security. Adequate lighting will not only make it easier to find items but also enhance safety when working in the garage.

8. Establish a Cleaning and Organizing Routine:

Maintaining a clean and organized garage requires consistency. Establish a cleaning and organizing routine that fits your schedule. Set aside dedicated time each month or season to declutter, clean, and reorganize your garage.

Make it a family or household task, involving everyone to ensure everyone understands the organization system and contributes to its maintenance. Regularly reassess the organization system and make adjustments as needed to accommodate any changes in your storage needs. not only take it clean but also clean your washing machine.

9. Label and Inventory:

Labeling is a simple yet effective way to maintain an organized garage. Use labels or tags on bins, shelves, and cabinets to clearly identify the contents inside. This makes it easier to find specific items and encourages everyone in the household to return things to their proper places. Additionally, consider creating an inventory list of the items stored in your garage.

This can be a digital spreadsheet or a physical notebook where you note down the contents of each box or storage container. Having an inventory will help you keep track of your belongings and prevent unnecessary purchases.

Conclusion:

With these comprehensive tips and strategies, you have all the tools you need to maintain a clean and organized garage in Manchester. Remember, it’s a gradual process, so don’t get overwhelmed. Start by decluttering, optimizing storage solutions, creating dedicated zones, implementing regular cleaning routines, utilizing hooks and hangers, maintaining a maintenance schedule, enhancing lighting, establishing a cleaning and organizing routine, and labeling and inventorying your items.

By incorporating these practices into your garage maintenance routine, you’ll enjoy a functional and clutter-free space that adds value to your home and makes everyday tasks more efficient. Take the first step today and transform your garage into an organized oasis.

FAQS

Why is it important to keep my garage clean and organized?

A clean and organized garage is not only aesthetically pleasing but also functional. It allows you to find items easily, protects your belongings from damage, and can even increase the resale value of your home.

How often should I clean and organize my garage?

It depends on your usage, but a good rule of thumb is to perform a thorough cleaning and organization at least once a year. Regular maintenance and decluttering can be done quarterly or as needed.

What should I do with items I no longer need in my garage?

Consider donating, recycling, or selling items that you no longer use or need. Properly dispose of hazardous materials at designated facilities.

What are some essential tools or supplies I need for garage organization?

You may need storage shelves, bins, hooks, pegboards, labels, a broom, mop, vacuum cleaner, and cleaning supplies.

How can I prevent pests like rodents and insects from infesting my garage?

Seal any cracks or gaps, keep food items in airtight containers, and consider using pest control measures like traps or repellents.

Are there any specific guidelines for storing hazardous materials in the garage?

Store hazardous materials in their original containers and on sturdy shelves away from direct sunlight, heat sources, or open flames. Follow local regulations for safe storage.

washing machine tips

HOW TO CLEAN WASHING MACHINE-Tips

Cleaning your washing machine is essential to ensure that it continues to function efficiently and doesn’t become a breeding ground for mold and bacteria. Here are some key steps on how to clean your washing machine:

  1. Gather Your Supplies:
    • Before you start, gather the necessary supplies: white vinegar, baking soda, a microfiber cloth, a toothbrush, and a bucket.
  2. Empty the Drum:
    • Remove any clothing or items from the drum, ensuring it’s completely empty before starting the cleaning process.
  3. Clean the Detergent Dispenser:
    • Remove the detergent dispenser and soak it in warm, soapy water. Scrub away any residue with a toothbrush.
  4. Run a Hot Cycle with Vinegar:
    • Pour two cups of white vinegar into the detergent dispenser. Run the machine on the hottest and longest cycle to clean the drum and remove mineral buildup.
  5. Wipe Down the Exterior:
    • While the machine is running, wipe down the exterior with a mixture of water and vinegar to remove any grime or stains.
  6. Clean the Rubber Gasket:
    • The rubber gasket around the door can trap dirt and mold. Use a toothbrush and a mixture of water and vinegar to clean it thoroughly.
  7. Clean the Filter:
    • Consult your machine’s manual to locate and clean the lint filter. This step will help improve drainage and prevent blockages.
  8. Run a Rinse Cycle:
    • After the vinegar cycle, run another hot cycle with plain water to remove any remaining vinegar residue.
  9. Deodorize with Baking Soda:
    • Sprinkle baking soda inside the drum and run a short cycle with hot water to deodorize your washing machine.
  10. Wipe Down the Door and Seal:
    • After completing all cycles, wipe down the door and the seal with a clean, damp microfiber cloth.
  11. Keep it Dry:
    • Leave the door open after each wash to allow the interior to dry thoroughly, preventing mold growth.
  12. Regular Maintenance:
    • To prevent future buildup, clean your washing machine every 1-2 months, and follow the manufacturer’s guidelines for maintenance.

Conclusion

By following these steps on how to clean your washing machine, you can maintain its efficiency and ensure your clothes come out fresh and clean with every wash. Regular cleaning not only extends the lifespan of your machine but also helps maintain the quality of your laundry. Don’t forget that a clean washing machine is essential for cleaner and fresher clothes.

1. TIP 1 (BAKING SODA)

clean washing machine by baking soda

Our first step in washing machine cleaning will obviously be with baking soda, baking soda is the most reactive and powerful ingredient against stains.

All you have to do is take 1 or 2 cups of baking soda and sprinkle it all over the inside area of the washing machine.

Give them the most extended and hottest round so that in the last you will see the water turns black, which will be evidence of extracting all bacteria.

2. TIP 2 (VINEGAR)

clean washing machine by vinegar

Take 1 to 2 cups full of vinegar, pour it inside a grim bottom area on your washing machine, and give it the hottest and longest cycle round to properly work and give you a satisfactory result.

3. TIP 3 (BLEACH)

clean washing machine by bleach

All you have to do is fill half the washing machine with water and then pour 1 cup of bleach into it.

After that start, your washing machine gives it the hottest and longest cycle.

You can give it 5 cycles to get better results, bleach will disinfect all germs and clean them.

HOW TO PREVENT YOUR WASHING MACHINE FROM GETTING NASTY

Washing machines are undoubtedly convenient appliances that make our lives easier, but without proper care, they can become breeding grounds for mold, mildew, and unpleasant odors. Here’s a detailed guide on how to maintain your washing machine to keep it clean and running smoothly:

1. Leave the Door Open: After you’ve finished using your washing machine, leave the door open. Allowing the interior to air out prevents moisture from becoming trapped inside, which can lead to mold and musty smells. By leaving the door ajar, you let excess water evaporate, discouraging the growth of unwanted microorganisms.

2. Clean the Dispenser Tray: For washing machines with a dispenser tray, dirt and detergent residue can accumulate over time. Remove the tray and wash it with hot, soapy water. A toothbrush can be used to scrub away stubborn deposits. Ensure that all compartments are thoroughly cleaned before reinserting the tray. This practice guarantees that your detergent and softener are dispensed cleanly during cycles.

3. Properly Clean the Rubber Seal: The rubber seal around the door is a common spot for mold to develop due to moisture retention. Gently pull back the seal to access its inner parts. Clean it with a mixture of hot water and mild detergent, using a toothbrush to reach crevices. Regular cleaning prevents the buildup of grime and maintains the seal’s elasticity.

4. Clean the Filter: Many washing machines have a filter located near the bottom. This filter traps debris such as lint, coins, and fabric fibers. It’s crucial to clean this filter every six months to prevent blockages and maintain optimal water drainage. Follow your machine’s manual to locate and remove the filter, then rinse it under running water to remove dirt and lint.

5. Use Vinegar or Baking Soda: Vinegar and baking soda are natural cleaning agents that can help keep your washing machine fresh. About once a month, run an empty cycle on the hottest water setting. Add one cup of white vinegar or baking soda to the drum before starting the cycle. This process helps dissolve built-up detergent residues and eliminates odors.

6. Wipe Down the Exterior: Don’t overlook the exterior of the machine. Wipe it down regularly with a damp cloth and mild detergent. Pay special attention to control knobs, buttons, and the detergent dispenser. A clean exterior not only looks better but also prevents dust and grime from finding their way into the machine’s interior.

7. Check Pockets Before Loading: Before tossing clothes into the washing machine, check all pockets for any items that could cause harm to the machine or get tangled with other garments. Coins, paper clips, and tissues are common culprits that can lead to mechanical problems or blockages in the drain pump.

8. Use the Right Detergent: Using the appropriate type and amount of detergent is essential. Follow the manufacturer’s recommendations for the best results. Excessive detergent can create a buildup that contributes to foul odors and reduced machine efficiency.

9. Run a Monthly Hot Cycle: Running an empty hot water cycle once a month helps to dissolve detergent residues, mineral deposits, and grime. This prevents unwanted buildup and maintains the machine’s cleanliness.

10. Regular Maintenance: Consider scheduling professional maintenance for your washing machine annually. A qualified technician can perform a thorough inspection, clean hard-to-reach areas, and address any potential issues before they escalate.

By diligently following these guidelines, you can extend the life of your washing machine, keep it operating efficiently, and ensure that your clothes emerge clean and fresh after every cycle.

clean rug without vacuum

How to Clean a Jute Rug Without a Vacuum: A Comprehensive Guide

clean rug without vacuum

Jute rugs are a popular choice for home decor due to their natural beauty and eco-friendly characteristics. However, cleaning jute rugs can be a bit challenging, especially if you don’t have a vacuum cleaner at your disposal. But fret not! In this comprehensive guide, we will explore effective methods and tips on how to clean a jute rug without using a vacuum.

By following these simple techniques, you can maintain the beauty and longevity of your jute rug while keeping it free from dirt, debris, and allergens. Let’s dive in!

1. Shake it

shake your rug

The first step in cleaning a jute rug without a vacuum is to shake it vigorously. Take your rug outdoors, preferably in an open area or on a clothesline, and hold it from one end.

Give it several firm shakes, ensuring the rug is fully stretched out. This action will help dislodge loose dirt, dust, and debris trapped within the fibers. Repeat the process on both sides of the rug to ensure thorough cleaning. You can also have guidance to wash jute rugs in the washing machine.

2. Beat It:

beat your rug without vacuum

Another effective method to remove stubborn dirt from a jute rug is by beating it gently. Find a suitable area outside where you can hang the rug over a sturdy object, such as a clothesline or railing. Use a soft brush or a broom to beat the rug gently, starting from one end and working your way across the entire surface. The repeated beating action helps loosen and remove dirt particles trapped within the jute fibers, leaving your rug cleaner and refreshed.

3. Brushing it Away:

brush your rug without vacuum

To clean rug brushing is an excellent alternative to vacuuming when it comes to cleaning a jute rug. You can go with a soft-bristled brush or a dry scrubbing brush to prevent damaging the delicate fibers.

Start by gently brushing the surface in the direction of the jute weave, applying light pressure. This method effectively dislodges dirt and debris, making it easier to remove them. Brush the entire rug, focusing on high-traffic areas and spots that require extra attention.

4. Baking Soda for Odor Removal:

clean your rug with baking soda without vacuum

Jute rugs can sometimes develop unwanted odors. To freshen up your rug and eliminate any lingering smells, baking soda comes to the rescue. Sprinkle a generous amount of baking soda evenly over the surface of the rug.

Allow it to sit for at least 30 minutes, as baking soda naturally absorbs odors. Afterward, thoroughly shake or beat the rug to remove the baking soda, leaving behind a pleasantly refreshed scent.

5. Spot Cleaning:

Accidental spills and stains are bound to happen, but fear not! You can effectively spot-clean your jute rug without a vacuum. Here’s a step-by-step process:

a) Blot the Stain: Immediately after a spill occurs, use a clean, white cloth or paper towel to blot the stained area gently. Avoid rubbing or scrubbing, as it may cause the stain to spread or penetrate deeper into the fibers.

b) Mild Soap Solution: Create a solution by mixing a few drops of mild liquid soap or dishwashing detergent with lukewarm water. Dip a clean cloth into the solution, wring out any excess liquid, and gently blot the stained area. Repeat this process until the stain is no longer visible.

c) Rinse and Dry: Dampen a clean cloth with water and blot the area to remove any soap residue. Allow the rug to air dry in a well-ventilated area, away from direct sunlight or heat sources.

Professional Cleaning:

While the methods mentioned above are effective for regular maintenance and spot cleaning, it’s important to consider professional cleaning for your jute rug on occasion. Professional cleaners have the expertise and equipment to deep clean and rejuvenate your rug without causing any damage. They can also treat stubborn stains and restore the rug’s natural shine.

When choosing a professional cleaner, look for those experienced in handling natural fiber rugs like jute. Seek recommendations from friends or family, read reviews, and inquire about their cleaning methods to ensure they align with the delicate nature of jute rugs.

Remember, professional cleaning should be done sparingly, as excessive moisture or harsh chemicals can weaken the jute fibers. It’s best to consult with the cleaning professionals regarding the frequency of deep cleaning for your specific rug.

Prevention and Maintenance:

Prevention is key to maintaining the cleanliness of your jute rug. Here are some preventive measures and maintenance tips to keep your rug in excellent condition:

  1. Regular Rotation: To ensure even wear and tear, rotate your jute rug every few months. This prevents specific areas from experiencing excessive foot traffic or sun exposure.
  2. Use a Rug Pad: Placing a rug pad underneath your jute rug provides extra cushioning, minimizes slippage, and helps protect the rug’s fibers. It also acts as a barrier, preventing dirt and debris from seeping through to the floor.
  3. Avoid Excessive Moisture: Jute rugs are susceptible to water damage, so it’s crucial to keep them dry. Avoid placing them in areas prone to spills or excessive moisture, such as bathrooms or kitchens.
  4. Regular Spot Cleaning: Promptly address spills and stains by following the spot cleaning method mentioned earlier. The sooner you tackle a stain, the easier it is to remove.
  5. Gentle Vacuuming (If Available): If you have access to a vacuum cleaner with a brush attachment and adjustable suction, you can gently vacuum your jute rug on a low setting to remove loose dirt and debris. However, be cautious and ensure the vacuum does not have a beater bar or strong suction, as it can damage delicate fibers.

Conclusion:

Clean a jute rug without a vacuum cleaner is entirely possible with the right techniques and care. By shaking, beating, brushing, spot cleaning, and practicing preventive measures, you can maintain the beauty and cleanliness of your jute rug for years to come.

Remember to be gentle and avoid excessive moisture or harsh chemicals that could damage the delicate jute fibers. With these steps in mind, you can enjoy the natural elegance of your jute rug while keeping it fresh and free from dirt, dust, and allergens.

clean rug without vaccum

How to clean jute rug in the washing machine

Jute rugs are a popular choice for home decor due to their natural beauty and durability. However, they can be a challenge to clean, especially when they become heavily soiled or stained. Many people wonder if it’s possible to clean a jute rug in a washing machine. The good news is that it is possible to do so, but there are some important things to keep in mind to ensure that the rug is not damaged in the process.

In this article, we’ll provide a step-by-step guide on how to clean a jute rug in a washing machine, while also providing some tips on how to care for your jute rug to keep it looking its best.

Before we begin, it’s important to note that not all jute rugs are machine washable. Be sure to check the care instructions on your rug to determine whether it can be safely washed in a machine. If the care instructions advise against machine washing. You can read the cleaning checklist and follow the following instructions to avoid damaging the rug.

Step 1: Vacuum the rug

vacuum the rug

Before washing your jute rug in a machine, it’s important to remove as much loose dirt and debris as possible. Start by vacuuming the rug thoroughly on both sides.

Use a vacuum cleaner with a soft-bristled attachment to avoid damaging the rug’s fibers.

Step 2: Pre-treat any stains

brushing rug

If your jute rug has any stains, it’s important to pre-treat them before washing the rug. There are several natural cleaning solutions that can be used to pre-treat stains on jute rugs.

One of the most effective is a mixture of white vinegar and water. Simply mix equal parts white vinegar and water in a spray bottle and spray the solution directly onto the stain.

Let the solution sit for a few minutes, then blot the stain with a clean, damp cloth. Repeat this process until the stain is removed.

Step 3: Choose the right washing machine

Washing machine

When it comes to washing your jute rug in a machine, it’s important to choose the right type of machine. Front-loading machines are generally gentler on delicate fabrics than top-loading machines.

If you don’t have a front-loading machine, you can still wash your jute rug in a top-loading machine, but be sure to set the machine to a gentle cycle and use cold water.

Step 4: Use a mild detergent

cleaning detergent

When washing your jute rug in a machine, it’s important to use a mild detergent that is free of bleach, fabric softeners, and other harsh chemicals.

Look for a detergent that is specifically designed for delicate fabrics. You can also use a natural laundry detergent, such as one made from plant-based ingredients.

Step 5: Wash the rug in the washing machine

washing rug

To wash the rug in the washing machine place the jute rug in the washing machine and add the mild detergent. Set the machine to a gentle cycle and use cold water. Avoid using hot water, as it can shrink or damage the rug’s fibers. If your jute rug is particularly large, you may need to wash it in a commercial-sized machine at a laundromat.

Step 6: Rinse the rug

After the washing cycle is complete, remove the rug from the machine and rinse it thoroughly with cold water. Be sure to remove all traces of detergent from the rug, as any remaining soap can attract dirt and debris.

Step 7: Dry the rug

Dry the rug

Jute rugs should never be dried in a dryer, or you can use a hairdryer for it. as the heat can damage the fibers and cause the rug to shrink. Instead, hang the rug outside on a clothesline or lay it flat on a clean, dry surface in a well-ventilated area. Avoid placing the rug in direct sunlight, as this can cause the colors to fade. It may take several hours for the rug to dry completely, so be patient.

Tips for caring for your jute rug:

  • Regular maintenance: To keep your jute rug clean and in good condition, it’s important to perform regular maintenance. Vacuum the rug at least once a week to remove any loose dirt or debris. Use a vacuum cleaner with a soft brush attachment or a handheld vacuum to gently clean the rug’s surface. This will help prevent dirt from becoming embedded in the fibers.
  • Avoid excessive moisture: Jute rugs are prone to water damage, so it’s essential to avoid excessive moisture. Do not soak the rug in water or steam clean it, as this can cause the fibers to swell and warp. Additionally, avoid placing the rug in areas with high humidity, such as bathrooms or basements, as moisture can cause mold or mildew to develop.
  • Rotate the rug: To ensure even wear and prevent the rug from developing permanent indentations, rotate it periodically. This will distribute foot traffic and sunlight exposure more evenly, extending the lifespan of the rug.
  • Use a rug pad: Placing a rug pad underneath your jute rug provides additional protection and helps to prevent slipping. A rug pad also adds cushioning and improves the rug’s stability. Choose a rug pad specifically designed for use with jute rugs or natural fiber rugs.
  • Professional cleaning: While you can clean your jute rug at home, it’s recommended to have it professionally cleaned every 12 to 18 months. Professional cleaners have the expertise and specialized equipment to deep clean and remove stubborn stains without damaging the rug.
  • Preventive measures: To minimize dirt and debris from entering your home and accumulating on your jute rug, consider using doormats at entryways to trap dirt and wipe shoes before entering. You can also establish a no-shoe policy in certain areas of your home to reduce the amount of dirt brought in.

Conclusion

Cleaning a jute rug in the washing machine can be a convenient and effective method for maintaining its cleanliness and longevity. However, it is crucial to follow the proper steps and precautions to ensure the best results and avoid damaging the rug. Before attempting to clean the jute rug in the washing machine, it is important to check the care instructions provided by the manufacturer. Some jute rugs may not be suitable for machine washing and may require alternative cleaning methods.

If there are specific stains or spots on the rug, it is advisable to spot-clean them before machine washing. Using a mild detergent or a mixture of water and vinegar, gently blot the affected areas. Once the spot cleaning is complete, it’s time to prepare the rug for machine washing. This will help contain the rug and prevent it from tangling or fraying.

When selecting the washing machine settings, it is best to choose a gentle cycle with cold water. Hot water can cause jute fibers to shrink or expand, potentially distorting the rug’s shape. Additionally, it is important to avoid using harsh detergents or bleach, as they can damage the natural fibers of the jute rug. Instead, opt for a mild and gentle detergent specifically designed for delicate fabrics.

How to Clean Silver Jewelry at Home?

How to Clean Silver Jewelry at Home?

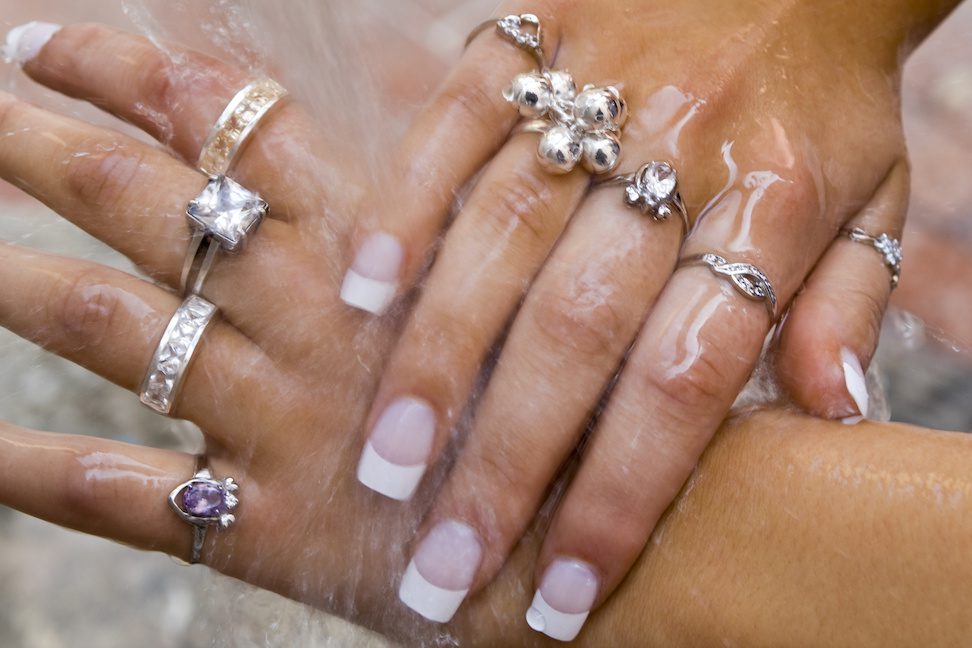
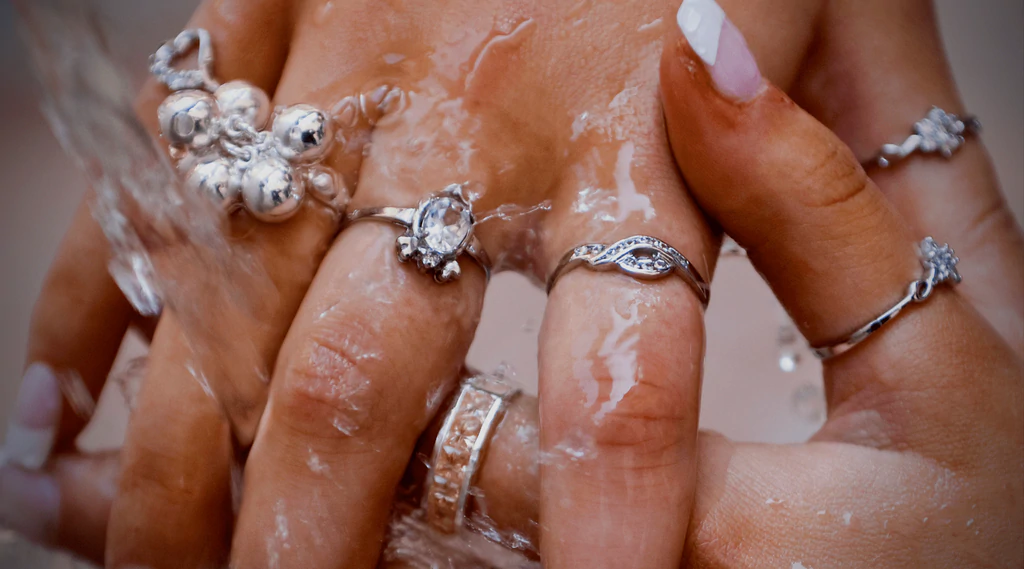
Silver jewelry is quite popular among teens and elders for being an elegant, affordable, and chiasmatic piece of ornamentation, which goes along with almost every type of dress. The association of silver with elegance has been so for very long; however, an apparent hitch would be the tarnishing or blackening of silver wear over time, which dims its vibrance. ​​But the good news is that with a bit of effort, using the do-it-yourself methods explained in this blog post you can clean silver jewelry at home.

Easy DIY Methods To Clean Silver Jewelry at Home

1. Soap and Water 

For mild tarnishing on silver jewelry, ammonium and phosphate-free dishwashing soap coupled with warm water work best. The water temperature can be between 90-110° Fahrenheit, and the soap should be used accordingly depending upon the quantity of jewelry being washed. 

This method involves fewer chemicals that might damage your jewelry items and thus should be the first go-to option. 

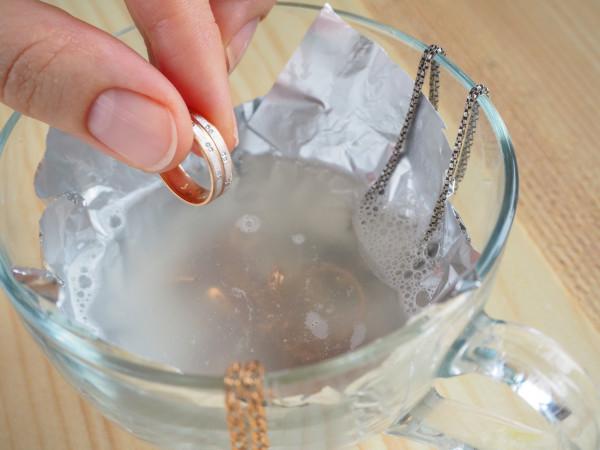
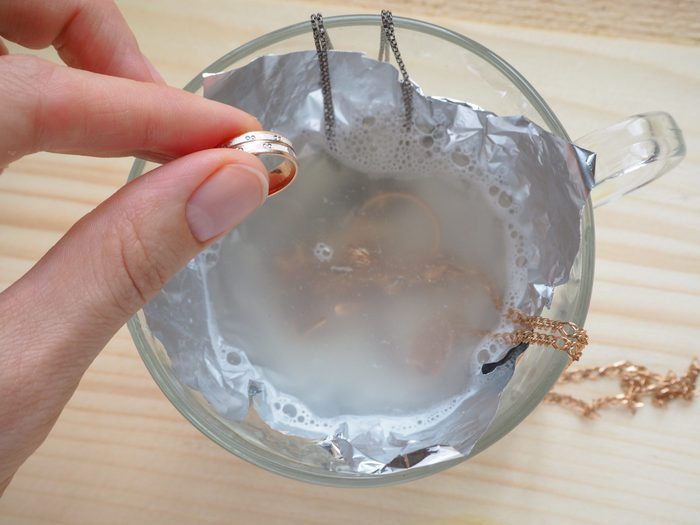
2. Baking Soda and Aluminum Foil

Baking soda has been known to work wonders when it comes to cleaning products. This method is known to have the most positive reviews in regard to cleaning silver jewelry. Here are the steps you can follow in cleaning tarnish that won’t go away with mild soap:

  • Take a piece of aluminum foil and cover the bowl or plate with it. 

(Note: You can use an aluminum plate as well)

  • Next, add one tablespoon of baking soda in it. 

(Note: Water softener powder can be used as an alternative as well.)

  • Pour hot water on it and mix the solution with a spoon. 
  • Submerge the tarnished jewelry in the solution for about 15 seconds or more, depending on the tarnishing. 
  • Remove the jewelry and clean it with paper towels. 

The tarnish should be gone by then. However, it is important to note that products with heavy tarnishing will not look new with just this method. Additional polishing might still be needed to get it shining like before. 

3. Lemon Juice and Olive Oil

Lemon juice can help remove oxidized buildups in jewelry due to its acidic properties. You can use ¼ cup lemon juice and ½ tsp—olive oil to clean your jewelry items. Use a piece of cloth to dip it in the solution and rub the tarnish off of the silver. 

Clean it with warm water afterward and dry with a clean towel. 

Alternatives to Olive Oil:

Lemon juice can be coupled with bath salt or powdered milk as well to achieve the same results. Here’s how:

  • In about half a cup of lemon juice, add 4 tablespoons of bath salt. Add 1 cup of hot water and place your jewelry in it. Leave it there for 2-5 minutes. Rub it with a cloth afterward, and rinse with lukewarm water. Dry it with a clean towel and you’re good to go!
  • In a bowl, mix one and a half cups of warm water, one tablespoon of lemon juice, and a half cup of powdered milk. Mix the content, and place it in your jewelry for 6-8 hours. Take it out afterward, rinse and clean with lukewarm water, and dry it. The tarnish should be gone, leaving behind a vibrant shine. 

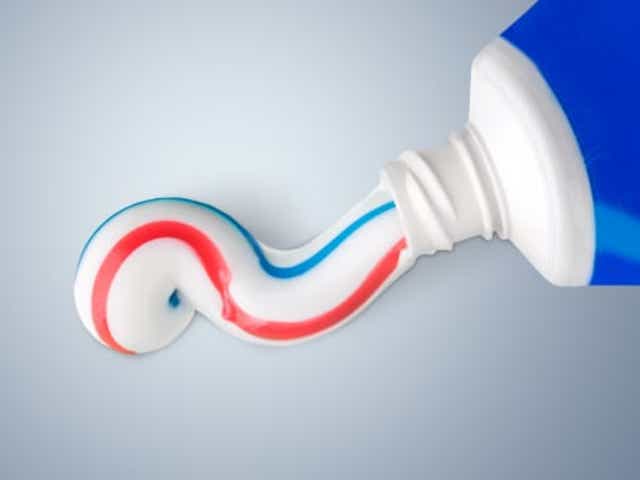
4. Toothpaste 

Toothpaste is also another famous DIY cleaner for household items. For example, to clean your silver jewelry, use a non-whitening formula toothpaste, dilute it with water, and with a soft-bristle brush, gently rub off the tarnish. Make sure not to use this method on silver-plated jewelry, as it can remove the layer as well. 

5. Window Cleaning Detergent

Window cleaners are also an excellent option to clean your silver jewelry, as they help remove dirt buildups and also help restore the shine of sterling silver. 

You can spray it on a toothbrush and gently scrub off the affected areas. However, be careful not to use it on antique silver jewelry as it can be fragile and damaged easily. 

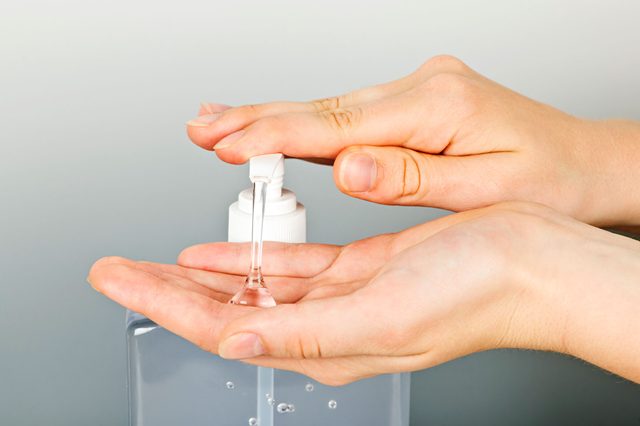
6. Hand Sanitizer

Hand sanitizer can work with silver jewelry items, but you should avoid using it directly. Instead, squeeze a small amount on a clean cloth and gently scrub off the tarnish present on the jewelry. Clean it with water afterward and dry it to prevent any further oxidization. 

7. Ketchup or Mayonnaise

This might sound like a strange option to clean your jewelry, but it can actually work in helping you clean your silver ornaments. Ketchup and mayonnaise contain vinegar and some other strong ingredients, which help remove the blackening on silver jewelry items. Just take a small amount of one of the two and leave it on the jewelry for about 10-15 minutes. Afterward, clean it with a cloth and rinse it under warm water. Lastly, dry it with a paper towel and it should do the job. 

Things to Avoid while Cleaning Silver Jewelry:

  • Do NOT use these methods on jewelry with precious or semi-precious stones. It does not risk your expensive jewelry items, so we advise you to seek professional cleaning services. 
  • These do-it-yourself methods are NOT suitable for vintage, or antiqued silver, as well as for costume jewelry.

Conclusion:

DIY methods have been famous for being cheap, easy, and accessible to everyone, and silver jewelry is especially popular among the youth, particularly girls. Hence, using DIY methods to clean silver ornaments is a good go-to option to keep your silver jewelry with you for a long time. However, like with each DIY method, there is no guarantee of absolute results. However, the methods have been tested and known to work, with good positive outcomes, and thus are highly recommended. Just look out for the warnings and these should work just fine! Happy cleaning! For cleaning services visit us.

Frequently Asked Questions:

  1. Does pure silver rust?

    Just like pure gold, pure silver does not rust. However, it is very soft and thus cannot be used to make utensils or jewelry items. It is therefore paired with another metal, typically copper, and is commonly known as sterling silver.

  2. Which toothpaste is best for cleaning silver?

    We recommend using plain, solid-colored toothpaste with no extras, like baking soda, tartar control, or whitening agents. Also, avoid using gel toothpaste. 

  3. What causes tarnishing?

    Tarnish is a byproduct of a chemical reaction between a metal and a nonmetal compound. The non-metal is usually oxygen or sulfur dioxide, which are highly reactive toward metals and cause oxidation. 

  4. How do you stop silver oxidizing?

    o slow down the process of tarnishing, make sure to clean your silver jewelry regularly, as moisture and oils from your skin can cause it to oxidize. 

  5. What is the best way to store silver jewelry?

    We recommend storing your silver jewelry in plastic bags with a zip-top bag, or a box lined with soft cotton. Avoid using wooden boxes for storage.

a different towels and bottle on iron stand

How to Iron Clothes Without an Iron

While ironing can be quite effective at removing wrinkles, it can also be quite dangerous, especially if you don’t know what you’re doing. Ironing involves direct contact with high amounts of heat, and if not done correctly, can result in serious burns or even fires! There are many ways to remove wrinkles and iron clothes without an iron – here are some we’ve found!

10 Hacks To Get Rid Of And Prevent Wrinkles

It may be obvious, but one of the best ways to get rid of wrinkles is with heat. If you’re able to iron clothes without an iron, great! For those times when you don’t have access to a traditional ironing board or just want a fresher look, try any of these 10 great tricks for removing wrinkles and preventing them from happening again. They’ll save you time and money—not bad for something that takes virtually no effort!

1. The Newspaper Hack

news paper hack


Dealing with wrinkled clothes can be a frustrating experience, especially when you don’t have access to a traditional clothes iron. Whether you’re on the go, in a pinch, or simply prefer alternative methods, there are several creative ways to smooth out those unsightly wrinkles and restore your garments to their original pristine state.

In this article, we’ll delve into a variety of innovative techniques that allow you to achieve wrinkle-free clothes without the need for a traditional iron. From using household items to unexpected tools, these methods prove that ingenuity and resourcefulness can go a long way in maintaining well-presented attire.

2. The Towel Pressing Method: A Simple Solution

Picture this scenario: You’ve just taken your freshly washed and dried clothes off the line, but they’ve developed unsightly wrinkles from being hung for a few hours. Fear not – there’s a straightforward solution that requires nothing more than a damp towel. Start by folding your recently laundered clothes into neat piles.

Next, place a damp towel over the wrinkled areas and gently press down for about 20 minutes. The combination of the dampness and slight pressure will help relax the fabric fibers, effectively smoothing out the wrinkles. This method is particularly handy when you’re in a hurry or lack access to an iron, ensuring your clothes look presentable and well-maintained.

3. The Bowl Over The Clothes Technique: Wrinkle Removal on a Budget

Not everyone has an iron at their disposal, and that’s perfectly okay. A simple yet effective alternative involves using a large bowl filled with warm water to help eliminate wrinkles. This technique is particularly useful for delicate fabrics that can’t withstand the direct heat of an iron. Begin by selecting a spacious bowl and filling it with warm water.

Then, lay your wrinkled clothes over the bowl, making sure they’re smooth and even. Gently smooth out the wrinkles with your hands or a rolling pin, taking care not to stretch or damage the fabric. Allow the clothes to sit in the warm water for approximately 10-15 minutes. Once you’ve removed them, hang them up to dry, and you’ll notice a significant reduction in wrinkles.

4. Sock Polishing: An Unexpected Wrinkle Removal Technique

If you’re looking for an unconventional yet surprisingly effective way to banish wrinkles, your solution might be hiding in your sock drawer. Transform a pair of clean cotton socks into a wrinkle-removing tool by slipping them onto your hands, and using them as makeshift gloves. Take the rumpled fabric, such as curtains or bedsheets, and slowly pull it through your sock-covered hands for about ten seconds.

You’ll be amazed at how smoothly the material becomes, giving your garments a polished appearance without the need for an iron. This method is a quick fix for small areas of wrinkled fabric that need immediate attention.

5. The Dryer’s Limited Ironing Abilities

Believe it or not, some people opt to forgo purchasing a clothes iron and attempt to use their dryer as an alternative. While using a dryer can help eliminate some wrinkles, it’s important to note that it’s not as effective as traditional ironing. The primary challenge lies in the fact that air doesn’t conduct heat well, making it difficult to press out wrinkles or achieve completely smooth results.

However, if you’re in a hurry and your clothes are only mildly wrinkled, tossing them in the dryer with a damp cloth can help loosen the fibers and reduce some wrinkles. Keep in mind that this method may not deliver the crisp, professional finish that an iron provides.

6. The Bag Folding Method: Wrinkle-Free in Theory

Imagine being able to achieve wrinkle-free clothes by using nothing more than a few plastic bags. The bag folding method involves laying your wrinkled clothing flat, smoothing it as much as possible, and then sandwiching the garment between two plastic bags. Leave the setup undisturbed for about 30 minutes to 3 hours, and according to the theory, your clothes will emerge wrinkle-free.

This technique is based on the idea that plastic bags when combined with the fabric’s natural moisture, create a steam-like effect that relaxes the wrinkles. While the bag folding method might work for certain fabrics and wrinkles, it’s important to manage your expectations, as its effectiveness can vary.

7. The Pillowcase Ironing Board: Compact and Convenient

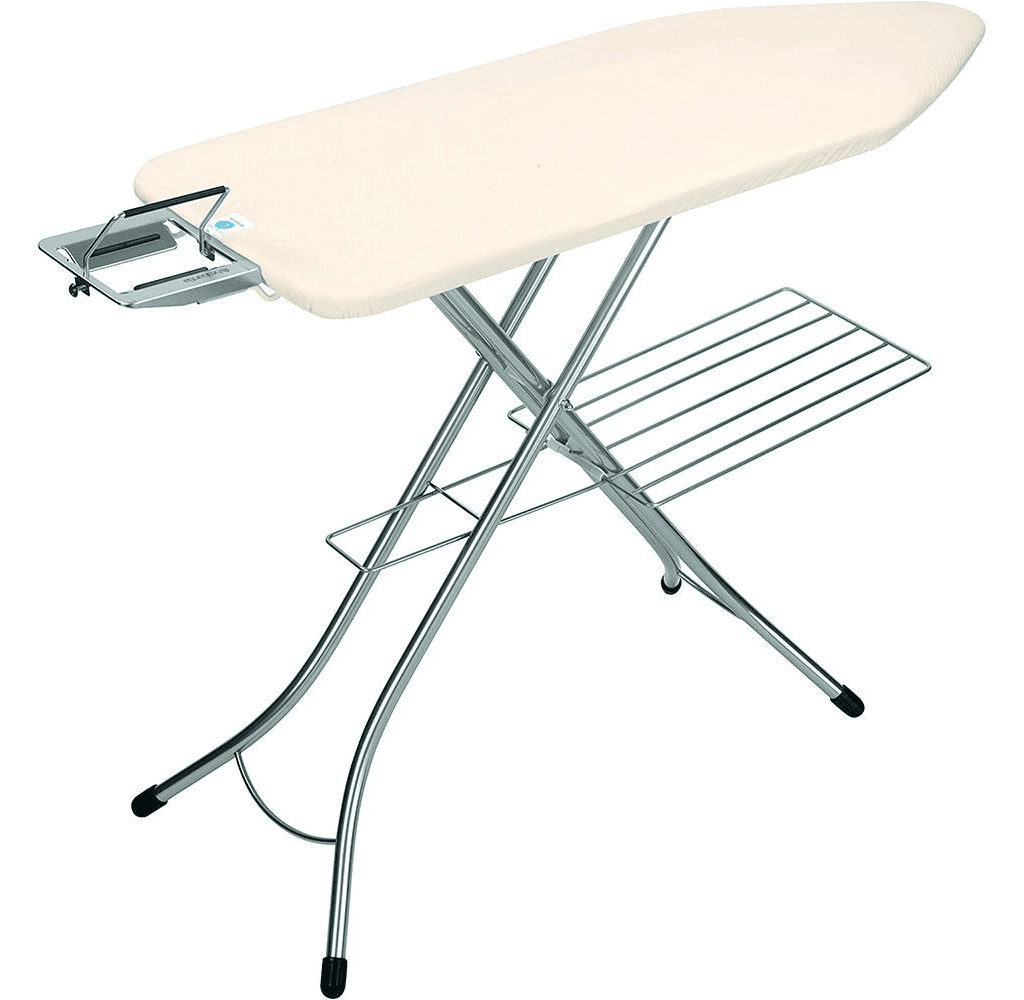
Ironing boards can be bulky and space-consuming, particularly for individuals living in small apartments or travelers on the go. Enter the pillowcase ironing board – a creative solution that repurposes a common household item into a makeshift ironing board. Simply drape a sturdy pillowcase over your forearm or any flat, stable surface, and you have an instant ironing board at your disposal.

This method is especially handy when you need to quickly smooth out a small area of fabric, like a collar or cuffs, and don’t want the hassle of setting up a full-size ironing board. Pillowcases are flexible and foldable, making them an ideal space-saving option for impromptu ironing needs.

8. The DIY Flat Iron: Creative Innovation

If you’re feeling particularly crafty and resourceful, you might consider making your own flat iron using household items. This DIY project not only saves you money but also allows you to tailor the iron’s design to your preferences. To create your DIY flat iron, you’ll need to assemble a few basic components, including a heat-resistant surface, a heating element, and a way to secure the fabric in place.

While this solution requires some ingenuity and a basic understanding of electrical safety, it can result in a functional flat iron that serves your wrinkle-removing needs. Just remember to exercise caution and follow proper safety guidelines when working with heat and electrical components.

9. Ice Bags for Wrinkle Elimination: A Cool Approach

Ice can be a surprisingly effective tool for removing wrinkles from fabric. When fabric comes into contact with ice, it becomes cool to the touch, and this change in temperature can help relax fabric fibers and smooth out wrinkles. To utilize this method, place ice in plastic bags and position them over the wrinkled areas of your clothes.

As the ice melts, the dampness will set into the fabric, gradually releasing the wrinkles. However, exercise caution with delicate or sensitive fabrics, as excess moisture could potentially cause shrinking or color bleeding. If you’re concerned about this, place the ice inside plastic bags to create a barrier between the ice and the fabric.

10. Using a Hair Straightener/Curler: Quick and Efficient

If you own a hair straightener or curler, you’re in luck – these versatile tools can serve as effective alternatives to traditional irons for small areas of wrinkled fabric. Heat up the hair straightener or curler on medium heat for around 30 seconds. Once it’s adequately warm, gently glide the heated plates over the wrinkled sections of your clothing.

The combination of heat and pressure will help release the wrinkles and leave your clothes looking smoother. Keep in mind that this method is best suited for small areas or quick fixes, as using a hair tool on larger pieces of fabric can be time-consuming.

Conclusion: Wrinkle-Free Innovations for Every Situation

Using a clothes iron might be the conventional solution for removing wrinkles, but these alternative methods demonstrate that creativity and resourcefulness can yield impressive results. From using everyday household items to repurposing tools you already have, these techniques offer practical alternatives to ironing when you’re in a bind or simply prefer to avoid the hassle of setting up an ironing board.

Whether you’re traveling, living in a small space, or seeking budget-friendly options, there’s a wrinkle-removing solution tailored to your needs. Experiment with these methods to discover which ones work best for your fabrics and preferences. By embracing innovation, you can bid farewell to unsightly wrinkles and welcome a world of wrinkle-free possibilities.

If you however want professional ironing services visit us.

how to clean an iron

How to Clean an Iron

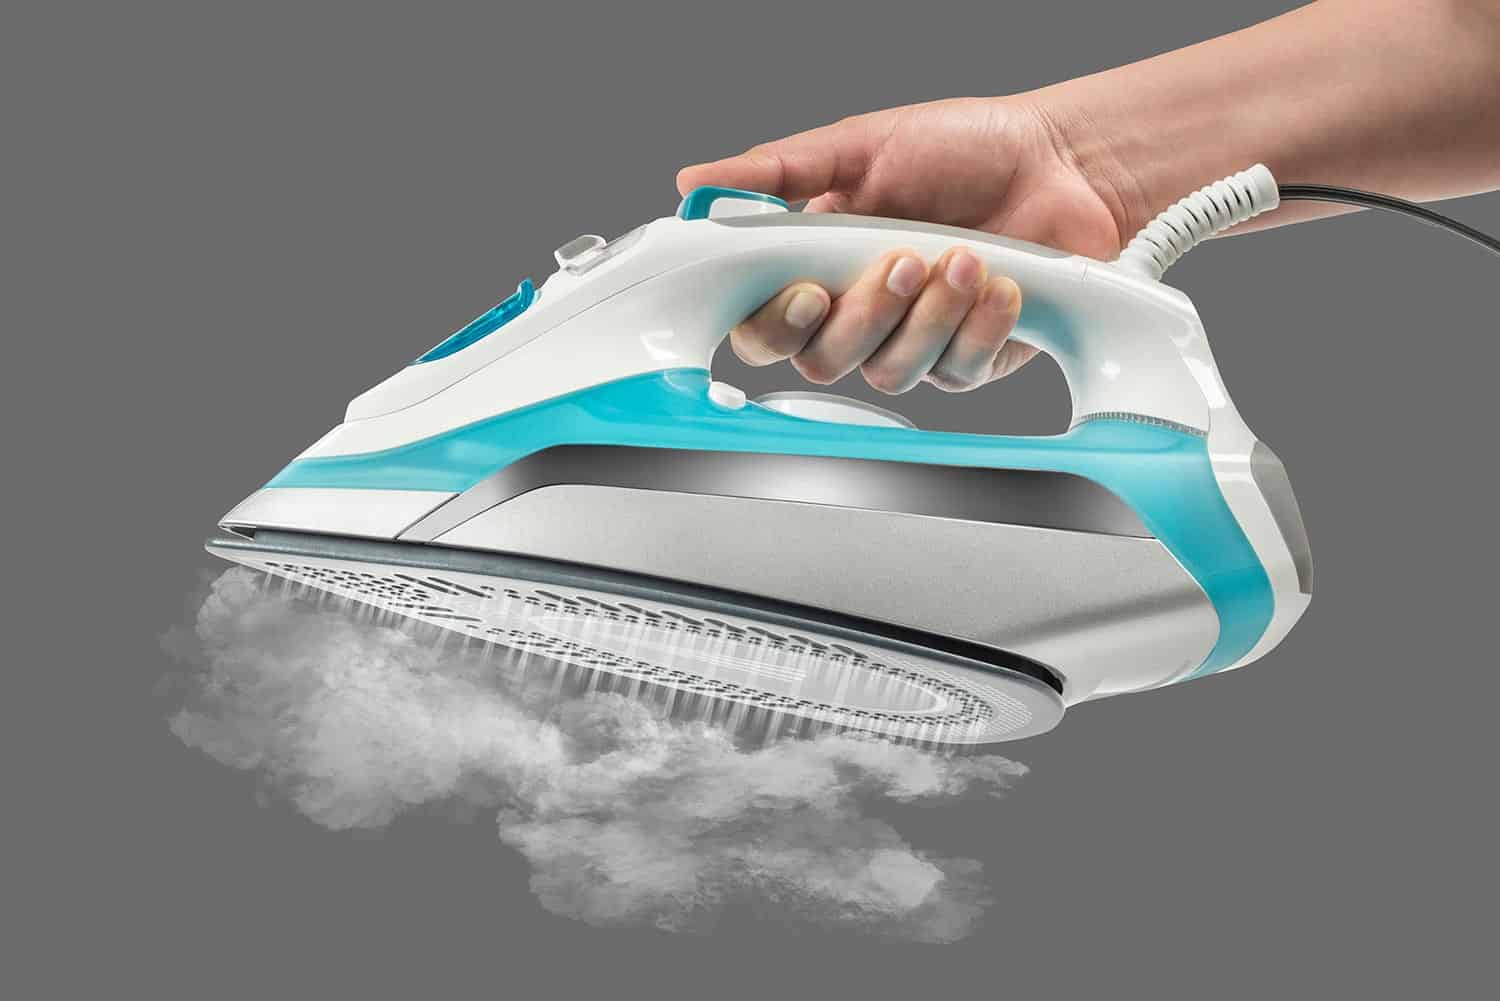
Keeping your iron clean is essential for maintaining its efficiency and ensuring the longevity of both the appliance and your clothes. Over time, mineral deposits, fabric residues, and other impurities can accumulate on the soleplate of the iron, leading to uneven heat distribution, sticky stains on clothing, and even potential damage to delicate fabrics. Learning how to clean an iron is a simple yet crucial household task that can greatly improve your ironing experience and help you achieve crisp, wrinkle-free results every time you press your clothes.

Whether you’re an occasional iron user or rely on it daily, mastering the art of iron cleaning will not only extend the life of your appliance but also contribute to the overall care and maintenance of your wardrobe. In this guide, we’ll walk you through step-by-step instructions and effective techniques to keep your iron in top-notch condition, ensuring it remains a reliable ally in your quest for well-pressed, impeccable attire.

clean an iron


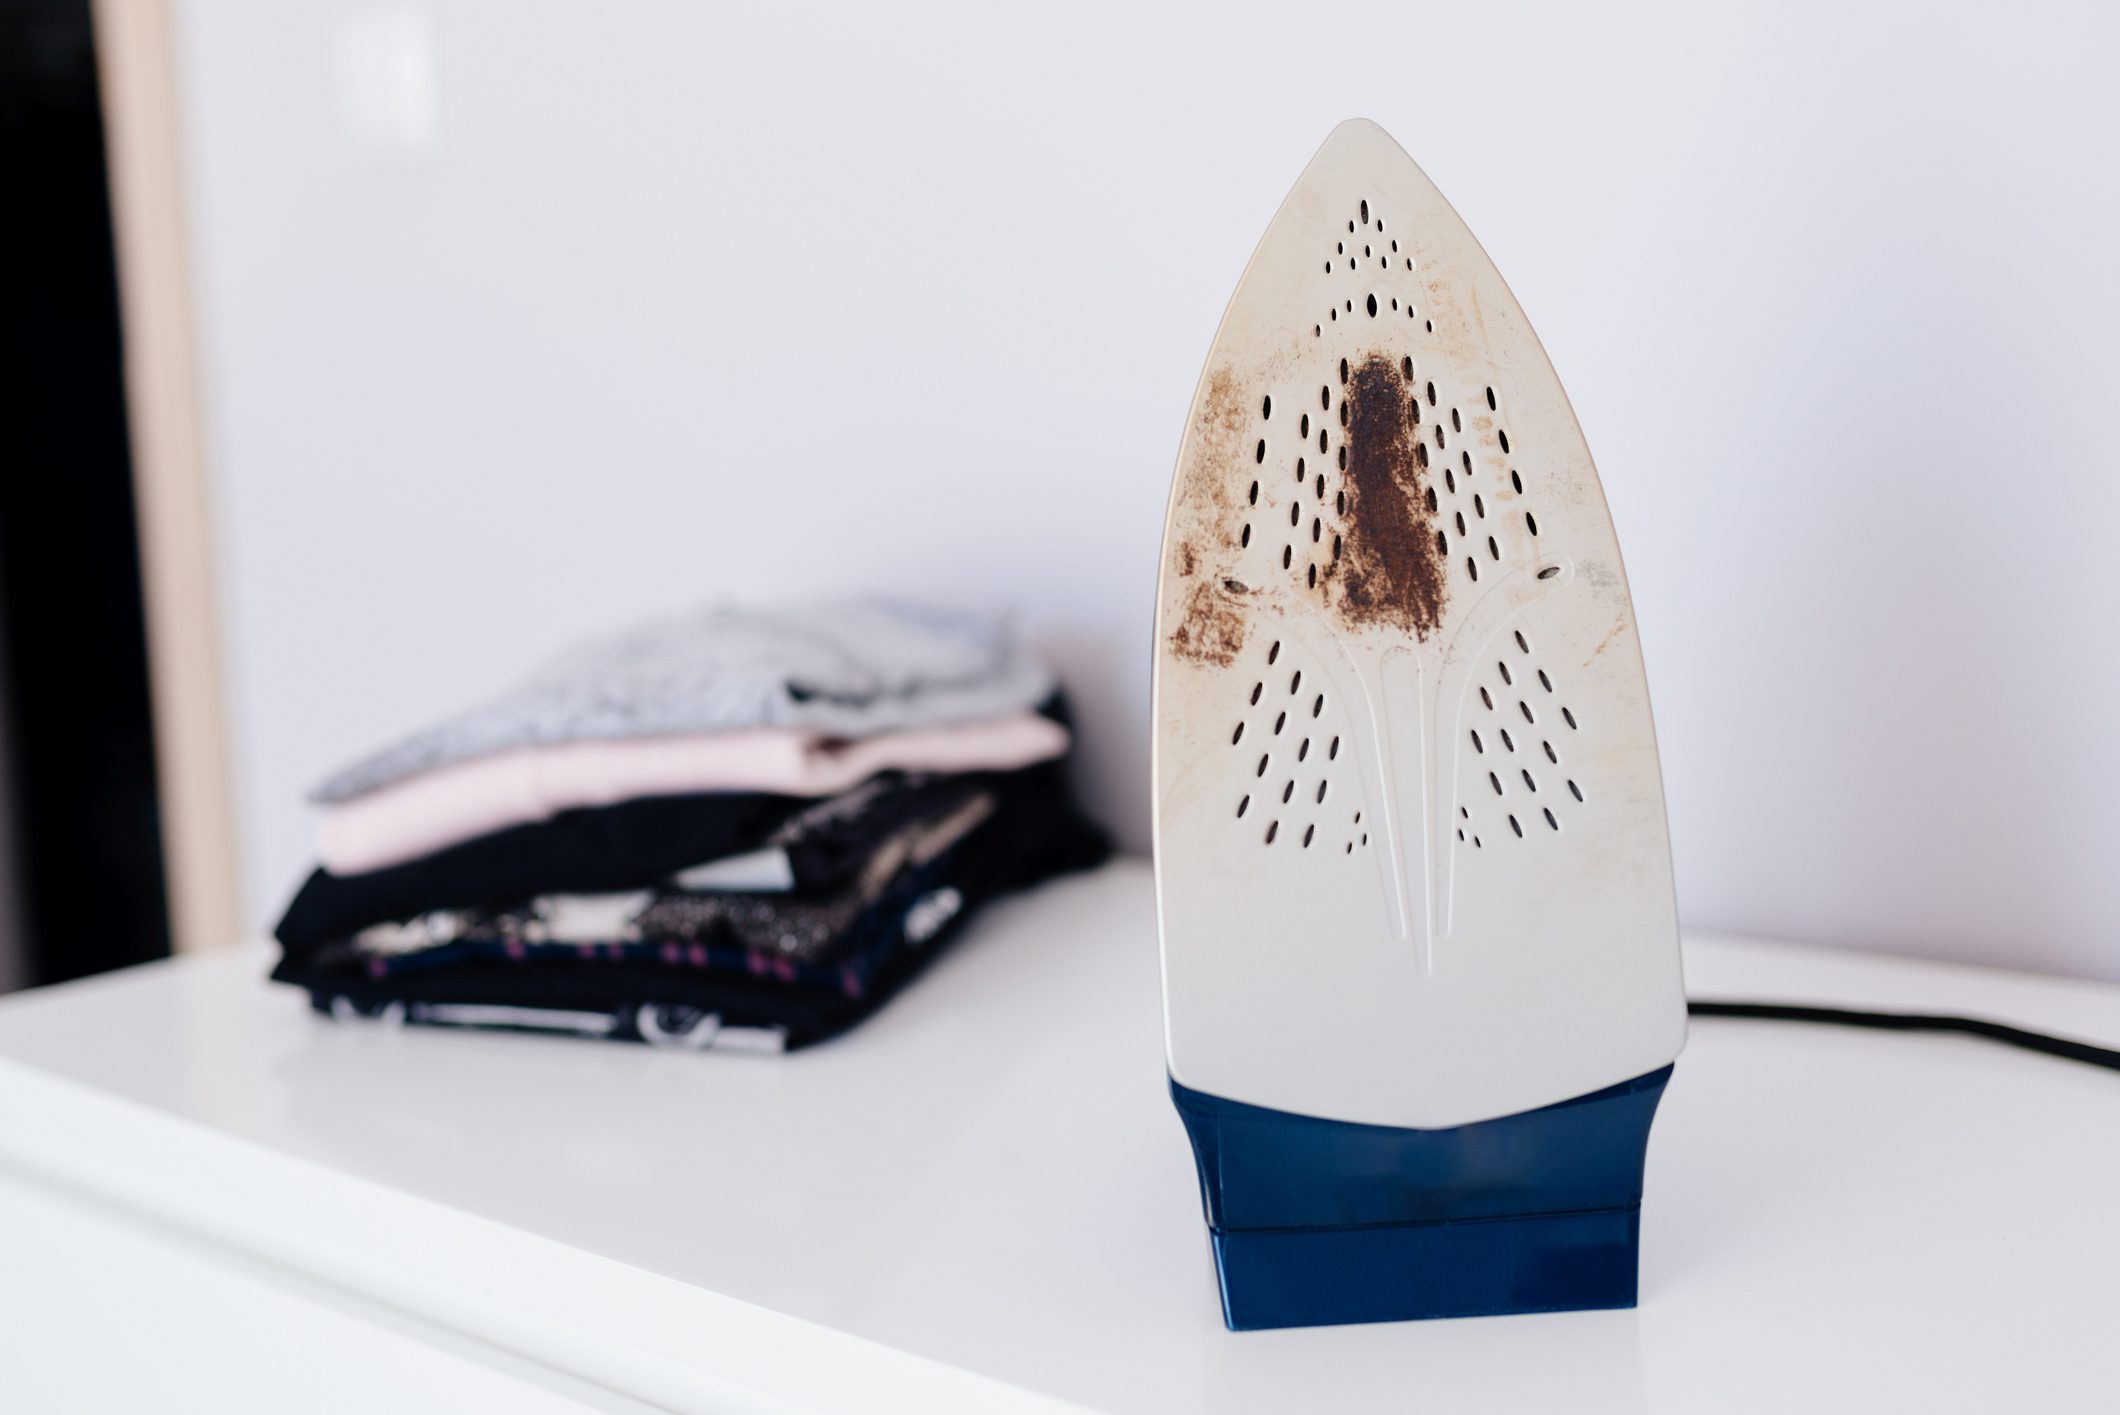
What is the black stuff on my iron?

The soleplate of your iron becomes black over time because of the build-up of burnt fabric, dirt, and ironing spray. Furthermore, accumulated heavy water and rust clog the holes of the plate.. Here are some simple ways to clean your iron at home.

black stuff on iron


How clean the soleplate of a steam iron?

  1. To remove burnt spots off your iron take Tylenol tablets and press the hot iron on them from exactly where you want to remove the spot. A melted tablet will help loosen the stain. Now, vigorously rub a clean cloth over the stain until you have completely removed it.
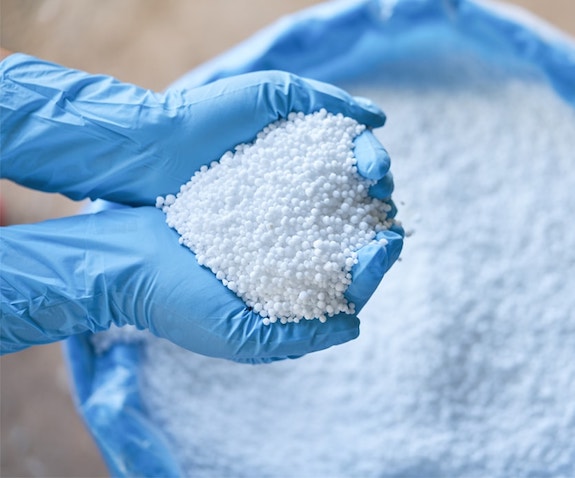
  2. You can use baking soda paste as a versatile stain remover, which is also effective for cleaning your iron plate. Carefully put a generous amount of this paste over the plate and scrub it off with a brush.
  1. To clean holes of a steam iron dip cotton swabs in distilled vinegar and put it in the holes to clean them thoroughly.
  2. Take a vinegar-soaked towel and put your iron at a medium-high temperature and place it on the towel for about 20 minutes.
  3. Salt is also a very good cleaning agent. Take a good amount of salt on paper and glide hot iron over it, this will help remove the gunk off your iron plate.
  4.  If you mess up your iron with melted plastic or chewing gum rub ice cubes over the plate to harden the plastic or chewing gum. Now scrape it off carefully using a plastic knife. Remove the remaining residue using vinegar or baking soda paste.
  5. Nailpolish remover can also be used to dissolve the stubborn grime. Let the iron heat up and soak cotton or tissue paper in acetone and rub the bottom plate rigorously.
  6. Dishwashing soaps and laundry detergents can also serve the purpose. Use a dish scrubber to scrub the gunk off.
  7. Dryer sheets can also be used to wipe the grimed iron plate. Rub them while the iron is slightly heated to get better results.
 clean the soleplate of a steam iron?


 How clean steam iron vents?

  1. Pour half a cup of distilled water mixed with half a cup of water in the water compartment of your steam iron. Now, take cotton buds soaked in this mixture and insert them in the holes to clean the hard water build-up. Use a toothpick or a small toothbrush to clean out the residue. Now turn on the iron and let the steam of the mixture come out of the vents for further cleaning.
clean steam iron vents?


How clean the jets on my iron?

White vinegar or apple cider vinegar both work wonders for cleaning water jets of iron. Simply heat up the vinegar and press the button to spray it out of the jets. This will help unclog them.

Tips to maintain the cleanliness of iron for a long time

  • Always use distilled water to fill up your steam iron. Hard water quickly clogs the jets and vents of your iron.
  • Make sure to fill up the iron unplugged and not when it is hot.
  • Don’t forget to empty the water container of your iron before keeping it away for a long period of time.
  • While not in use keep the iron in a standing position. So that water does not leak out which will prevent hard water build-up and rusting of the bottom plate.
  •  To avoid damage to the bottom plate make sure not to press directly on zippers, metal hooks, plastics, and fabric paints.

All of these cleaning hacks are very effective for cleaning your iron at home. If you’re tired of your clothes ironing routine and you want to get your clothes ironed by a professional. Make sure to have a look at our excellent clothes ironing service.

11 Tips to Clean Silver Jewelry at Home

11 Tips to Clean Silver Jewelry at Home

Are you tired of buying new silver jewelry after every few months? Are you sad that your favorite silver necklace is now damaged and discolored and you are unable to find it in the market again? Don’t worry, we are here to share some easy and simple ways to prevent your silver jewelry from tarnishing. But your jewelry is already tarnished? Don’t be upset, you’re in a good place to learn about inexpensive and effective ways to clean your silver jewelry at home and maintain its luster and shine.

Silver jewelry, when left in the open air, tends to tarnish over time, this is due to the chemical reactions of sulfur present in the air and silver. If silver is mixed with copper, it reacts with oxygen as well. It is best to take preventive measures to keep your jewelry from tarnishing but if it has been a little damaged you can still save it by cleaning it at home using easily available household items. Let’s dive into the tips to clean silver jewelry at home.

Household items to clean silver jewelry at home

You can easily remove tarnish and make your jewelry shine like before by using simple items present in your kitchen cupboard.

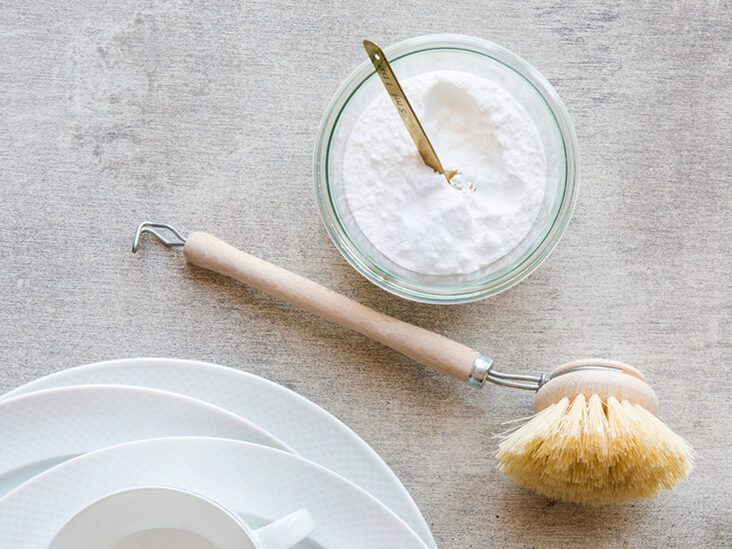
1. Baking soda

Baking Soda


Wondering how to clean your silver earrings at home? Try using baking soda.

Time: 10 minutes

Instructions:

      A) Aluminum foil method

  1. Boil water. Pour it into a small dish.
  2. Line your dish with aluminum foil
  3. Add baking soda to the dish to make a solution in the ratio of 1 tablespoon baking soda to 1 cup water (the solution will bubble).
  4. Now, put your tarnished silver earrings or any other jewelry item in the solution for about 5-10 minutes.
  5. Take out the jewelry and rinse it with cool water and dry it out with a soft cloth.

Your jewelry is ready to be worn again.

      B) baking soda paste method

  1. Take a small dish and add 2 tablespoons of baking soda and 1 tablespoon of water.
  2. Mix them together to make a thick paste.
  3. Use your fingers or any brush to spread the paste over your damaged jewelry item.
  4. Rinse it with cold water and dry it with a soft cloth and enjoy your clean jewelry.

2.  Salt + Lemon

salt & lemon


Go to the kitchen and find these two items to rescue your tarnished silver jewelry at home.

Time: 15 minutes

Instructions:

  1. Take a small dish and put 3 tablespoons of salt and hot water in it
  2. Add a medium-sized lemon to it
  3. After mixing all the ingredients, place your silver chain in it for about 5 to 10 minutes
  4. Take it out and remove the tarnish by thoroughly cleaning it with a cleaning cloth.

3. Ketchup

ketchup


You can also use ketchup to fix your tarnished silver.

Time: 15 minutes

Instructions

  1. Spread a generous amount of ketchup over your jewelry and rub it with a soft cloth or paper towel or use a toothbrush for more stubborn tarnish.
  2. Ketchup helps loosen up the tarnish and make the jewelry shiny.

4. Detergent or soap

Detergent or soap


To clean badly tarnished silver cutlery or jewelry, detergent is a very good option.

Time: 30 minutes

Instructions:

  1. Take a dish according to the size and quantity of your silver jewelry.
  2. Pour hot water into it and add 1 cup of detergent or liquid soap. Leave it submerged for 30 minutes.
  3. After 30 minutes the dirt and grime build-up will loosen up. Take a toothbrush and scrub it gently.
  4. Rinse it with cool water and let it air dry or wipe it off with a dry towel.
  5. It will leave the jewelry clean and bright.

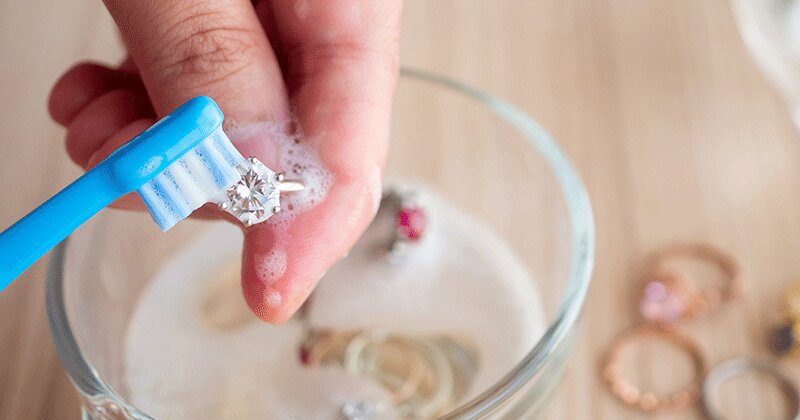
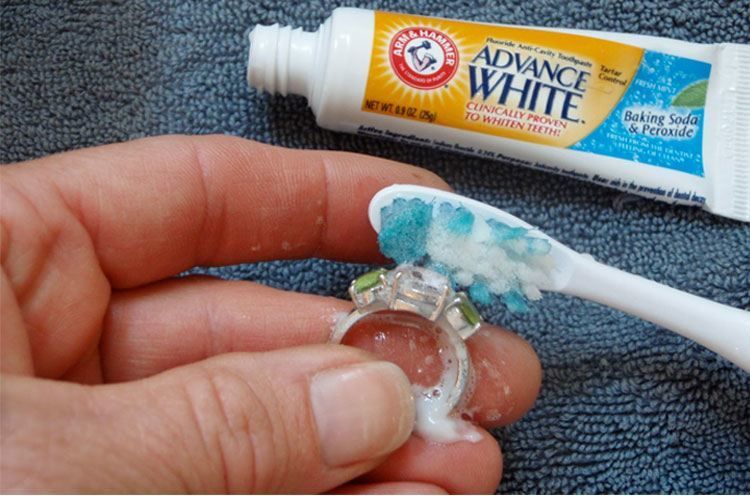
5. Toothpaste

toothpaste brush


Do you want to quickly clean your silver ring before going out to a party? Just head towards your washroom and your problem is solved.

Time: 5 minutes

Instructions:

  1. Apply toothpaste to the silver ring and thoroughly scrub it with a toothbrush for 5 minutes.
  2. Rinse it with tap water.
  3. Next, wipe it dry with a clean cloth.
  4. Now you’re good to go.

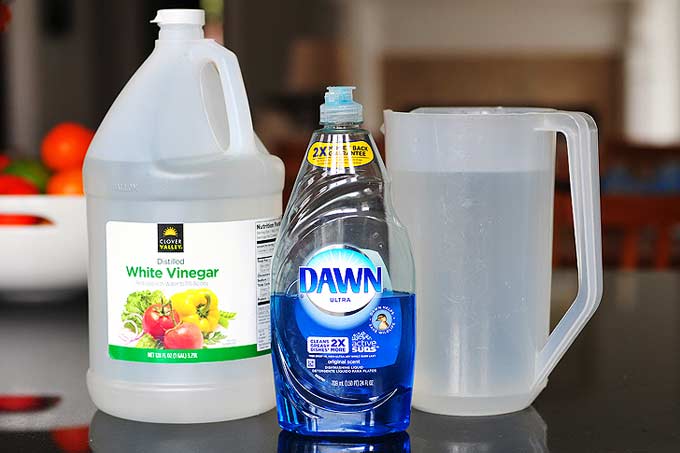
6. Vinegar

Vinegar


If your silver bracelet or necklace needs cleaning and you want a DIY solution, follow the instructions below.

Time: 3 hours

Instructions:

  1. Take half a cup of vinegar, 2 and a half tablespoons of baking soda, and ¼ cup of hot water in a glass.
  2. Mix all the ingredients together.
  3. Now immerse your tarnished silver for 2 to 3 hours.
  4. Remove it and rub it with a cloth.
  5. Then rinse it with cold water and dry it with a clean cloth.

7. Hand Sanitizer

Hand sanitizer


Another household product to clean silver is hand sanitizer. Hand sanitizers have alcohol in them which is great for removing dirt and gunk off the silver products.

1. Cover your jewelry item with a generous amount of sanitizer.

 2. Now rub it with a cloth. It will polish the dullness away from your jewelry.

8. Window Cleaning spray

window cleaning spray


Although not recommended for every kind of silver jewelry, window cleaners work pretty well for cleaning sterling silver jewelry items.

  1. Spray your sterling silver with window cleaner and rub it with a clean cloth to remove the dirt and grime build-up.
  2. Repeat the process until the required clean shine is achieved.

9. Ammonia + Water


Time: 3 hours

Instructions:

If your jewelry has a gunk buildup of years and has very strong stains, you can make use of ammonia. But make sure that the jewelry is sterling silver and not pure silver.

  1. Take ammonia and lukewarm water in the same ratio in a vessel. Soak your jewelry for about 15 minutes. 
  2. Scrub it lightly with a toothbrush or cloth.
  3. Rinse it with tap water and wipe the water with a clean dry cloth.

10. Cornflour + Water


Cornflour is a great ingredient to restore the shine of your jewelry.

  1. Make a thick paste of water and cornflour as much as required.
  2. Apply it generously to your jewelry and let it dry.
  3. Rub it off of your jewelry using a clean damp cloth.
  4. Now take a dry cloth and buff your jewelry turning it from dull to shiny.

11. Professional cleaning

If you want to clean your silver jewelry at home and get the best cleaning results and avoid any possible damage by using home remedies. You can opt for a professional cleaner as well.

How to prevent your jewelry from tarnishing

To keep your silver jewelry from corrosion and to extend its life span keep in mind that apart from the air (that is responsible for the actual reaction) there are other factors that contribute to the acceleration of the tarnishing process. For example pH and temperature.

Moreover, apart from oxygen and sulfur, Chlorine, Amino acids, Alcohols, and Salts also react with silver. Thus, to keep your jewelry as good as new for a longer period of time make sure to avoid its contact with products that contain the above-mentioned elements.

Products that damage silver jewelry

  • Skin products
  • Perfumes
  • Deodorants
  • Makeup
  • Moisturizers
  • Sweat and body oils
  • Tap water
  • Water in swimming pools
  • Wool clothing
  • Food
  • Hair products
  • Hair sprays
  • Hair creams
  • Hair gel

Tips to prevent your jewelry from tarnishing

Here are some very useful tips to prevent your jewelry from tarnishing.

  1.  Make sure to wear jewelry after you wear perfume.
  2. Remove your jewelry before swimming to avoid chlorine contact and preferably before bathing as well.
  1. Try to take off your silver jewelry before exercising to prevent contact with salts and amino acids present in sweat.
  2. It is also recommended to keep away from foods like salad dressings, mayonnaise, and eggs when wearing silver jewelry.
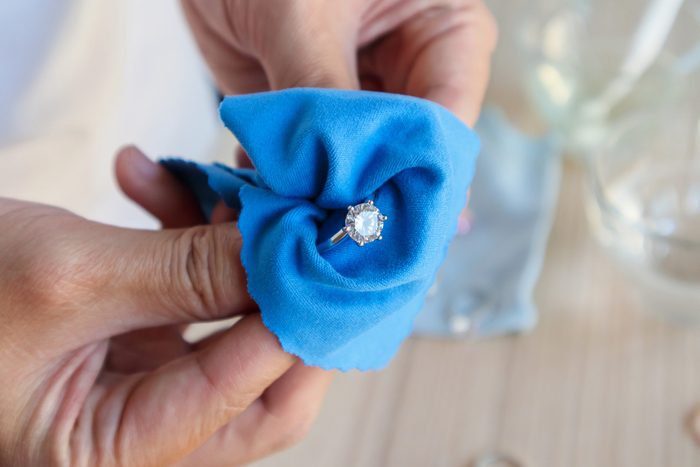
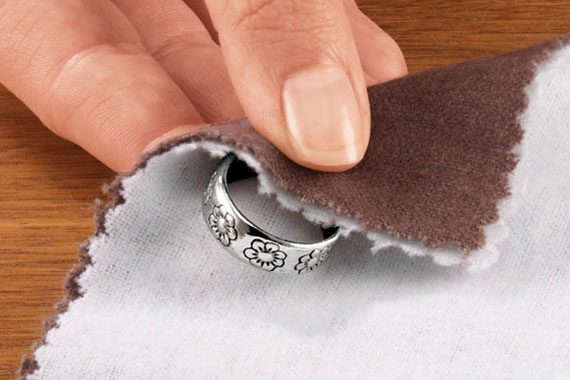
  3. Cleaning silver with a polish cloth or in a jewelry cleaning machine regularly will also delay the tarnishing process.
  4. It is seen that silver jewelry that is worn often has longer life as compared to unused jewelry. So make sure to use your jewelry regularly.

If the tarnish is heavy make a very thick paste of baking soda. Apply it to the jewelry with a cloth, let it dry. Now scrub it with a brush lightly. Rinse it with water and buff dry to polish.

Vinegar does not damage silver. It is in fact the best cleaning agent for tarnished silver.

Baking soda is a very good remedy for cleaning silver but one should avoid cleaning antique silver with it because it is delicate and baking soda can be too harsh on it.

Storage

By and large, to delay the process of tarnishing, make sure to keep your silver jewelry from exposure to moisture and air. Here are some key points to follow while storing silver.

  • Storage should be in a cool and dry area.
  • Storing your jewelry items in tightly sealed bags will keep them as fresh as new.
  • Tiny bags of silica gel can also be added to these air-tight bags for moisture absorption.
  • A flannel-coated container is also ideal for silver jewelry items.
  • Some chalks can also be placed with your jewelry items to absorb moisture.
  • Another remedy used is the application of hair conditioner over silver jewelry to slow down the tarnishing.

These DIY hacks will help you clean silver jewelry easily at home. If your jewelry is expensive and you want to get the best cleaning results and avoid any possible damage by using home remedies, you may opt for a professional cleaner as well. For more cleaning tricks and tips, please explore our blog further. To find out more about our cleaning services from global clean, contact us through a call or text message via Facebook or our website https://global-clean.co.uk/.

How to Remove Grease Stains the Right Way – 7-Step Guide

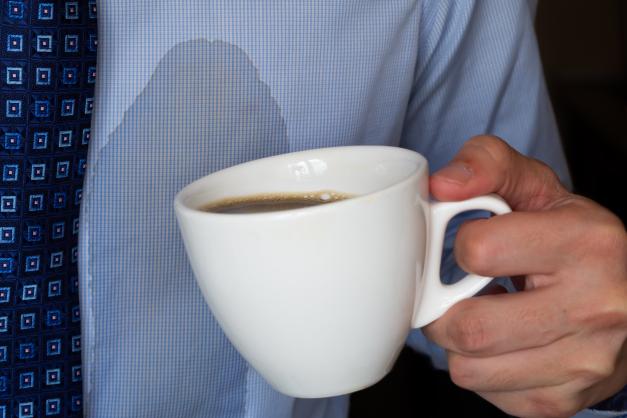
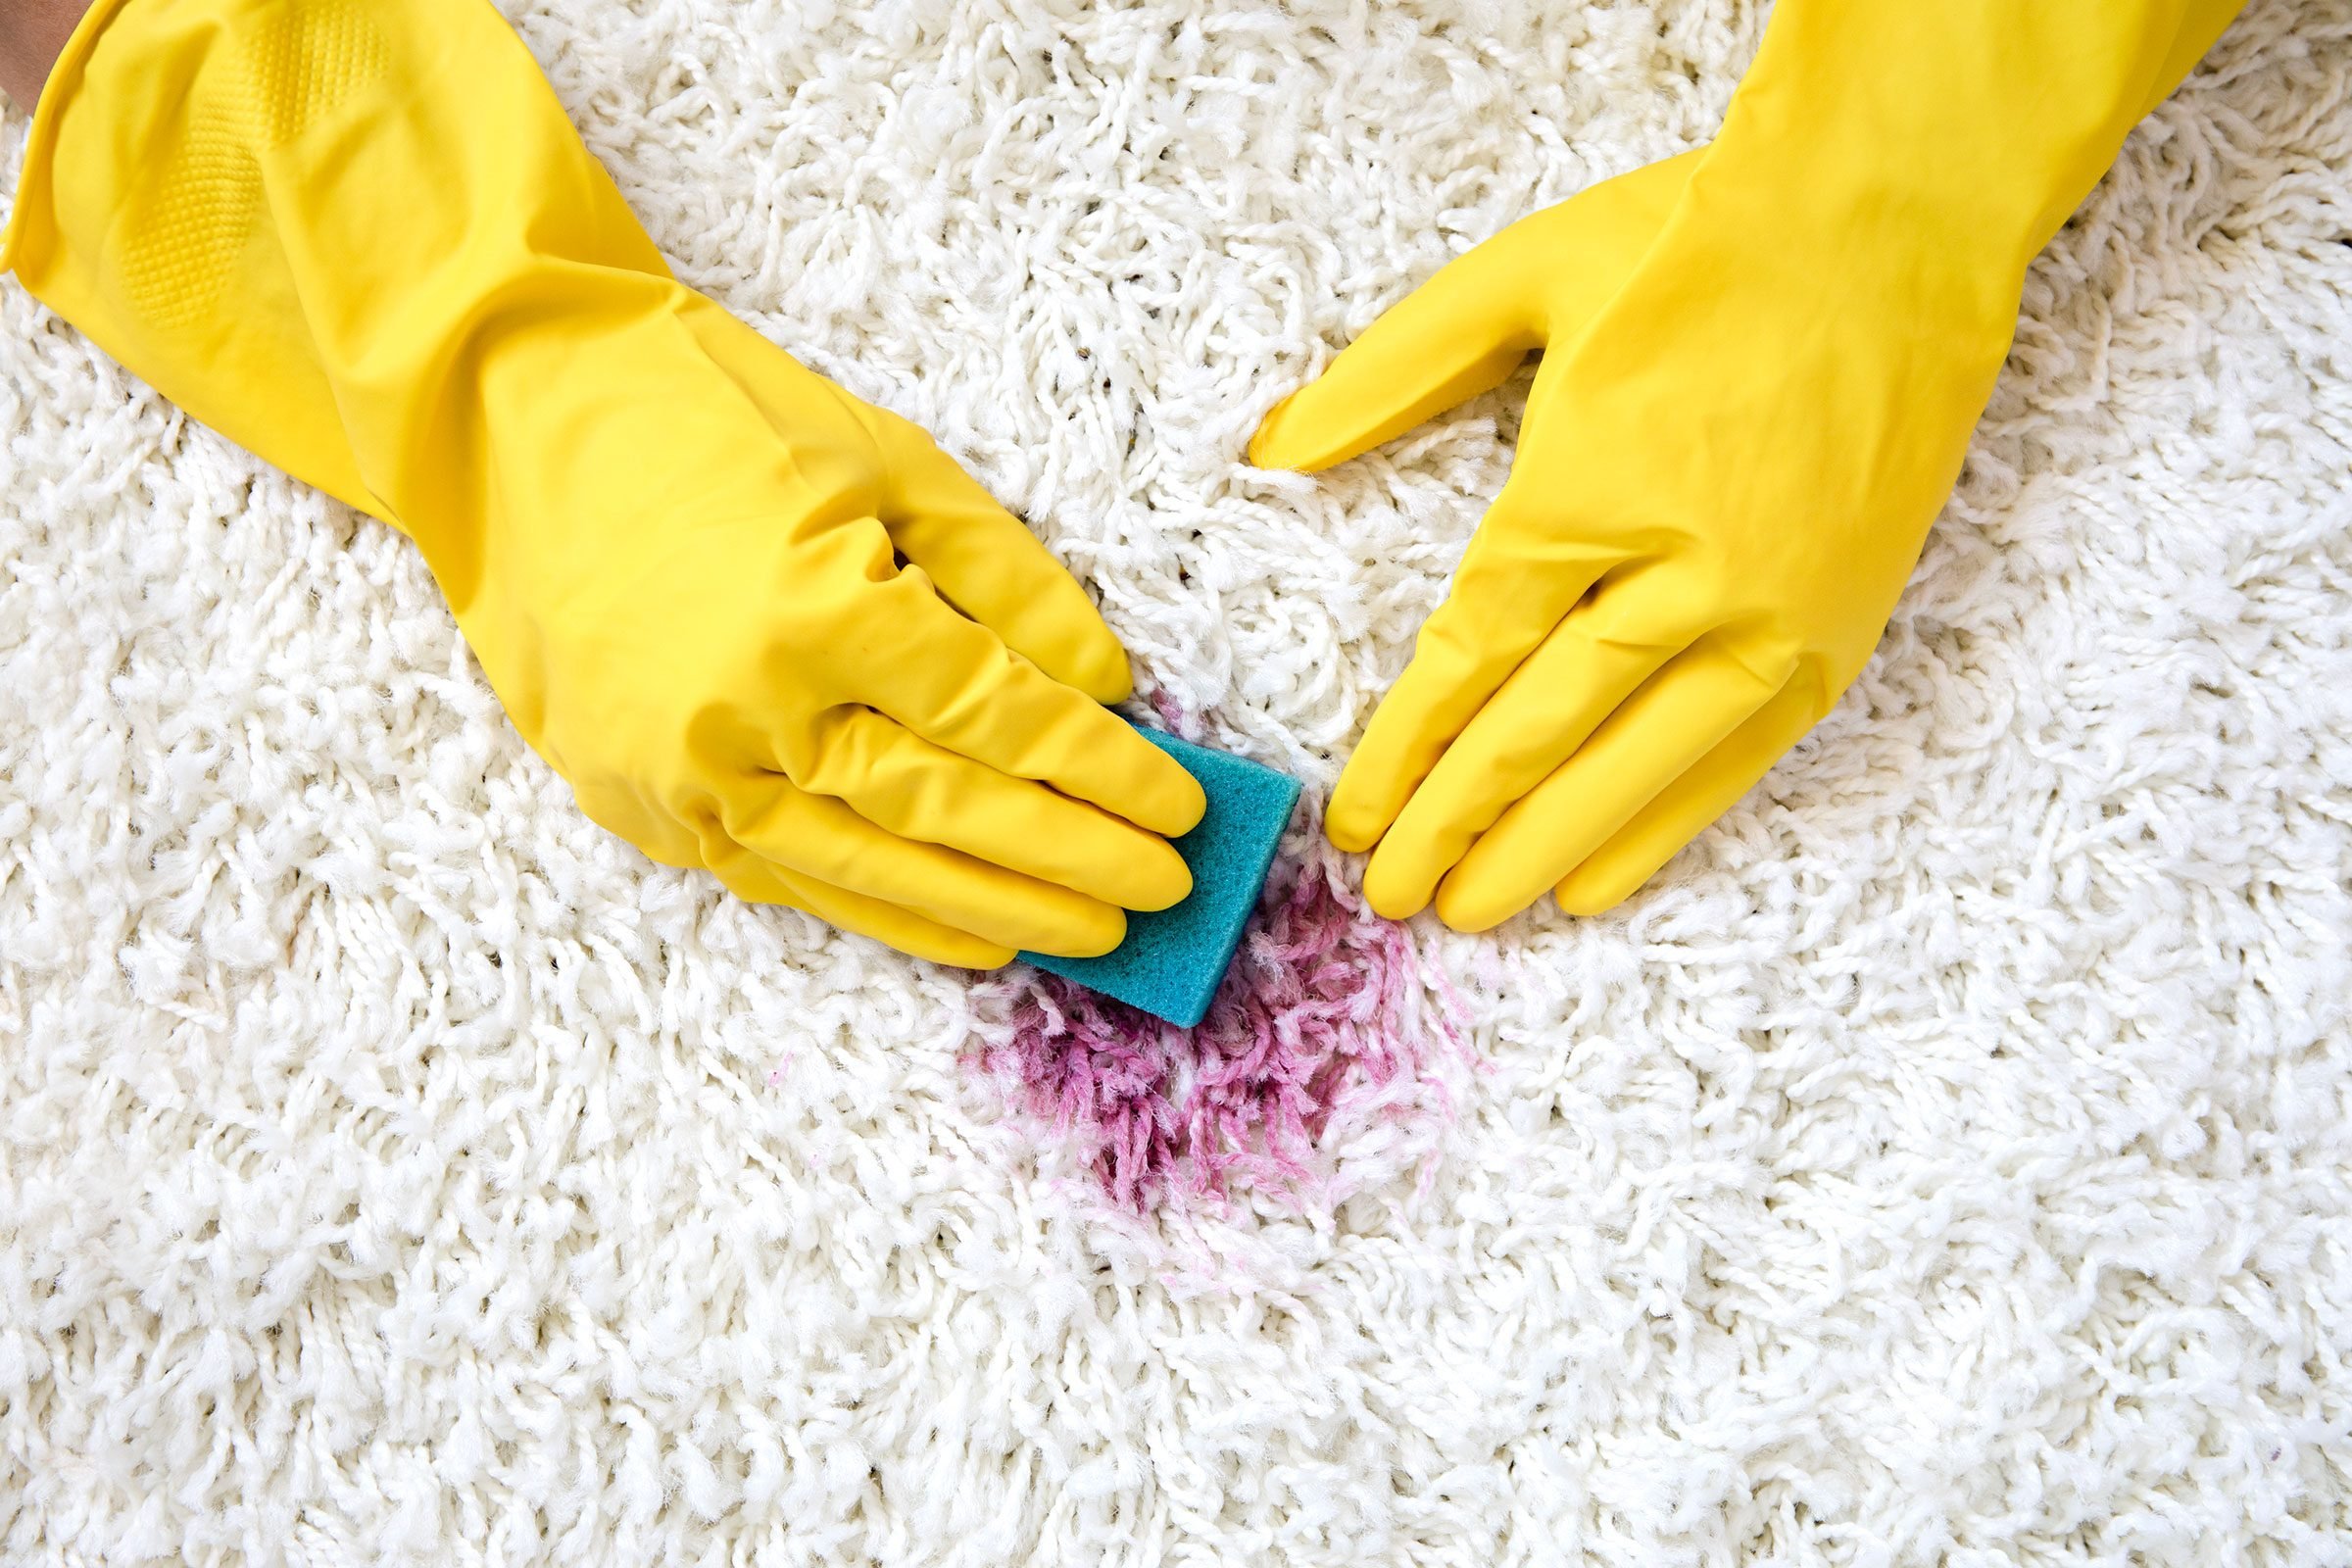
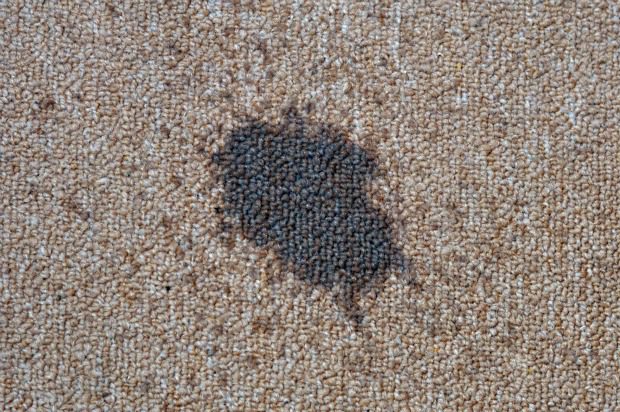
In this article, we will be going over the 7 best ways to Remove Grease Stains. The first and most important step is to ensure you have the right supplies, you need to do a bit of research on what products work the best, where to find them, and at the best cost. You should also know that these stains can be challenging to Remove if they’ve been there for a while. But don’t worry! There are many different methods you can use depending on what works best for your situation and how much time you want to spend cleaning them up!

So, let’s begin without any more delay!

Step One: Pre-Treat the Stain with Dish Soap or Laundry Detergent

Laundry detergent

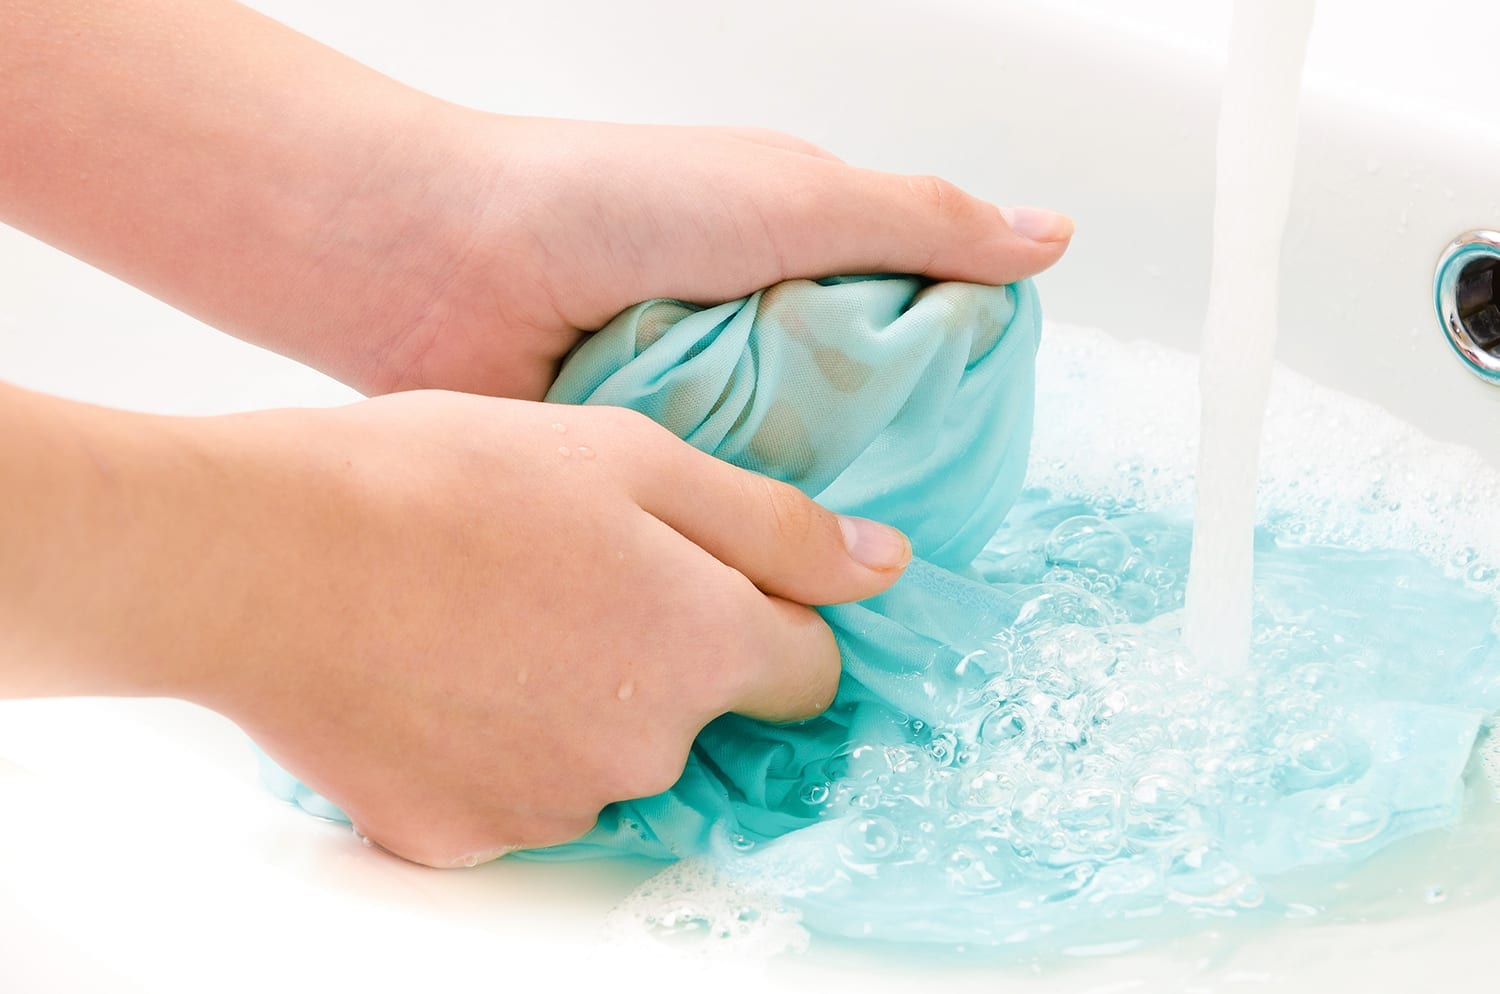
Before you start scrubbing at that stain, it’s essential to pre-treat it with a little dish soap or laundry detergent. This will help to break down the grease and make it easier to Remove. Just use a cloth or your fingers to apply a small amount of soap directly to the stain and wait about five minutes before moving on to step two.

Step Two: Apply a Stain Remover Solution to remove the grease stain

Stain remove solution the grease stain

If you have a commercial stain remover like Shout or Resolve, now is the time to use it! Pour some of the solutions directly onto the grease stain and use a little bit of elbow grease to Remove. This step is most effective if you onto another item of clothing and hold it over the stain for a few minutes to let the solution soak in. Then you can remove all of that nasty grease!

Step Three: Apply Baking Soda

Baking Soda

Baking soda is excellent at absorbing oils, so this step will help remove any excess oil or residue on your clothes after pre-treating and scrubbing them with soap. Just sprinkle some baking soda onto the spot. Where there’s still visible oil, then use an old toothbrush (or another item like a credit card) to rub off as much as possible.

You can easily remove this with dish soap if you used it earlier, as that stuff is quite powerful! If not, simply repeat these steps until you have removed everything from your fabric. Make sure to let the baking soda sit on your fabric for at least 30 minutes before moving on to step four.

Step Four: Use Rubbing Alcohol to Remove Stubborn Stains

Rubbing Alcohol to Remove Stubborn Stains

This is one of our favourite ways to Remove Grease Stains because it’s so simple yet effective! Just mix some rubbing alcohol with water in a spray bottle and spritz the area where there are still visible stains. Then use an old toothbrush or another item like a credit card to rub off all of that residue until it has completely disappeared. This method works great if you have white vinegar, which can also be used as part of this process instead of plain ol’ rubbing alcohol. The only problem with that is that sometimes oil stains will transfer over onto whatever surface you’re using to remove them. So if you’re working on a white shirt, be careful not to get the vinegar on any other parts of the fabric!

Step Five: Use Ammonia

Use Ammonia

If all else fails, ammonia can be used as an effective grease stain Remover. Just mix one part of ammonia with four parts of water in a spray bottle and spritz the area where the stains are still visible. Let it soak in for about five minutes before scrubbing it off with an old toothbrush or another item like a credit card. Make sure to test this solution on an inconspicuous spot first to make sure that it doesn’t cause any damage to your clothes!

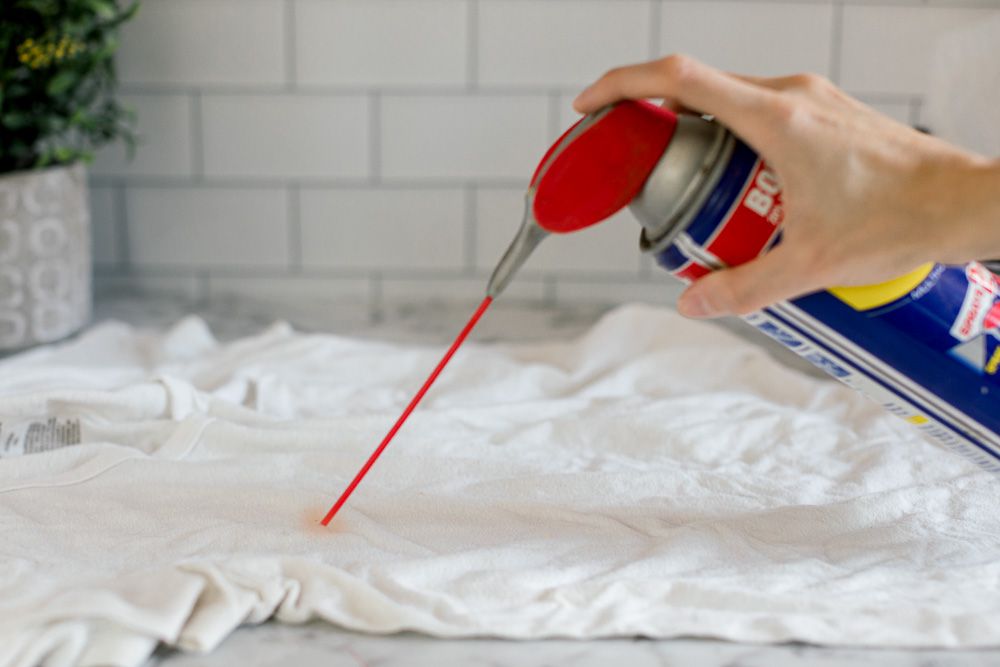
Step Six: Remove Stubborn Stains with WD-40

 Remove Stubborn Stains with WD-40

Remove Stubborn Stains with WD-40

If you’re really struggling to Remove Grease Stains, then this method is your best bet. Just spray some WD-40 directly onto the stain (you can also use another type of oil like vegetable oil if there’s not a big difference in price). Then take an old toothbrush or another item like a credit card and rub it into the fabric until all of that nasty grease has been Removed! Try applying mineral spirits instead for something even more effective since they work great at dissolving oils.

Step Seven: Use Rubbing Alcohol Again

Rubbing Alcohol

Last but not least, just mix one part rubbing alcohol with three parts water in a spray bottle and spritz it onto the area where the stains are still visible. Let it soak in for about five minutes before scrubbing it off with an old toothbrush or another item like a credit card. This will help remove any leftover residue from the WD-40 or mineral spirits that you just used!

And there you have it – seven easy steps to Remove Grease Stains the right way! Be sure to bookmark this page so you can reference it next time you have an unfortunate grease stain emergency. And if all of these methods still don’t work, then maybe it’s time to invest in some specialized laundry detergent specifically designed for removing oil and grease stains. To get professional help visit us.

The Importance of Move-In Checklist for Landlords, and Tenants

The Importance of Move-In Checklist for Landlords, and Tenants

Imagine you have moved into a new apartment, and deposited a high amount as a security fee but have received half of it when you shift your place. Heartbreaking right? Similarly, if you are a landlord who returned the entire security deposit to your former tenant, but later realized the mistake when you had to incur significant expenses to repair your thoroughly damaged property caused by the tenants.. The two situations are equally panic for both tenants and landlords.
If you are one, you never want to become trapped in them. So, how can you avoid such troubles? Through a carefully signed move-in checklist. 

Both renters and tenants must sign the Move-In Checklist, a document required whenever a shift to a new location takes place.

What is a Move-In Checklist?

This document provides a convenient way for both tenants, and landlords a way to keep a good track of the rental property’s condition. It gives a deep insight into the status of all rooms, bathrooms, kitchen, appliances, furniture, plumbing system, heating system, cooling system, garden, porch, and garage. 

Why Move-In Checklist Important?

It presents a fair play between the two stakeholders and saves them from any disagreement/conflict in the future.

For Landlords:

The document provides great helping hands for the property owners. It gives the existing state of affairs to them. It documents the awareness about the damage caused by the rentals other than the regular wear, and tear. It will help to hold the rentals accountable for the indemnity caused by them. You can easily deduct a calculated amount from the security. It gives a legal backup to the landlords so that they can file a legal suit against the rentals who have caused the harm.

For Tenants:

It is evenly beneficial for both rentals, as it offers the present condition of their new residence. A complete picture of every nook and corner of the rented estate is presented to them. So, that they can demand any repairs, and will enjoy a well-maintained, good-conditioned, and deeply cleaned residence to live in. Not only this, but they can also obtain legal support in case of any dispute with the owner. As it serves as preserved written evidence. Hence documenting the preexisting harm reduces the likelihood of any disturbances in the future. It also offers an opportunity to get to know about the damaged parts of the house. Through this document, the rentals would be able to secure their amount paid as a security fee.

How the Move-In Checklist is Managed?

Soon after the completion of a thorough inspection of the rental property, the written part of the document should be signed by both parties. Before signing it make sure that you have read it carefully. A copy of the signed file should be with both tenant and the landlord. Attaching one copy with the lease agreement and keeping it there until your tenant moves out of the estate would be a wise approach.

Point to be Noted: 

Specify the responsibilities of both the tenant and the landlord in the lease agreement to ensure being in a safe zone. Moreover, it would help the property administration of your rental unit which would receive less wear and tear.

What is the Move-Out Checklist?

This document gives instructions for the tenants when they are about to shift from their earlier residence. It outlines the tasks that tenants need to complete before their move out.

How is it Looks like?

There are no general terms for composing the checklist. Since it defines the existing conditions which are different for each property, thus every landlord documents a specific checklist according to suitability. It enlists the terms which the rentals are supposed to fulfill when they are about to move out. Following these instructions, and sticking to the terms minimizes the probability of emerging issues in the future. Both subjects will get peace of mind, and it ensures a friendly departure of rentals while guaranteeing the full security amount in their accounts. In the same manner, the landlord would not have to bear the cost of extra expense for the intentional, or accidental injuries caused by rentals

Template for Move-In Checklist

  • Kindly schedule your inspection 1 week before your move-out.
  • You must thoroughly clean the house before moving out.
  • Clean kitchens and all bathrooms cautiously.
  • Maintain the paint on the walls in the same condition as it was during the check-in.
  •  Do not leave any trash residue at any corner.
  • All the kitchen appliances must be working properly, and should not retain any stain.
  • Properly manage and clean all the window glasses and frames.
  • All the furniture, and light fixtures, and bulb lights should work properly.
  • The plumbing system must not show any blockage or leakage.
  • All the heating, and cooling systems should work efficiently.
  • All the alarms should be working properly. 
  • All sinks, tubs, and tiles should not bear any hard water stain.
  • Inform the landlord about the issues or other damages inside the rental property.
  •  
  • Fulfill all the above-mentioned items before the move-out inspection to ensure that you receive the full amount of your security deposit.

Therefore, prioritize the repairing, repainting, and trash removal. Above all deep cleaning is mandatory. You need not risk your security amount, so it is suggested to hire professional cleaning services. Test out Global Cleaning Company to assure perfect End of Tenancy Cleaning.