fbpx

Global Clean – Cleaning Services In London

10-Hidden-Areas-in-Your-Home-Youre-Forgetting-to-Clean

10 Hidden Areas in Your Home You’re Forgetting to Clean (But Shouldn’t!)


When it comes to cleaning, most of us focus on visible surfaces like countertops, floors, and furniture. While these areas are essential to maintain, several hidden spots in your home often get overlooked. These neglected areas can accumulate dirt, allergens, and bacteria over time, posing potential risks to your health and hygiene. In this article, we’ll explore the 10 hidden areas in your home you’re forgetting to clean and provide actionable tips to ensure your home stays truly spotless and healthy.

How to Clean a House Professionally

1. Behind and Under Furniture

Out of sight, out of mind—this saying often applies to the areas behind and beneath furniture like sofas, beds, and dressers. Dust, pet hair, and crumbs collect in these spots, which can lead to allergies and pests if ignored.

Why It Matters:
Dust and debris can contribute to poor air quality and attract unwanted pests.

How to Clean:

  • Periodically move your furniture to clean behind and underneath it.
  • Use a vacuum cleaner with a crevice tool to sweep away dirt and dust efficiently.
  • Furniture sliders can make heavy pieces easier to move around.

How to Clean Carpet

2. Inside Kitchen Appliances

You may wipe the exterior of your appliances, but the interiors are often full of grease, crumbs, and grime. Your oven, microwave, refrigerator, and dishwasher are all guilty offenders.


Why It Matters:
Unclean appliances can impact food safety and your appliance’s functionality.

How to Clean:


  • Remove shelves and trays from appliances, soak them in warm soapy water, and scrub gently.
  • Use baking soda and vinegar to remove stubborn stains and smells in your oven.
  • Clean the interior of your refrigerator and microwave with an all-purpose cleaner.

How to Get Pee Out of a Mattress


3. Ceiling Fans and Light Fixtures


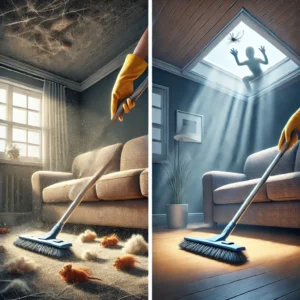
Ceiling fans and light fixtures are common hidden areas in your home you’re forgetting to clean. Over time, they collect dust, which can spread throughout your home when the fan or light is turned on.
 

Why It Matters:
Dust from ceiling fans can trigger allergies and asthma.

How to Clean:

  • Use a microfiber cloth or a specialized duster to clean fan blades and light fixtures.
  • Cover each blade with an old pillowcase to collect dust as you clean.
  • Dust your fixtures often for a clean and healthy living space.


4. 
Back of the Toilet


While the toilet bowl is often cleanedthe space behind the toilet is easily overlooked. This area is prone to collecting dust, hair, and other bacteria, causing an unsanitary situation.
10-Hidden-Areas-in-Your-Home-Youre-Forgetting-to-Clean

Why It Matters:
Grime build-up behind the toilet causes odors and unsanitary conditions.

How to Clean:


  • Use a small scrub brush and disinfectant to reach behind the toilet.
  • Make this area part of your routine cleaning schedule to avoid buildup.


5. Air Vents and HVAC Filters


Air vents and HVAC filters are 
important factors in maintaining good indoor air quality, but these are rarely considered during your cleaning session. Dust, allergens, and even mold may accumulate here.

Why It Matters:
Dirty vents and filters can lower the efficiency of your HVAC system and circulate allergens in your home.

How to Clean:

  • Vacuum vents regularly with a brush attachment.
  • Change HVAC filters every 1-3 months, depending on usage and manufacturer
  • recommendations.
  • Duct cleaning by professionals is a good option for a deep clean.


6. 
Under Large Appliances


The 
areas under your refrigerator, washing machine, and stove are often hotspots for food crumbs, spills, and dirt.
Unclean areas under appliances attract pests and contribute to the development of awful smells.

How to Clean:


  • Pull out appliances every few months to sweep and vacuum underneath.
  • Use a damp mop or cleaning wipes to remove stains and debris.


7. Curtains and Blinds


Curtains and blinds add charm to your 
house but tend to collect dust and allergens over time. This is important to clean frequently for a healthy living space.
Dust on curtains and blinds can exacerbate allergies and lower indoor air quality.

How to Clean:


  • Vacuum blinds using a brush attachment or wipe them down with a damp cloth.
  • Machine wash curtains according to care instructions or vacuum them with a fabric attachment.


8. Behind and Under Beds


The area 
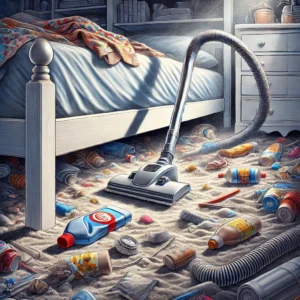
under your bed is dust bunny and a forgotten item collection area. Cleaning this space is essential for a healthier sleeping environment.

Why It Matters:
Dust under your bed can disrupt your sleep and trigger allergies.

How to Clean:


  • Remove items stored under the bed and vacuum the area thoroughly.
  • Use a damp cloth to wipe down bed frames and other surfaces.


9. Inside Drawers and Cabinets


Drawers and cabinets may look 
clean from the outside, but crumbs, dust, and spills can hide inside. These hidden messes can attract pests and create an unsanitary environment.

Why It Matters:
Neglected drawers and cabinets can become breeding grounds for bacteria and pests.

How to Clean:


  • Empty drawers and cabinets periodically.
  • Wipe them down with a damp cloth and let them dry before restocking.
  • Use drawer liners to make future cleaning easier.


10. Door Frames and Baseboards


These 
are usually not noticed areas where dust fingerprints and scuff marks can accumulatethus giving your home a less clean look.

Why It Matters:
Clean door frames and baseboards make your home look nice.

How to Clean:

  • Wipe down door frames and baseboards with a damp cloth or sponge.
  • For stubborn stains, use mild detergent and gently scrub.


Why Cleaning Hidden Areas in Your Home

MattersClean those secret places to ensure fresher airfewer allergens, and healthier living spaceIf left alone, these hidden areas may contribute to health problems, pest infestation, and a less comfortable place to live.


Let Global Clean Help!

Tired of juggling all these hidden cleaning tasks? Global Clean specializes in tackling the hidden areas in your home youre forgetting to clean. Our professional team ensures every corner of your home is spotless, giving you peace of mind and a healthier living space.

Contact us today to book your cleaning service and experience the difference!


5 Common Cleaning Mistakes

5 Common Cleaning Mistakes You’re Probably Making (And How to Avoid Them)


Cleanliness is an essential aspect of keeping your home healthy and invitingUnfortunatelythe best intentions may often lead to habits that harm instead of help. In this article, we will explore five common mistakes made when cleaning and offer practical solutions to help you clean smarter, not harder. These mistakes will help you avoid wasting time, and damage, and really enjoy a truly clean and healthy living space.


1. Using Too Much Cleaning 
Agent

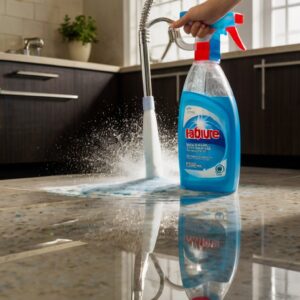
Ithard to resist the thought that the more cleaning agents, the cleaner the job, but this is one of the biggest mistakes people commitToo much can lead to leaving behind residues that attach dirt and grime, particularly on surfaces like dishesfloors, or glass.


Why it
s a mistake:


Excess products
are harder to rinse off, thus requiring more water and effort in cleaning. It may also damage certain surfaces or make them slippery and unsafe.


How to avoid it:


  • Always read the label for the correct amount to use.
  • Use a diluted solution for most cleaning tasks.
  • When in doubt, start with less product and add more if necessary.


2. Ignoring High-Touch Surfaces


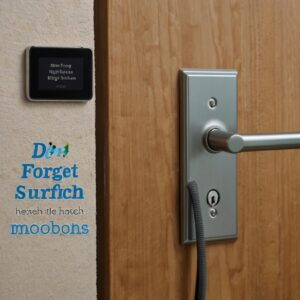
Many such touch places, such as doorknobs, light switches, television remote controls, and hand-held mobile phones, happen to be breeding places for germs and bacteria. They are the most vulnerable to being ignored in common cleaning routines. This has led to an increase in illnesses and allergies in houses.


Why it
 is wrong:


High-touch areas 
are touched by multiple hands often and thus become haven for germs. Skipping these areas defeats the purpose of cleaning other areas.

How to avoid it:


  • Add high-touch surfaces to your daily or weekly cleaning list.
  • Use a disinfectant spray or wipes that are designed for these surfaces.
  • Pay extra attention during cold and flu season to prevent illness.


3. Cleaning Without a Plan


Another common cleaning mistake is 
entering your cleaning routine without a defined plan. You may clean an area, then go into another, only to head back to the first place to tidy something you overlooked. This lack of organization wastes time and energy and leads to an uneven clean.

Why itwrong

Random cleaning disperses dirt and dust around the place, undoing everything you’ve done and leaving you frustrated.

How to avoid it:


  • Have a plan in mind before you begin cleaning.
  • Start from the highest areas of a room (like shelves or ceiling fans) and work your way down to the floors.
  • One area at a time and complete the area before cleaning something else.


4. 
Not Deep Cleaning Frequently Enough

While surface cleaning is necessary for keeping your home presentable, neglecting deep cleaning results in a buildup of dirt, allergens, and bacteria over time. These are tasks such as cleaning behind appliances, washing curtains, or shampooing carpets.


Why its a mistake:
Surface cleaning only 
looks at the visible dirt. Hidden grime builds up, causing odors, health issues, and even pest problems.

How to avoid it:

  • Schedule deep cleaning tasks seasonally or every few months.
  • Focus on the areas that often get neglected, such as beneath furniture, behind the stove, and inside cabinets.
  • Contract professional deep cleaning services from Global Clean for effective, efficient results.


5. 
Incorrect Tools or Products


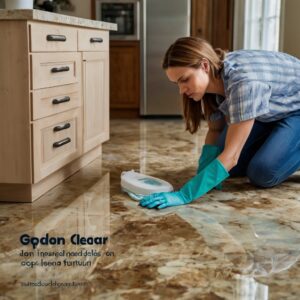
Wrong tool for delicate surface or wrong cleaning agent for the work to be done. For example, scouring pads on glass will leave scratches, while other chemicals may damage wood or natural stone, and so on.


Why it
s a mistake:
This error can cause permanent damage to your surfaces, furniture, or appliances, calling for repair or replacement, which is a costly affair.

How to avoid it:


  • Read product labels to ensure they are safe for the material you’re cleaning.
  • Use microfiber cloths for most surfaces—they’re gentle yet effective.
  • Invest in eco-friendly cleaning products to avoid harsh chemicals.


How to Avoid These Common Cleaning Mistakes

It is easier than you think to avoid these mistakesBegin with being mindful of your habits and investing in the right cleaning tools and products. A cleaning checklist can also keep you on track, ensuring no surface is overlooked. Finally, consider scheduling regular professional cleaning services to handle the tasks you might miss.


Why Deep Cleaning Matters


Deep cleaning 
will penetrate the surface, targeting areas that have hidden dirt and allergens. Regular deep cleaning enhances indoor air quality, increases the lifespan of your furniture and carpets, and creates a healthier living environment.

Why Choose Global Clean?

At Global Clean, we specialize in avoiding common cleaning mistakes while delivering excellent results. Our professional cleaners are trained to:


  • Use the right tools and eco-friendly products for every surface.
  • Develop a strategic cleaning plan to ensure thoroughness.
  • High-touch areas and neglected spots are to be paid close attention to.
  • Regular and deep cleaning services will be provided according to your needs.


Book Your Cleaning Service Today


Stop struggling with these common mistakes and let Global Clean take care of your home. Our experienced team ensures a spotless, healthy space so you can relax and enjoy your time.
Contact us now to schedule your cleaning service—because a clean home is a happy home!

cleaning-a-dog-without-bathing.

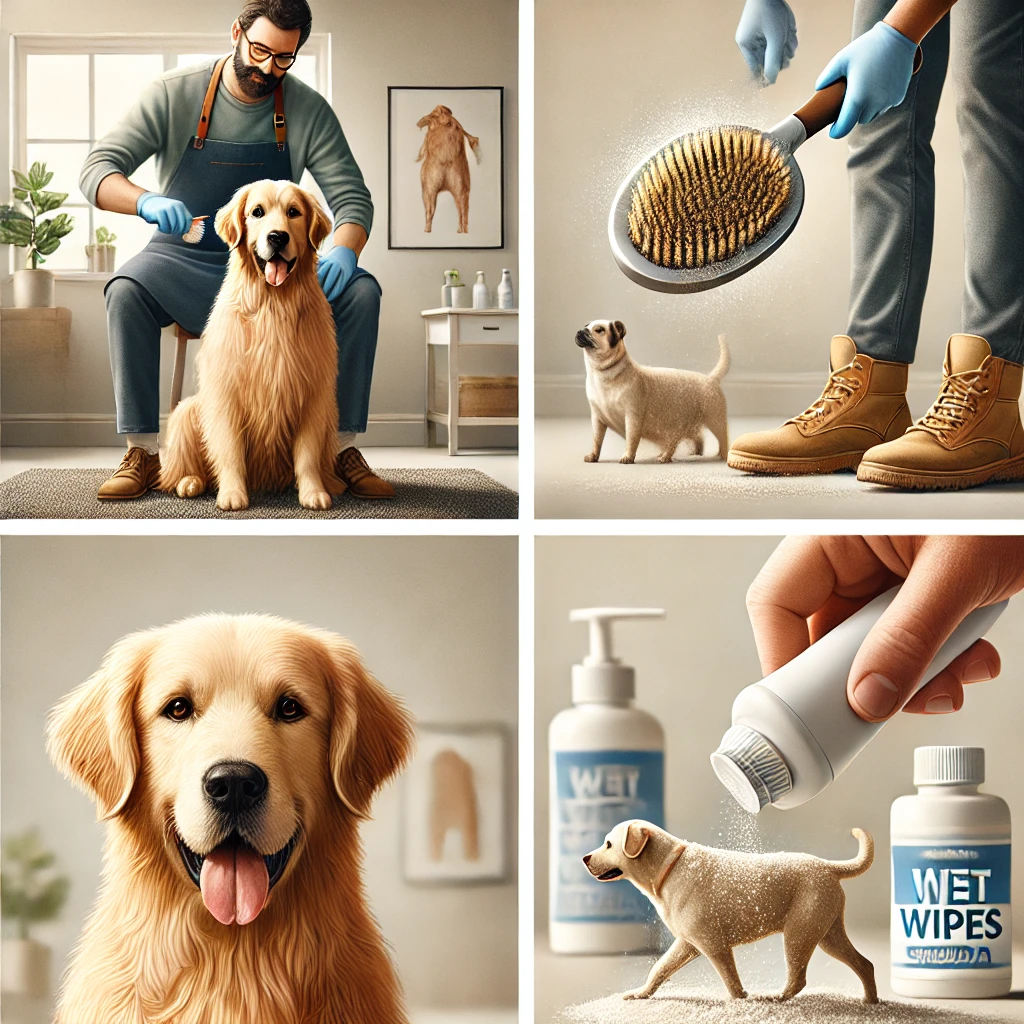
How to Clean Your Dog without Bathing : Tips for a Fresh and Happy Pet


Keeping your dog clean and fresh is essential for their health and happiness. However, there are times when giving your dog a full bath isn’t possible or necessary. There are effective ways to clean your dog without bathing, whether due to cold weather, a lack of time, or simply avoiding stress for your pet. Here’s How to Clean Your Dog without Bathing Them

How to Clean a Patio: Step-by-Step Guide

How to Clean a Patio: Complete Step-by-Step Guide


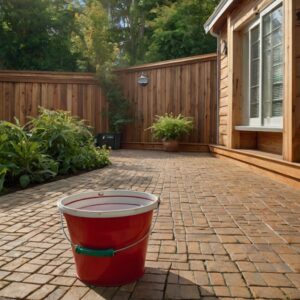
Your patio is the centerpiece of your outdoor living area, 
where you can relax, host people, and enjoy nature’s beauty. However, dust, grime, moss, and algae will gradually accumulate, making walking less comfortable and potentially hazardous. Regular maintenance will ensure that your patio is clean, durable, and attractive for some time. In this guide, you will find how to clean a patio, including green cleaning methods and tips about battling tough stains.


Why Cleaning Your Patio 
Matters


clean patio is an appearance boon and has some critical implications for safety and longevity. Moss and algae can leave surfaces slippery, which poses severe safety risk. Dirt and debris also promote discoloration and quick deterioration of materials. Cleaning your patio ensures:

  • Aesthetic Beauty: A sparkling patio enhances the looks of your home.
  • More Durable: Reducing the accumulation prevents wear and tear.
  • Safe Patio: Removing the moss and algae decreases the chances of falls and slips.


Materials Needed to Clean Patio

Before you start with the process, you’ll want to get the following:


  • Broom or brush stiffly
  • Water warm in a bucket
  • Patio cleaner specialized or dish soap
  • White vinegar (optional)
  • Baking soda (optional)
  • Garden hose, if available
  • Gloves and safety goggles if using chemical cleaners

How to Clean Patio Without a Pressure Washer


How to Clean Patio Without a Pressure Washer


If you don
have a pressure washer, or you are just not comfortable using one, no worries here-you can quickly get a good clean of your patio with the right tools and a little elbow grease. Here’s how to do it:


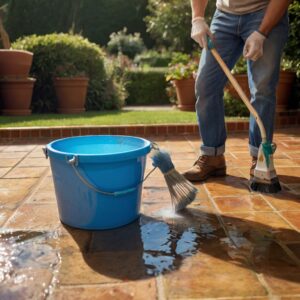
Step 1: Clear Loose Debris

Sweep the patio thoroughly with a stiff broom to remove leaves, twigs, dirt, and other loose debris. Look for corners and crevices where debris likes to collect.


Step 2: Mix Your Cleaning Solution

For a gentle and eco-friendly solution, combine warm water and a few drops of dish soap in a bucket. If you’re tackling moss or algae, mix equal parts white vinegar and water instead.


Step 3: Scrub the Surface

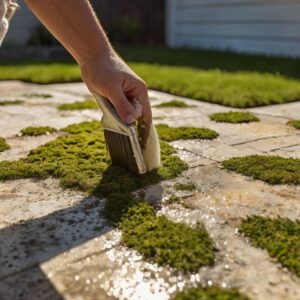
Dip your brush into the cleaning solution and scrub the patio surface in circular motions. Focus on all visible areas with stains, moss, or algae. Be patient, as manually scrubbing takes time but works excellently.


Step 4: Rinse

Scrub the entire patio and begin rinsing it using clean water from a garden hose or other buckets, removing all soap, dirt, and residue.


Step 5: Let It Dry

Allow the patio to air dry completely before using it again. Inspect the area for missed spots and repeat the scrubbing process if needed.


If your patio has stubborn stains, here are some specific solutions to try:


  • Oil Stains: Sprinkle baking soda over the affected area, let it sit for 15 minutes, then scrub with a brush and rinse with water.
  • Moss and Algae: Apply white vinegar directly on mossy areas, let it sit for 30 minutes, scrub, and then rinse.
  • Rust Stains: Mix lemon juice and salt to make a paste. Apply it to the rusty marks, let it sit for 10 minutes, and then gently scrub them.


More Tips for Patio Maintenance


  • Precautionary Steps: Seal after cleaning to prevent dirt from accumulating again and make cleaning easy next time.
  • Seasonal Cleaning: To avoid a buildup, clean your patio at least twice a year, preferably in spring and fall.
  • Eco-Friendly Cleaning: Minimize environmental impact using natural solutions such as vinegar and baking soda.
  • Weed Control: Regularly removing weeds that grow between the paving stones of your patio will keep it looking clean at all times.

Free DIY Spring Cleaning Checklist 2024


Why Choose Manual Cleaning Over a Pressure Washer?

Manual cleaning might take some elbow grease, but it is better suited to some patio materials, such as natural stone or older paving slabs. The use of pressure washers can damage fragile surfaces or release joints between stones in some cases.

  • Beneficiations of Manual Cleaning
  • Gentle on all materials
  • Eco-friendly solutions at home
  • Free and simple to do


Conclusion


Learning how to clean a patio without a pressure washer is not only 
easy but also very efficient. Proper care and correct cleaning techniques can help keep your outdoor space perfectly clean and safe. You might be getting ready to have a summer barbecue or just generally taking care of your home; it’s all a matter of keeping your patio looking fresh.


Clean and care for your patio. It will add value to the property and enhance your enjoyment of the space.

How to Clean and Maintain Kitchen Knives

how to clean kitchen knives? A Complete Guide


Knives are essential in the best-arranged kitchen, whether you own a professional kitchen or a home space. these are crucial utensilsCleaning and maintaining kitchen knives prolongs their life and improves their performance and safety. In this blog post, we‘ll examine how to clean and maintain your kitchen knives effectively so they stay sharp, safe, and ready for use.


Why Cleaning and Maintaining Kitchen Knives Is Important

Neglecting your kitchen knives can lead to dull blades, rust, and unsanitary conditions, impacting their efficiency and lifespan. Clean and well-maintained kitchen knives provide a smoother cutting experience, reduce accidents, and ensure your food preparation remains hygienic.

How to Clean a Washing Machine: Step-by-Step Guide


How to Clean Kitchen Knives Properly

Cleaning kitchen knives may not be complicated; howeverimproper cleaning can damage their blades or handles. The steps for effective cleaning are as follows:
How to Clean and Maintain Kitchen Knives


  • 1. Hand Wash Kitchen Knives: Never place kitchen knives in the dishwasher. The high heat, detergent, and jostling may damage the blade and handle. Immediately after use, clean kitchen knives under warm running water using mild dish soap and a soft sponge.
  • 2. Care with the Blade. To avoid accidental cuts, handle the blade gently. While cleaning the blade, follow the directions away from your hand to avoid injury.
  • 3. Dry Kitchen Knives Immediately
    After washing, dry kitchen knives with a soft, lint-free towel. Leaving them wet can lead to rust or water spots.


Tips for Maintaining Kitchen Knives

Regular maintenance is key to keeping your kitchen knives in top condition. Here are the best ways to maintain them:

1. Sharpen Your Kitchen Knives Regularly

How to Clean and Maintain Kitchen Knives


Use a sharpening stone, honing rod, or electric sharpener to maintain a sharp edge.
Sharpen your knives after each few uses to align the blade and sharpen them after every few months, depending on usage.


2. 
Keep Kitchen Knives Safe

Invest in a knife block, magnetic strip, or blade guards to store kitchen knives safely.
Do not just toss them inside a drawer where they get dull and damaged.


3. Oil the Blades to Prevent Rust

For knives made of high-carbon steelperiodically apply a small, food-safe mineral oil layer to the blade to prevent rust from forming.


4. Cut on the Right Surface

Use a wood or plastic cutting board. Avoid glass, marble, or stone surfaces, as these can quickly dull the blade.

How to Clean a Beauty Blender: A Step-by-Step Guide for Makeup lovers


How to Remove Rust from Kitchen Knives

Rust can accumulate on your kitchen knives, especially those of high-carbon steel. Heres how to clean and remove rust:

rusty khnives


Use Baking Soda

  • Mix baking soda and water into a pasteLet it sit on the rusty areas and scrub it with a soft-bristled brush.
    Lemon and Salt 
    Process

  • Sprinkle salt onto the rusted areas, then rub them with a slice of lemon. Let it sit for a few minutes and wash off.
    Chemical Rust Remover

  • If the above home-based methods have failed, use a product designed to remove knife rust. Ensure it is food-safe.

How to Extend the Lifespan of Kitchen Knives

Follow these extra tips to optimize the lifetime of your kitchen knives:
cutting with kinife

  • Do not use your kitchen knives as tools. Refrain from using them to open packages, pry off lids, or do anything else they weren’made for.
  • Avoid cutting frozen foods. If you try to cut through frozen items, the knife will chipLet them partially thaw first.
  • Regular Inspections: Check your knives regularly for any form of wear, such as chips on the blade or cracks in the handle.


Mistakes to Steer Clear in Cleaning of Kitchen Knives


  • Soaking Kitchen Knives: Knives should not be soaked in water, especially for a long period. This can damage the handle and lead to rust on the blade.
  • Using Harsh Scrubbers: Rubbing or cleaning knives with coarse sponges or steel wool can scratch the blade and remove its protective coating.
  • Lack of Sharpening and Whetting: Failure to hone or whet knives results in a dull edge that puts one at risk of using knives.


Advantages of Cleaning and Maintaining Kitchen Knives

How to Clean and Maintain Kitchen Knives


  • Better Performance: Sharp, clean knives accelerate food preparation.
  • Safety Improvement: A sharp knife is safer than a dull one since it requires less force and less momentum to control.
  • Longer Lifespan: Regular maintenance protects your investment, ensuring your kitchen knives last for years.
  • Hygiene: Cleaning ensures no food particles and bacteria settle on your kitchen knives.

Cleaning Knives & Cutting Boards – American Cleaning Institute


Conclusion:

Cleanliness and maintenance of kitchen knives are not complicated issues, but consistency is necessary. Proper washing, sharpening, and stocking the knife regularly, thus prolonging its use and improving your cooking operation, are necessary. Then, develop these habits as normal habits in your kitchen care, and the knives will last for years.
Start implementing these tips today, and you’ll notice a difference in the way your kitchen knives perform and look!


How to Clean a House Professionally

cleaning-a-hardwood-floor-using-a-damp-microfiber-mop

What is the Best Way to Clean a Hardwood Floor?


Hardwood floors are a timeless and elegant addition to any home, but maintaining their beauty requires proper care. Following the best cleaning practices is essential to keep your hardwood floors pristine. This blog post will cover the best way to clean a hardwood floor and offer practical tips to protect and preserve its natural shine.


Why Choose the Best Way to Clean a Hardwood Floor?

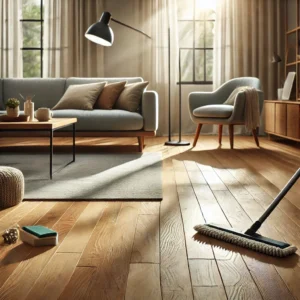
When cared for properly, hardwood floors can last for decades, but using incorrect methods can lead to scratches, discolouration, or warping. Adopting the best method to clean a hardwood floor ensures durability, enhances aesthetics, and prevents costly repairs.

How to Clean a Washing Machine: Step-by-Step Guide


Preparing to Clean Your Hardwood Floor

Before diving into the cleaning process, preparation is key:

  • Remove Dust and Dirt: Sweeping the floors with a microfiber dust mop or a soft-bristle broom can help remove dirt and dust. However, cleaning may cause scratches when particles are already on the floor.
  • Vacuuming: Use a vacuum that has a hardwood floor attachment to reach into corners and crevices, as a mop or broom might miss areas.
  • Check the Finish: Determine whether your floor has a polyurethane or oil-based finish, as this affects the type of cleaning products to use.


The Best Way to Clean a Hardwood Floor Safely

clean-and-polished-hardwood-floor-


1. Using a Damp Mop for Gentle Cleaning

The best way to clean a hardwood floor involves a balance of moisture and technique:
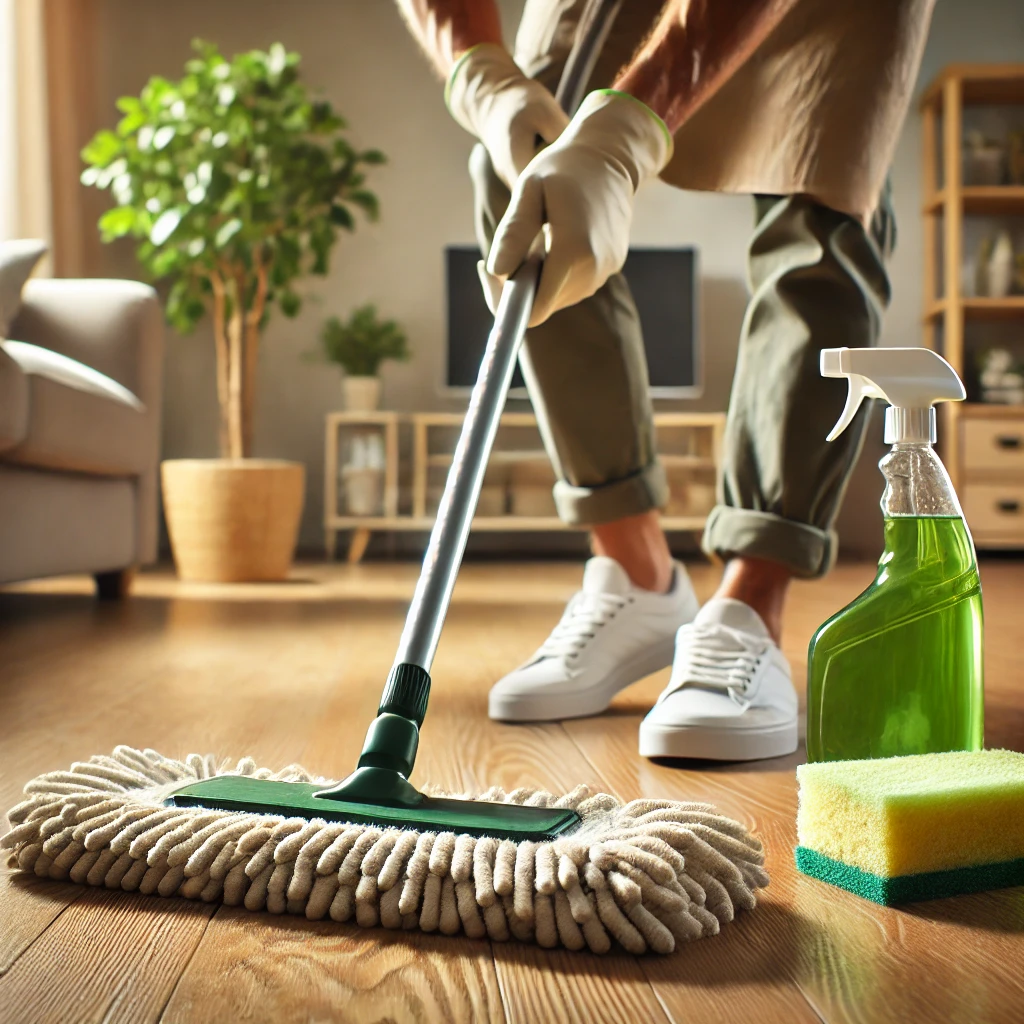
Dampen a microfiber mop with water; avoid soaking it to prevent excess moisture.
Gently 
drag the mop over the floor, focusing on heavily trafficked sections.
Dry the floor immediately with a clean cloth to prevent water damage.


2. 
Use Proper Cleaning Products

  • Making the right product selection is very important in cleaning a hardwood floor.
  • Use a pH-neutral hardwood floor cleaner that is suitable for your floor.
  • Avoid harsh chemicals and cleaners with abrasive or acidic contentsuch as vinegar, as they tend to strip the floor of its finish.
  • Test any new product on a small, inconspicuous area before applying it to the floor.


3. Deep Cleaning a Hardwood Floor

To deep clean periodically, follow these steps:

  • Remove furniture and rugs to be able to get all of the floor covered
  • Use a steam mop specially made for hardwood floors, or call in a professional hardwood cleaning service
  • Apply a wood-safe polish to bring back shine and a layer of protection


Tips to Protect Your Hardwood Floor

Maintaining a cleaned hardwood floor involves more than cleaning itself. Here are some more tips:
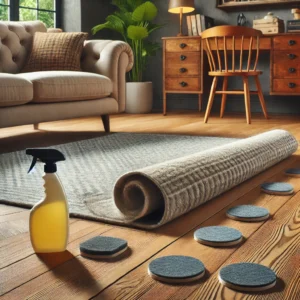
An-image-showing-a-hardwood-floor-protected-with-felt-pads-under-furniture

  • Use Doormats: Prevent entry of dirt and debris into your home by using doormats at entrances.
  • Use Furniture Pads: Protect the floor from scratches caused by furniture movement.
  • Avoid High Heels: Limit heavy impacts by not wearing sharp-heeled shoes on the floor.
  • Control Humidity: Use a humidifier and maintain stable humidity levels. A hardwood floor can warp or crack with wide variations in humidity.


Common 
Blunders to Sidestep in Cleaning a Hardwood Floor


When 
looking for the best way to clean your hardwood floor, do not make these blunders:

  • Using too much water or steam that causes warping
  • Failing to dust regularly as dust builds up and scratches the floor.
  • Using unsuitable cleaning products,wan damage the finish of the floor.

How to Mop Your Floor Like a Pro


Conclusion

Hardwood floors are easy to maintain if one uses the best way to clean a hardwood floor. With the right tools, techniques, and preventative measures, one can preserve the natural beauty and longevity of his flooring.For professional cleaning services, call Global Clean. Our expert team offers specialized care for hardwood floors, ensuring that they are always spotless and inviting. Contact us today for customized cleaning solutions!

-A-visually-appealing-image-of-a-modern-washing-machine

How to Clean a Washing Machine: Step-by-Step Guide


One of the home appliances you use  frequently is  undoubtedly  your washing  machine. It waits patiently for the wear and tear of washing your clothessilently battling dirt, grime, and mold, and still doing it without complaint.

But still, it impacts efficiency and freshness in the laundry. That’s why learning to clean a washing machine isn’t just suitable for your appliance and fresh, odor-free clothes. In this comprehensive how-to guide, well look at everything you need to know about cleaning and maintaining a washing machine in perfect condition.

Why You Need to Clean Your Washing Machine

Although washing machine uses soap and water, it does not clean itselfAll these result in detergent residues, fabric softeners, and dirt from clothesThe residues provide the perfect environment for mold, mildew, and bacteria. There are various reasons why you should have proper knowledge of how to clean a washing machine:

  • Get Rid of Bad Smells: Residue and mold can contribute to obnoxious smells.
  • Cleaner Wash: A clean machine will help you get your clothes clean of spots.
  • Extend the Machines Lifespan: Regular cleaning prevents damage and wear.
  • Maintain Hygiene: Prevent bacteria and mold from transferring onto your clothes.

Cleaning a washing machine helps avoid such troubles and keeps your laundry process efficient.

 
How Often Should You Clean a Washing Machine?

Experts recommend you wash your washing machine at least once per month. Washing may be needed every two weeks for households that frequently clean heavily soiled clothes or other large loads. Proper maintenance will ensure your machine works in the best possible condition, avoiding clogging, odor buildup, and bacteria growth.


Tools and Materials 
Needed

Before knowing how to clean a washing machine, acquire these tools and materials:

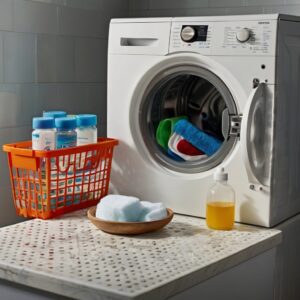
A_closeup_of_a_washing_machines_detergent


  • White vinegar.
  • Baking soda.
  • Microfiber cloths.
  • A toothbrush.
  • Warm soapy water
  • Washing machine cleaning tablets (optional)
  • Bleach (optional)


The right equipment helps you clean your washing machine and handle heavier grime.


Step 1: Clean the Drum of the Washing Machine


The drum is where your clothes are washed, so keeping it clean is also essential. Heres how to clean a washing machine drum

A_closeup_of_a_washing_machines_rubber_seal_


  • Vinegar Cycle: Place 2 cups of white vinegar in the detergent dispenser. Run a hot cycle. Detergent residue dissolveskills bacteria, and removes odors.
  • Baking Soda: Sprinkle ½ cup of baking soda into the drum and run another hot cycle. It neutralizes odors and breaks down grime.
  • Clean the Drum: Once all cycles are completed, use a microfiber cloth to clean the drum of any residue.

This is a straightforward process and one of the most important when learning how to clean a washing machine properly.


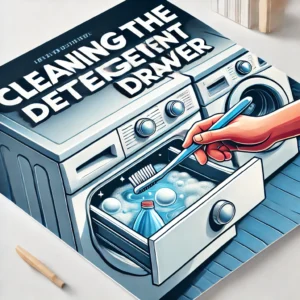
Step 2: Clean the Detergent Drawer


The detergent drawer is the tendency-prone stickiest part of your washing machine: it’s often oozing with detergent and fabric softener residue. Heres how to clean a washing machine drawer:

A-visually-appealing-image-of-a-washing-machines-detergent-drawer-being-cleaned


  • Take Out the Drawer: First, pull the drawer out. Most machines have detergent drawers that can be cleaned from the washing machine.
  • Soak and Scrub: Soak the drawer in warm, soapy water for 10 to 15 minutes. Clean using a toothbrush for heavily built-up areas.
  • Rinse and Dry: Rinse thoroughly under running water and dry it with a cloth before reinserting it into the washing machineCleaning the drawer inside is necessary to maintain hygiene with your washing machine.

How to Get Pee Out of a Mattress Quickly and Effectively


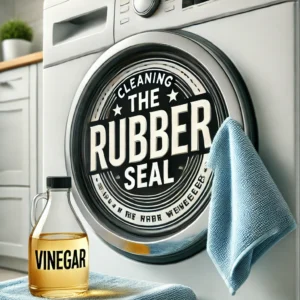
Step 3: Clean the Rubber Seal

The rubber seal around the door is also likely to trap dirt, lint, and moisture, which can create mold and mildew. Heres how you clean a washing machine seal,

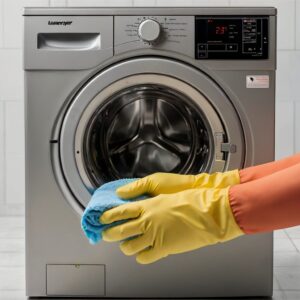
-A-close-up-image-of-a-washing-machines-rubber-seal-being-cleaned-with-a-microfiber-cloth-


  • Check the Seal: Look for debris or small items lodged in the seal.
  • Wipe with Vinegar: Wipe the seal completely using a soaked cloth.
  • Scrub Stubborn Spots: If there are stubborn spots, rub them with vinegar using a toothbrush.
    Let the seal dry out entirely by leaving the door open.


Keeping this seal clean prevents smells from entering your clothes.
Remove Lint and Debris.

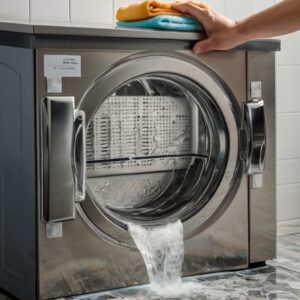
Step 4: Filter Cleaning

This filter attracts lint, hair, and debris. Without regular cleaningclogs build up, and your machine runs much less effectivelyThis is how you clean a washing machine filter:
_A_washing_machine_filter_being_removed


  • Locate Filter: Consult your owner’s manual for where the filter is on your washer. This is usually located at the bottom front of your washing machine.
  • Drain Remaining Water: Take a towel or bowl and place it under the filter area to catch any water.
  • Remove and Rinse Filter: Remove and run the filter under running water. Using a toothbrush, clean away any built-up residue.
  • Replace the Filter: Ensure it is aligned correctly before closing the lid.


Step 5: Clean the Exterior

Dont forget about cleaning the exterior of your applianceHow to clean the exterior of a washing machine is as follows:

  • Wipe With Damp Cloth: Wipe around the knobs and buttons with a damp microfiber.
  • Use Stainless Steel CleanerOptional If your washing machine is made from stainless steel, a stainless steel cleaner will get extra sparkle.


Odor and BBuildupPrevention Tips


Knowing how to clean a washing machine is half the battle, but prevention is equally important. Here are a few tips to keep your machine fresh:

Always leave the door open after each wash, allowing airflow circulation within the washing machine and preventing mold growth buildup.

Minimize the 
use of detergent because excessive usage creates residue buildup. Always follow the manufacturerguidelines on how much detergent to use.

  • Run Maintenance Cycles: Follow the instructions for Most appliances with a self-cleaning cycle.
    Pre-clean empty pockets so dust does not get into them and cause a clog in your filter.
  • How to Clean Inside of Washing Machine: Top-Loading Versus Front-Loading
    The cleaning procedure may vary according to the type of model.
    Top-Loading Machines
Best Solar Panel Cleaning Equipment: Boost Your Solar Power

Top-Loading Machines


Fill the 
barrel drum with hot water and add 2 cups of vinegar. Let sit for 30 minutes.
Brush the inside lining with a cloth or brush, disposing of the residue inside the machine.
Add ½ cup 
baking soda. Run a hot cycle.


Front-Loading Machines

Pay more attention to the rubber seal, which appears more in front-loaders.
Work with vinegar and baking soda separately in a couple of cycles to clean the drum.
Leave the door open so that moisture does not get a chance to settle.


Conclusion


The ability to clean the washing machine is essential to how long it will be efficient at its task of making your clothes fresh and clean each time. From the inner lining of the drum to the eradication of smells, these processes ensure that your washing machine is maintained wellClean your washing machine regularly to avoid expensive repairs, and enjoy fragrant laundry every wash.

Now, you will know exactly how to clean a washing machine. Follow these steps, and your appliance and your clothes will thank you!

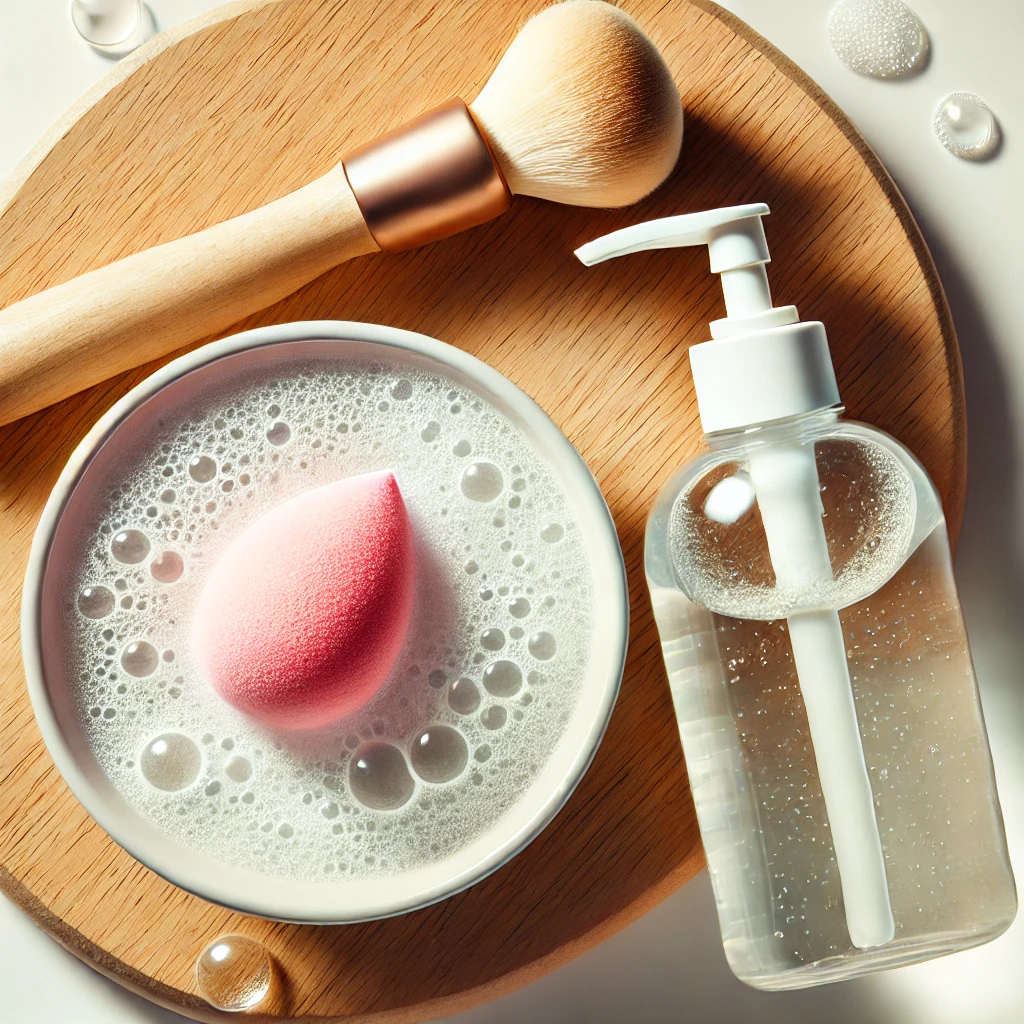
A-flat-lay-image-featuring-a-beauty-blender-a-bowl-of-soapy-water-and-a-bottle-of-liquid-soap-arranged-on-a-clean-white-surface.-The-beauty-

How to Clean a Beauty Blender: A Step-by-Step Guide for Makeup lovers

Having a beauty blender allows one to make exquisite makeup applications. However, a dirty beauty blender quickly becomes a breeding ground for bacteria, leading to skin irritation and breakouts. Therefore, cleaning your beauty blender regularly prolongs its life and ensures you don’t lose all your beauty and healthy skin. Here’s a step-by-step guide how to Clean a Beauty Blender,  the best methods for cleaning a beauty blender and some dos and don’ts.

How to Mop Your Floor Like a Pro


Why Should You Keep Your Beauty Blender Clean?


There are some crucial reasons you should ensure your beauty blender is cleaned:

  • Prevents Bacterial Growth: When applying makeup, natural oils, and even dead cells may collect in the sponge, which is a breeding ground for bacteria.

A_clean_damp_beauty_blender_


  • Smooth Makeup Application: With a cleanliness guarantee from your beauty blender, you’ll get smooth blending and applications. Therefore, you will have a professional finish on your makeup.

  • Extend the Life of Your Beauty Blender: Extend the life of your beauty blender by taking good care and proper cleaning of your beauty blender while using it long enough without wearing out.

That being said, let’s look at the different ways to clean a beauty blender, considering the benefits mentioned above.

How Often Must a Beauty Blender Be Cleaned?

Ideally, you want to clean the beauty blender immediately after use, especially if you have sensitive or acne-prone skin. However, that can be challenging. At the very least, clean it deep once a week. The more frequently you clean the beauty blender, the less buildup it will have, making each cleaning session quicker and more effective.

How to Clean Fabric Sofa

Easy Ways to Clean Your Beauty Blender

  1. Soap and Water Method

Clean your beauty blender using the soap and water method. Here’s how you do it,


What You Need: Gentle liquid soap or a specific cleanser for beauty blenders and warm running water.

Steps

  • Dip your beauty blender into the warm running water until soaked.

  • Rub a small amount of liquid soap directly onto the sponge.

  • Massage and squish gently the beauty blender. The soap will penetrate into the sponge, and you will start noticing makeup residue coming out.

  • Rinse under warm running water until all soap residue and makeup are removed.

  • Squish extra water and set the beauty blender on a clean, dry towel to air-dry.

Pro Tip: Use a fragrance-free, gentle soap not to irritate your skin.

  1. Olive Oil and Soap Deep Cleaning Method

This is the best method if you last cleaned your beauty blender a long time ago or if it has tough stains.


What You Need.

  • Olive oil
  • Liquid soap
  • Warm water


Steps to follow.

  • Dip your beauty blender through with warm water so it’s pretty wet.
  • Mix a drop of olive oil with liquid soap in another little bowl.
  • Dip your beauty blender in the oil-soap mixture and gently massage. The olive oil makes it easier to break down the oils and remnants of makeup.
  • Rinse the beauty blender using warm water to clean the mixture and squeeze out makeup and dirt.
  • Continue rinsing until all soap is gone and the water comes out clean.

Tip: Rinse the beauty blender twice to remove all the leftover olive oil that can impact the makeup application.

Spring Cleaning Checklist 2024

  1. Microwave Sanitizing

It is quicker yet needs to be used prudently because continuous use shortens the life of the sponge.

A_person_holding_a_beauty_blender_


  • Ingredients:
  • Microwave-safe cup, water, and a few drops of liquid soap.

Instructions:

  • Fill up a microwave-safe cup with water and add a drop of soap.
  • Place your beauty blender in the cup, ensuring it is fully covered.
  • Microwave cup for 30 seconds. Do not overheat. Overheating might damage your sponge.
  • Cool the cup before you take off your beauty blender
  • Rinse under running warm water to prevent soap buildup

Caution: Steaming an unwetted beauty blender could scorch it.


  1. Clean Beauty Blender pads or Block Cleaner

Use a beauty blender cleansing pad or solid cleanser for easy cleaning.

A_beauty_blender_is_being_gently_rubbed


What You Will Need: Beauty Blender Cleansing Pad or Solid Cleanser, Warm Water.

  • Step 1: Wet the beauty blender in warm water
  • Rub the sponge directly on the solid cleanser or use the cleansing pad to work up some suds into the sponge.
  • Rinse warm water until there’s no soap residue. Then, squeeze out the water weakly.


Beauty Blender Cleaning Tips

Air Dry in a Clean Area: Allow your beauty blender to air dry in a clean, open area. Do not place it in dim, enclosed areas where bacteria develop.

Change Frequently: Regardless of how much you clean your beauty blender, there comes a point where you will need to change your beauty blender. Doing this every 3 to 4 months is best to achieve maximum hygiene and effectiveness.

Store it in the case: of the beauty blender while unused To keep it dust and bacteria-free.


Mistakes to Avoid When Cleaning Beauty Blender

A_beauty_blender

Using Harsh Cleansers: Avoid using harsh soaps or fragrances, as these can cause stripping of all your nutrients for the skin and the material for the sponge.

Not Rinse Thoroughly Enough – Soap residue can quickly develop inside your beauty blender if you don’t clean it properly. Clean it thoroughly.

Water Temperature– Beauty blenders have some materials that may be ruined quickly if hot water is used. Try to use lukewarm or warm water instead.

Not Cleaning Regularly – Failure to clean your beauty blender often may make it stained, hard to clean, and less effective with makeup applications.


Conclusion on the Subject of How to Clean a Beauty Blender

You must learn to clean a beauty blender, especially if you’re a makeup enthusiast. Only through proper and frequent cleaning, employing the correct methods, and avoiding some mistakes will a beauty blender remain in good condition and perform its intended work of creating smooth, flawless makeup applications. Remember, a clean beauty blender means a cleaner and healthier skin routine!

Clean your beauty blender for a few minutes every time you use it or, if required, clean it within the week, and you will end up lengthening its lifespan and saving it from irritation and even breakouts that bacteria and dirt may cause. So, keep cleaning your beauty blenders as part of your beauty routine – your skin will thank you!


Frequently Asked Questions (FAQs)

  1. How often should I clean my beauty blender?

Clean your beauty blender after every use or every week for the best result.

  1. Can I use regular dish soap to clean a beauty blender?

While dish soap may effectively strip off makeup, it is too abrasive to the sponge and skin. There are gentle, skin-safe soaps and special beauty blender cleaners.

  1. How do I deal with my bad-smelling beauty blender?

When it begins stinking, that tells you it’s getting too much bacteria built up inside it, so get your deep cleaning out using olive oil and soap, then air dry it. After that doesn’t solve the problem, it is probably time to treat yourself to a new one.

  1. How long does it last?

In this respect, how long a beauty blender lasts depends on the user’s hygiene. The more you use it, the more often you’ll have to clean and store it properly, and you may need to replace it after six months.

In other words, a beauty blender should last 3-4 months if kept well-maintained. It should be replaced if it rips, stains cannot be removed, or the texture has changed.

9 Easy Ways to Motivate Yourself to Clean Your Room

Cleaning your room can sometimes be a chore, especially when you are not looking forward to it. On the other hand, a clean and organized space will look great, give you an active and happy mood, make you as productive as possible, and even offer some peace of mind. So here are some practical tips to help you get motivated enough to clean your room and stay inspired once you’re motivated.

How to Clean a House Professionally

1. Set a Goal and Visualize the End Result


Knowing precisely what you want may motivate you. Imagine how your room will transform and feel at the end of the cleaning process. Recalling a clean place’s cozy atmosphere may push you to start.

Tip: Take a “before” photo of your room. Looking back at the change will feel amazing once it’s cleaned up!

2. Break It Down into Small Tasks


Cleaning the entire room is very daunting. Divide the activity into manageable chunks instead of “clean the room.” Try “make the bed,” “clear the floor,” or “wipe the surfaces.” Finishing these one at a time compiles the momentum and makes the task less daunting.

Tip: Start with picking up clothes from the floor. After that, dust your desk or organize your bookshelf.

3. Set a Timer and Clean for Just 10 Minutes


Sometimes, the hardest part is just to start. Set a timer for 10 minutes and promise to clean during this time. You might find that as you start, you want to continue!

Tip: If 10 minutes is impossible, start with 5 minutes and gradually increase the time. Small steps can mean a huge difference.

How to Clean Carpet

4. Play some music or listen to a podcast.


While you clean, time goes by as you do it. You have something to entertain your mind while your hands are working. Listen to your favorite playlist, podcast, or audiobook; the time will pass, besides cleaning.

Tip: Create a “cleaning playlist” to energize and uplift you. 5. Reward Themselves When Cleaned

5. Reward yourself afterwards.


You will realize that getting a small reward boosts one’s motivation to clean. Come up with a reward, such as watching an episode of your favorite program, having a snack, or practicing a hobby you choose once you are done.

Tip: Promise yourself a soothing cup of tea or coffee after you’re done. This helps to give you something to look forward to as you clean. 6. Imagining Having Guests Over

6. Imagine Having Guests Over


If you’re unmotivated, put yourself in a scenario where friends or family may stop over without notice. Thinking about how you’d like your room to look for visitors may give you a new way of viewing your space.

Tip: Act as if you are cleaning for a guest. This mindset can help you get started cleaning.

7. Clean as You Declutter


Cleaning can be a great chance to declutter and remove unwanted items. Eventually, cleaning will become less hassle and more feasible because you will have fewer things to clean.

Tip: Designate a donation box to put the items you don’t need anymore or do not use. Decluttering leaves your room feeling even larger and neater.

8. Concentrate on How You’ll Feel After


A clean room creates an atmosphere that feels incredibly serene and organized. You may think about how easy you will feel, satisfied, and peaceful once your room is tidied up.

9. Don’t get obsessed by trying to make it perfect.


One of the reasons cleaning feels so overwhelming is that we’re trying to achieve perfection. Focus instead on progress over perfection. A little cleaning is better than nothing; you can always finish later.

Final Thoughts


It isn’t that hard to get motivated to clean up the room. By following these simple methods, one can make cleaning a manageable and satisfying task. After all, the more effort you put into a clean room, the happier, healthier, and more productive you will become.

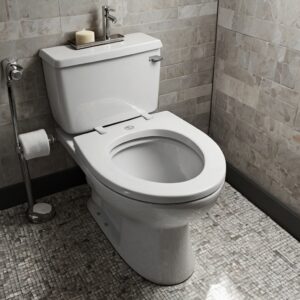
sparkling clean toilet bowl

How to Clean a Toilet Bowl with Stains

It doesn’t take much to learn how to clean a stained toilet bowl with stains it’s pretty rewarding once you have the right approach. A clean toilet bowl is a looker and very effective in minimizing germs and making your bathroom a fresher place.

This article will walk you through some practical, effective steps for cleaning a stained toilet bowl. You can do all this using a few simple tools and techniques and make that toilet look as good as new, tackling even the most stubborn stains.


Why do Toilet Bowls Get Stained

Knowing how to clean a stained toilet is most effective when one examines what causes stains to form in the first instance. Hard water, which contains minerals such as calcium and magnesium, is a likely candidate. Minerals such as these can prove to be deposited over time into unsightly rings and marks on the toilet. Moreover, neglect can cause stains when organic material and bacteria are present. Rust, lime, and mineral deposits can give a yellowish or brownish color, and once these stains are set, they might be hard to remove.


Essential Supplies You’ll Need

Cleaning a stained toilet bowl effectively requires the following supplies:

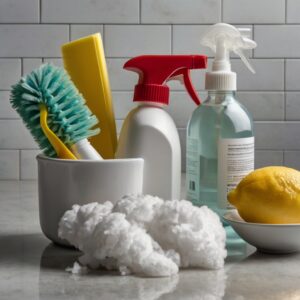
A close-up image of essential cleaning supplies for tackling a stained toilet bowl.


  • Toilet brush: A tough brush with firm bristles does the trick.

  • White vinegar: It helps dissolve mineral buildup.

  • Baking soda: Helps scrub away stains like a mild abrasive.

  • Lemon juice: It adds some additional strength to bleach in fighting those stubborn stains. It also gives the solution a fresh smell.

  • Bleach: For extreme cases, with much caution

  • Rubber gloves: Protect your hands from chemicals and bacteria.

You can easily find these materials around your house or neighborhood store. Let’s get to the nitty-gritty of the steps to clean your stained toilet bowl with these items.

How to Remove Stains on a Toilet Bowl Step-by-Step Cleaning Process


  • Step 1: Rinsing with water and adding vinegar

The process of how to clean a toilet with stains starts like you are cleaning a toilet fresh.

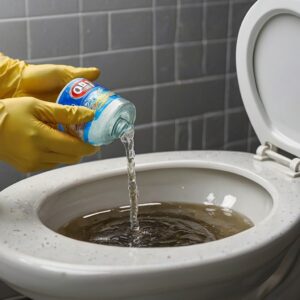
A step-by-step visual of the process of pouring vinegar into a toilet bowl


Flush it once to moisten the inner side, making it easy to break the stains. About a cupful of white vinegar is poured all around the bowl to ensure it lies exactly on the stained sites. Let the vinegar sit for at least 10 minutes; its acidity will enable it to break up the mineral deposits and other tough stains.

  • Step 2: Sprinkle Baking Soda

Let the vinegar do its magic first, then sprinkle the baking soda on the stains. The reaction between the baking soda and vinegar is fizzy, so most stains will be easy to lift. Use the toilet brush to scrub that mixture in the stained areas. Be generous on tough spots and where the rim is because grime usually gathers in those places.

  • Step 3: Applying Lemon Juice to Tough Stains


In case the stains do not disappear, add lemon juice during the cleaning procedure. Apply the juice directly to the stains or mix it with baking soda to form a paste. Leave it in there for 5 to 10 minutes, then scrub. The acid in the lemon juice helps break down the tough stains, and the perfume will be refreshing.


  • Step 4: Scrubbing Thoroughly using a Toilet Brush

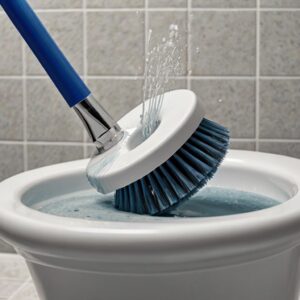
A close-up image of a toilet bowl being scrubbed by a toilet brush


A tough, long-lasting toilet brush is essential for cleaning a stained toilet bowl. Make sure to get underneath the rim and scrub the entire area. Stained areas may require more scrubbing. Circular motions help loosen up debris, which should be enough to clean all surfaces adequately.


  • Step 5: Flush and Assess


Flush the toilet to remove the cleaning solution and loose debris. Inspect the toilet bowl and confirm that the stains remain. Repeat the process if some discoloration is still visible. Tough stains may require more than one cycle to completely remove them.


Alternative Solutions for Cleaning Stained Toilet Bowls


In some cases, these traditional cleaning methods may not be effective enough. If the vinegar and baking soda method does not work, other alternative methods for cleaning a stained toilet bowl are given below.

 beautifully clean and sparkling toilet bowl


  • Pumice Stone

A pumice stone can effectively remove hard water stains and rings. Before scrubbing, wet the stone and gently rub the stained area in a circular motion. Avoid pressing too hard since this might scratch the surface.

  • Try Bleach for Tough Stains

Bleach is a strong cleaner but should be used carefully since it is harsh. Add a small quantity of bleach into the bowl, let it sit for some minutes, and scrub well. It is very effective in removing stains if seen colored if other methods haven’t worked.

  • Enzymatic Cleaners

More naturally oriented folks might prefer the enzymatic cleaners. This type of cleaner works by using enzymes to break down the organic material, and there is a ubiquitous place found on cleaning aisles in just about any store. Follow the instructions that will appear on the product packaging on how to clean a stained toilet bowl.


Prevention of Future Stains on Toilet Bowls

After you clean the toilet, keeping it free from stains is essential. Here’s how you can prevent your toilet bowl from staining:

  • Cleaning Frequently: Clean your toilet bowl at least once a week so that it does not accumulate anything. This limits the potential for minerals and other stuff to set.

  • Toilet Bowl Cleaner: Applying a toilet bowl cleaner weekly will prevent stains from coming in.

  • Consider Getting a Water Softener: If your water is hard, a water softener might be something that you could install to reduce the mineral build-up.

  • Flush Often: If you have one toilet that isn’t used as often, flush it every few days to prevent the water from becoming stagnant.

 image of a small checklist or list of tips for preventing future stains


Green Cleaning Options for How to Clean a Stained Toilet Bowl

You’re in luck if you are looking for some green cleaning options. There are several options for cleaning a toilet bowl with stains.

  • Natural Cleaners: Vinegar and baking soda are natural, non-toxic, and eco-friendly.

  • Lemon: Apart from being natural, lemon is biodegradable and has a fresh fragrance.

  • Reusable Tools: Invest in high-quality reusable cleaning tools, such as a long-lasting toilet brush, instead of disposable ones.


Conclusion

The learning curve of how to clean a stained toilet bowl can be arduous and time consuming if you don’t know what a stain is or have the right tools and methods to clean your toilet bowl. It is easy to keep your toilet bowl in good condition if you know the right tools and methods. Whether it be common household remedies such as vinegar and baking soda, or a stronger combination that may use bleach, the point is that you are going to find a way to tackle even the toughest stains.

Regular cleaning of your toilet bowl and preventive measures will help you avoid that unwanted future. If it is a case of water marks from hard water, or organic buildup by the enforcement of certain forms of bacteria and algae, or mineral deposits from minerals like calcium, then the methods described here would be of great use to keep your bathroom fresh and clean.